Skip to content
AI Growth Lab
Navigation menu
AI Growth Lab

Loading lesson…

CoursesContactPrivacy

Curriculum based on Datawhale / Easy Vibe · CC BY-NC-SA 4.0

← Back to course

Full-Stack Developer

Image Assets & Drawing Agents
  1. Asset Production & Agent Building
  2. Chapter 2: A More Obedient Image Generation Assistant — Using Lovart as an Example
  3. Chapter 3: Build Your Own Smart Drawing Assistant
UI Design Foundations
  1. AI Design Basics
  2. Chapter 3: A Panorama of Frontend Design Tools in the AI Era
  3. Chapter 4: Hands-On 1 — Imitating "Someone Else's Web Page" to Match
  4. Chapter 6: Make a Big-Tech Design System Your Own
Design Tools & Interface Styling
  1. Figma & MasterGo Basics
  2. 2. Figma basics
  3. 3. MasterGo basics
  4. UI Design Specs & Multi-Product Interface
  5. LLM & Skills Interface Beautification
From Design to Frontend Code
  1. Design Prototype to Project Code
  2. Modern Component Libraries
  3. 3. Scenario One: Build a Product Landing Page with HeroUI
Databases & Supabase
  1. Database & Supabase
  2. 2. Supabase
  3. 2.1 Creating Your First SQL Data Table
  4. 3. Your First SQL Application
  5. 4. Building Your First Supabase Application
Backend APIs & Integration
  1. Backend API Design & Development
Git & GitHub Workflow
  1. Git & GitHub Workflow
  2. What is GitHub?
  3. Bind local SSH to GitHub
  4. Use Trae for GitHub operations
Website Deployment & Zeabur
  1. Put Your Website Online (Easy): One-Click PaaS (Vercel/Zeabur)
  2. Deploy Dify with Zeabur
  3. Deploy a Snake game with Zeabur and Trae
Cloud Servers & Advanced Deployment
  1. Put Your Website Online (Advanced): Set Up Your Own VPS
  2. 4. Three Typical Deployment Scenarios
  3. 6. Cloud Provider Services Deep Dive (Beyond VPS)
  4. 8. 🎯 Vibecoding Deployment Workflow: Let AI Be Your DevOps
CLI AI Coding Tools
  1. Modern CLI Dev Tools
  2. Codex
  3. More Use Cases for CLI AI Coding Tools
Payments & Billing Integration
  1. Stripe Payment Integration
  2. Payment Confirmation & Subscription Events
  3. Choosing Other Payment Solutions
Comprehensive Projects
  1. Hogwarts Portraits Project
  2. AI Marketing Copywriting SaaS
  3. Online Exam & Management System
  4. Modern AI Image SaaS
  5. Custom Dify Agent Platform
On this page
  • Chapter 2: A More Obedient Image Generation Assistant — Using Lovart as an Example

Lesson Contents

  1. Chapter 2: A More Obedient Image Generation Assistant — Using Lovart as an Example
4. Practical scenario one: redesign a landing page with aesthetic prompts
5. Becoming a Supabase Master
Travel Planning Agent Platform
  • Spring Boot Movie Recommender
  • Grocery Microservices System
  • Go Traffic Data Platform
  • Chapter 2: A More Obedient Image Generation Assistant — Using Lovart as an Example

    In the first part, we directly called NanoBanana through code and experienced the basic "input and generate" process. This approach works fine when requirements are simple. But when generation tasks start to include more constraints, such as:

    • Needing multiple consistently styled images
    • Needing to repeatedly adjust based on existing results
    • Needing to dynamically modify the generation direction based on user input

    The single-call approach gradually becomes insufficient.

    This is where you need to introduce AI Agent (Intelligent Agent). This section uses Lovart as an example to show how the overall workflow changes when an image generation model has a "thinking layer." Note! This is not an advertisement, just helping everyone quickly grasp the convenience of AI Agents~

    2.0 Introduction to Lovart: Your AI Design Agent

    Lovart is an Agent-based design tool on the web. Compared to ordinary image generation tools, it adds a layer of "thinking and planning" before generation.
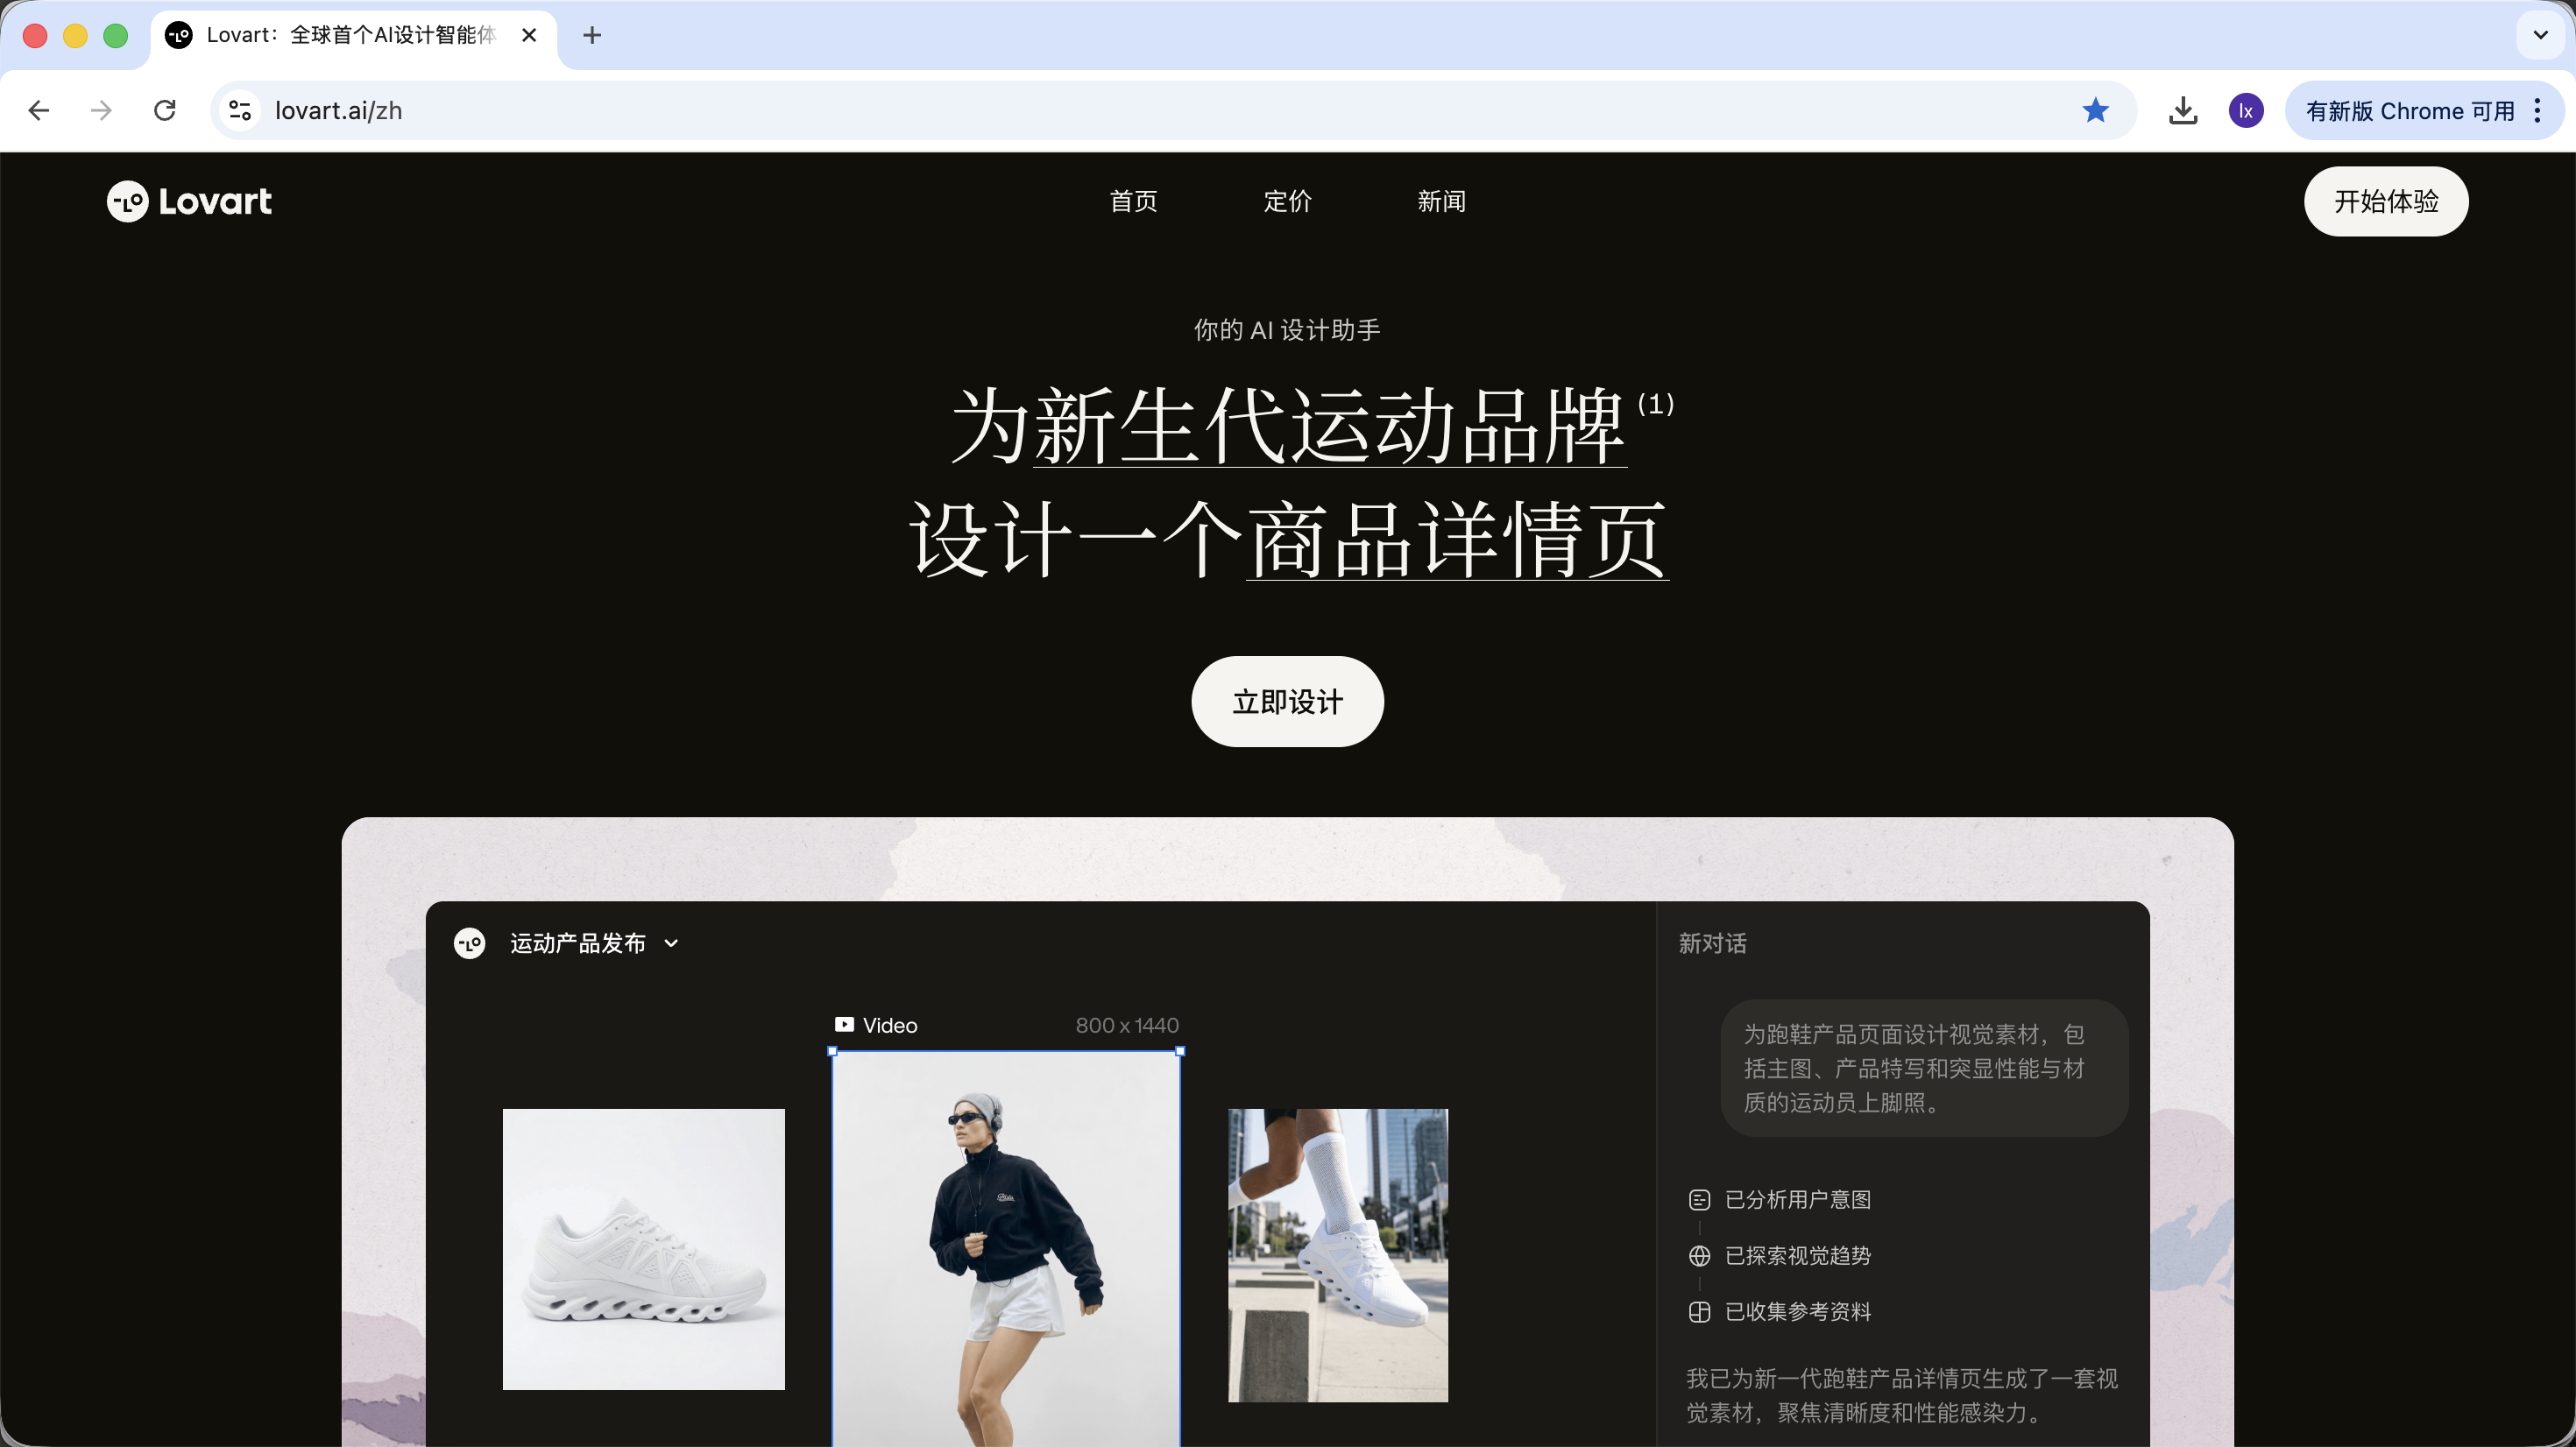
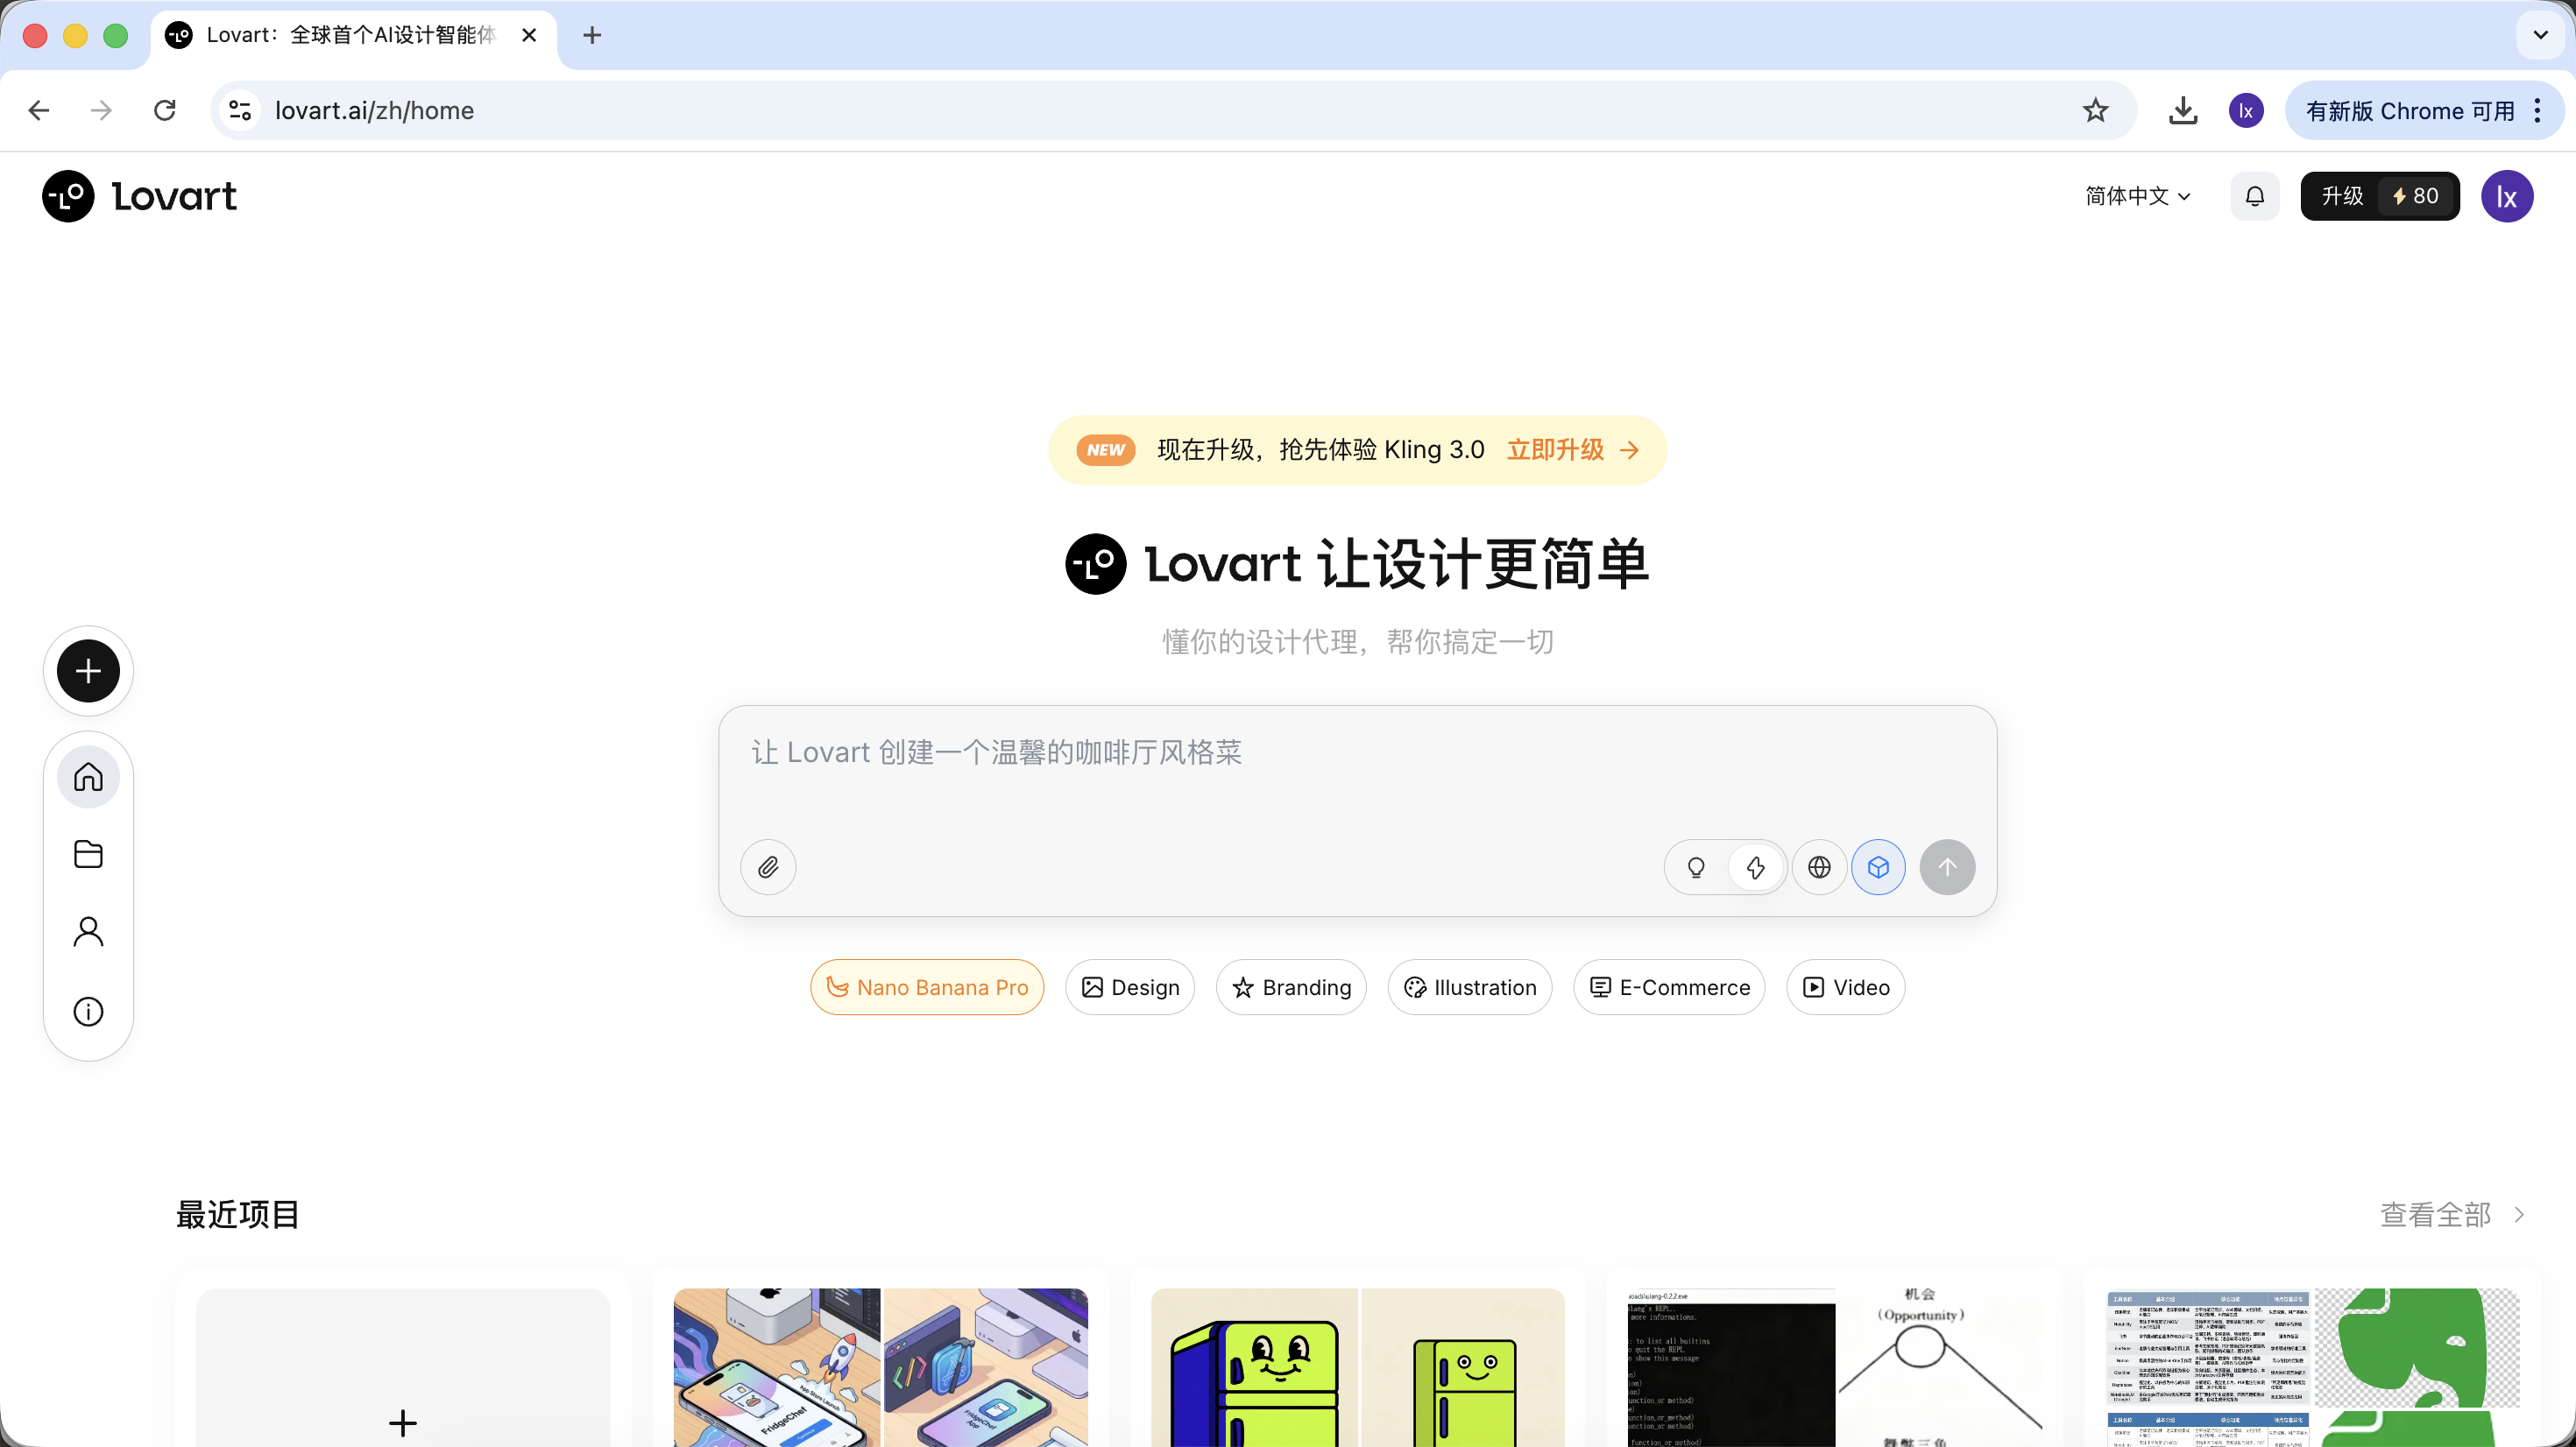
    Lovart sports-brand design landing page.

    Lovart prompt workspace.

    After entering Lovart, you mainly need to understand the following controls:

    Model Selection

    Click the cube icon below the input box to view the currently available generation models (such as GPT Image, Flux, etc.).

    To maintain consistency with the previous examples, this section still uses NanoBanana as the underlying generation model.
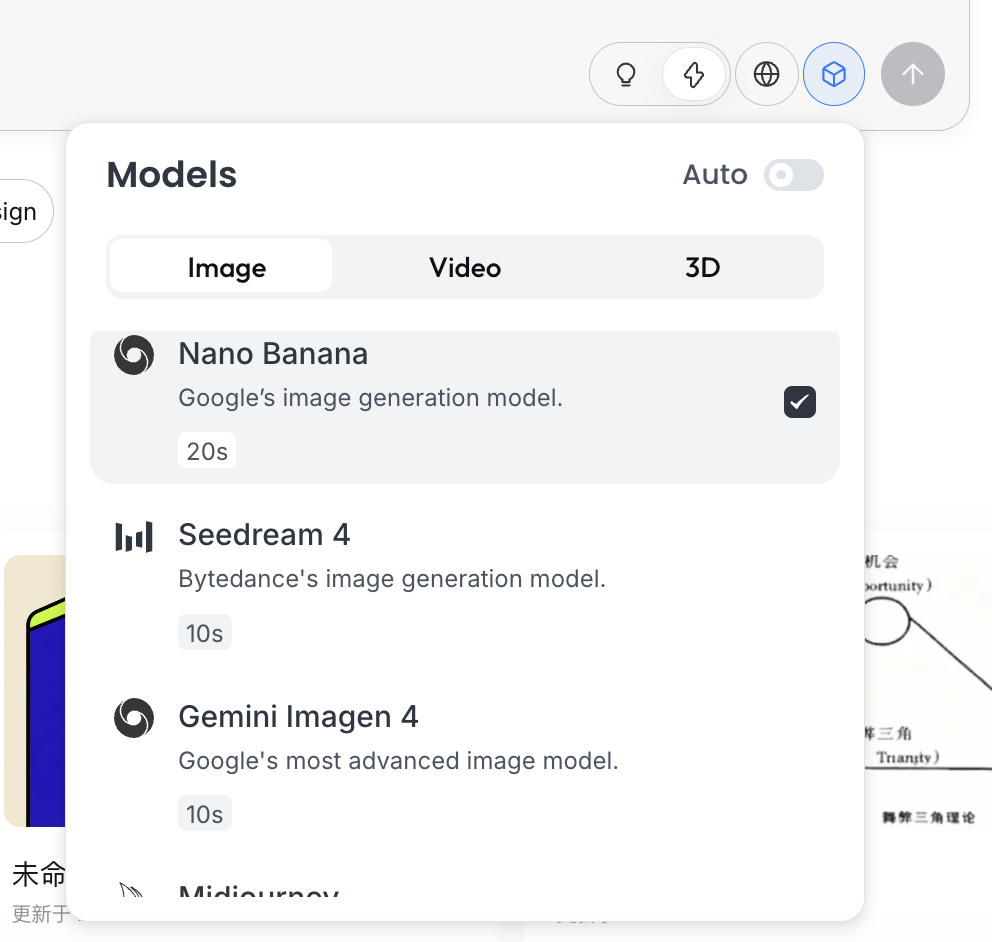
    Lovart image-model selector.

    Thinking Mode

    This is Lovart's core toggle:

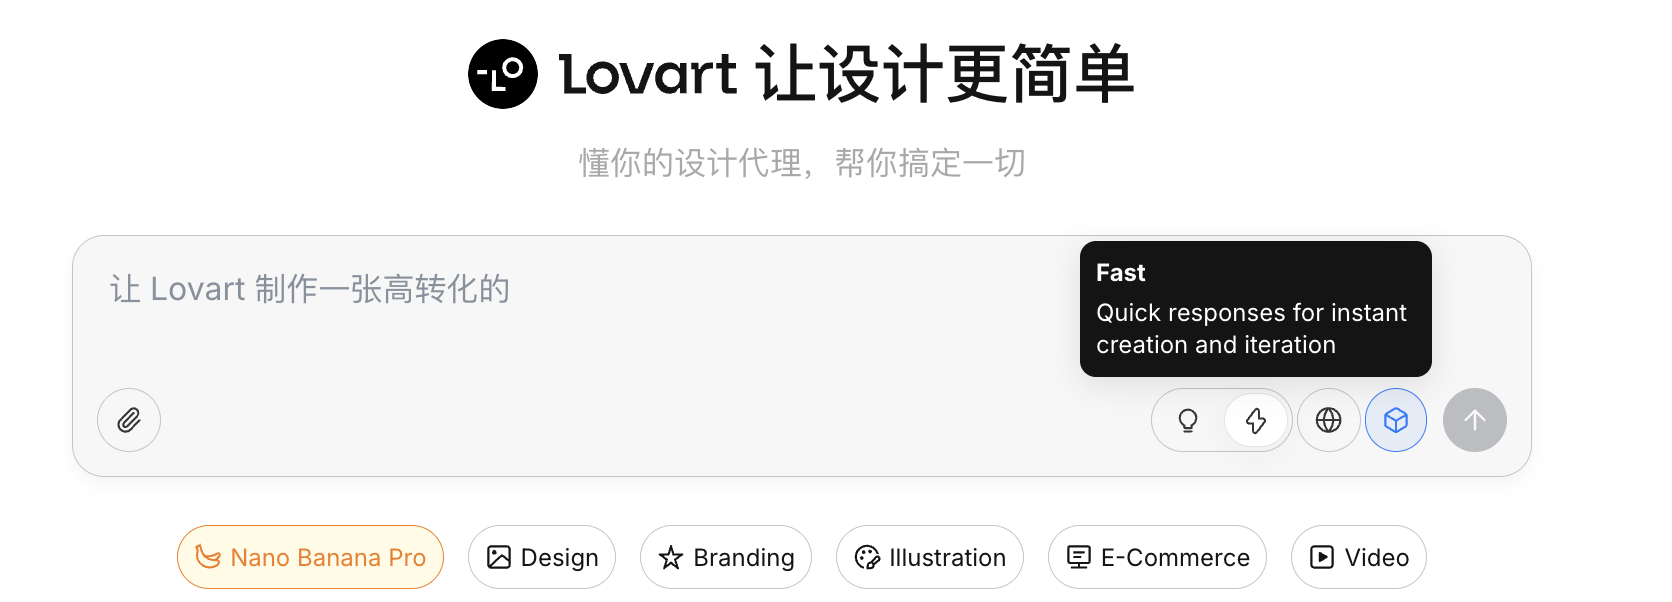
    • Fast Mode (⚡): Close to native API, fast response, suitable for single, clearly instructed generation
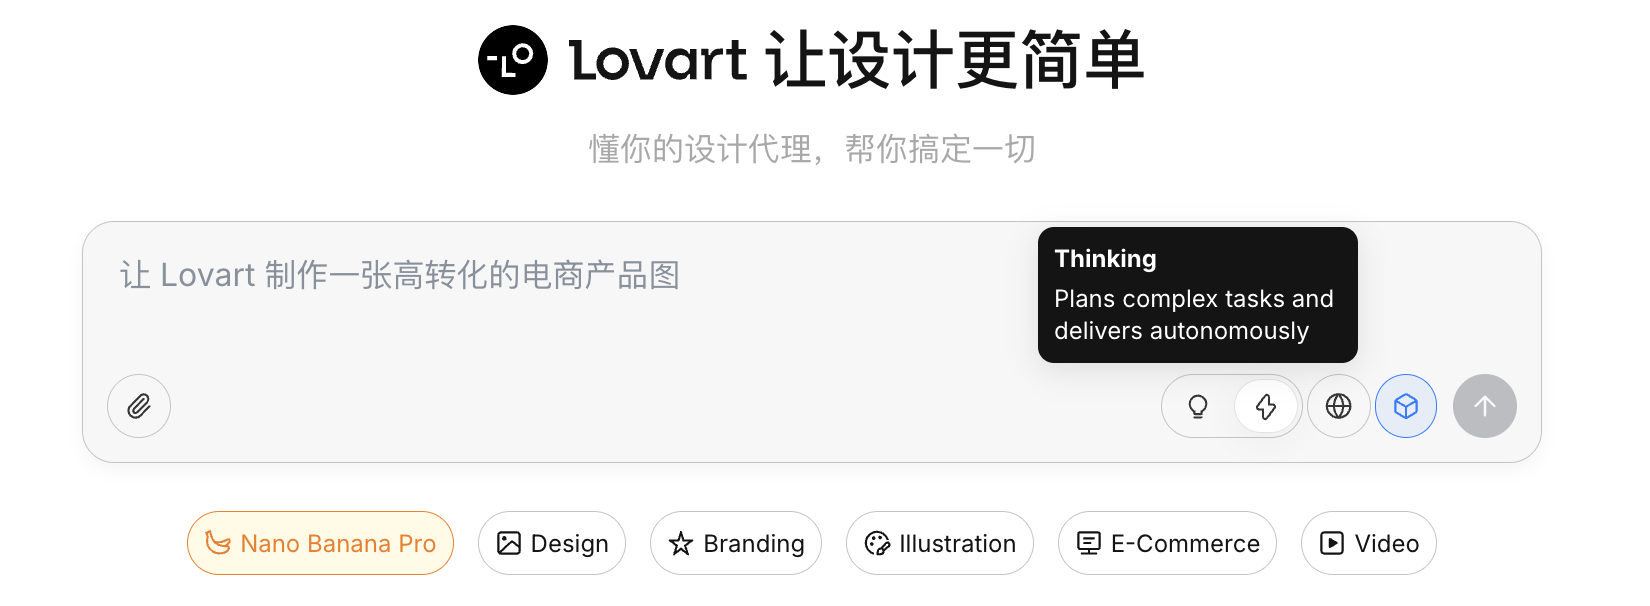
    • Thinking Mode (💡): Agent mode, AI first breaks down requirements, rewrites prompts, then executes generation

    Fast generation mode.

    Thinking generation mode.

    Web Access

    After enabling the globe icon, the Agent can retrieve web information during the generation process (such as design trends, color schemes) as supplementary input.

    2.1 Why Isn't the Native API Enough?

    Even though you can already generate decent quality images through Python, the native API still has limitations in complex tasks. The key reason is that the native API is inherently imperative. When you ask it to generate a specific object, it can execute directly; but when the input becomes "plan a complete set of game assets," it won't proactively decompose the goal into multiple executable steps.

    Lovart's core difference lies in its Agent mechanism. Between user input and the image generation model, it adds a layer of logic for understanding and planning: first identifying user intent, then decomposing tasks, rewriting prompts, and only then executing generation.

    2.2 Hands-on Demo: Create a Set of IP Sticker Pack in 5 Minutes

    Let's use "making a set of programmer duck IP sticker pack" as an example to see how the Agent participates in the entire process.

    Phase One: Planning (Agent's Thinking Capability)

    The Problem with Native API: You need to think about character design and emotional states yourself, and write individual prompts for each image.

    Lovart's Approach:

    1. Turn on 💡 Thinking Mode
    2. Enter a single instruction:

    Design a set of programmer duck IP sticker pack, flat style, cute

    The AI won't immediately start drawing. Instead, it first searches the web for related programmer duck designs. It then outputs a decomposed plan, automatically generating scenes like Debug, Coffee Break, Panic, etc., with corresponding visual descriptions for each.
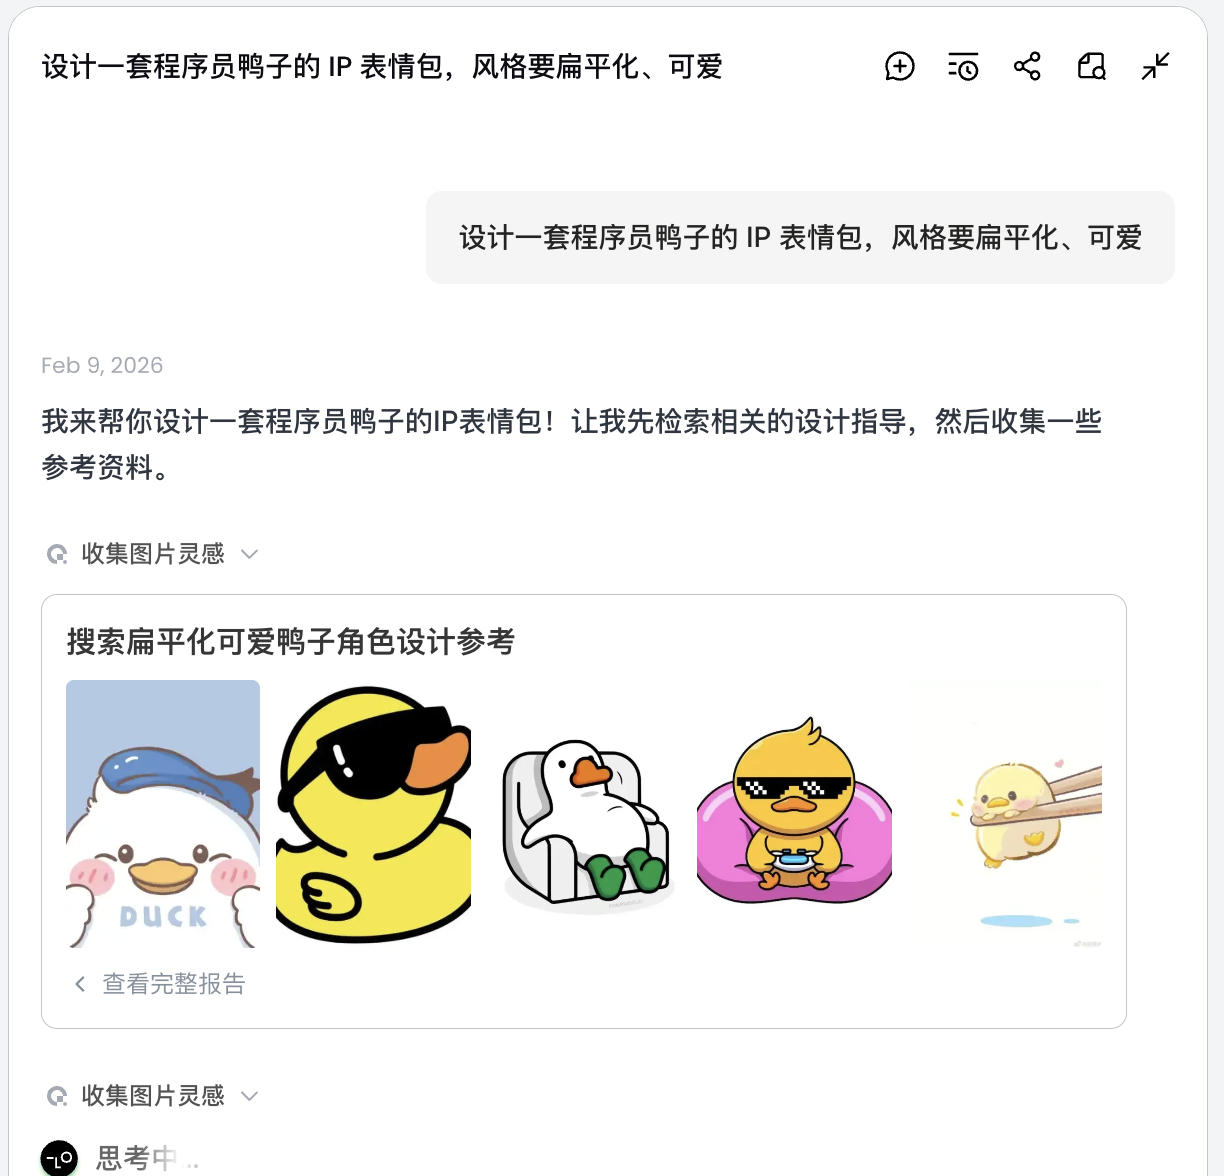
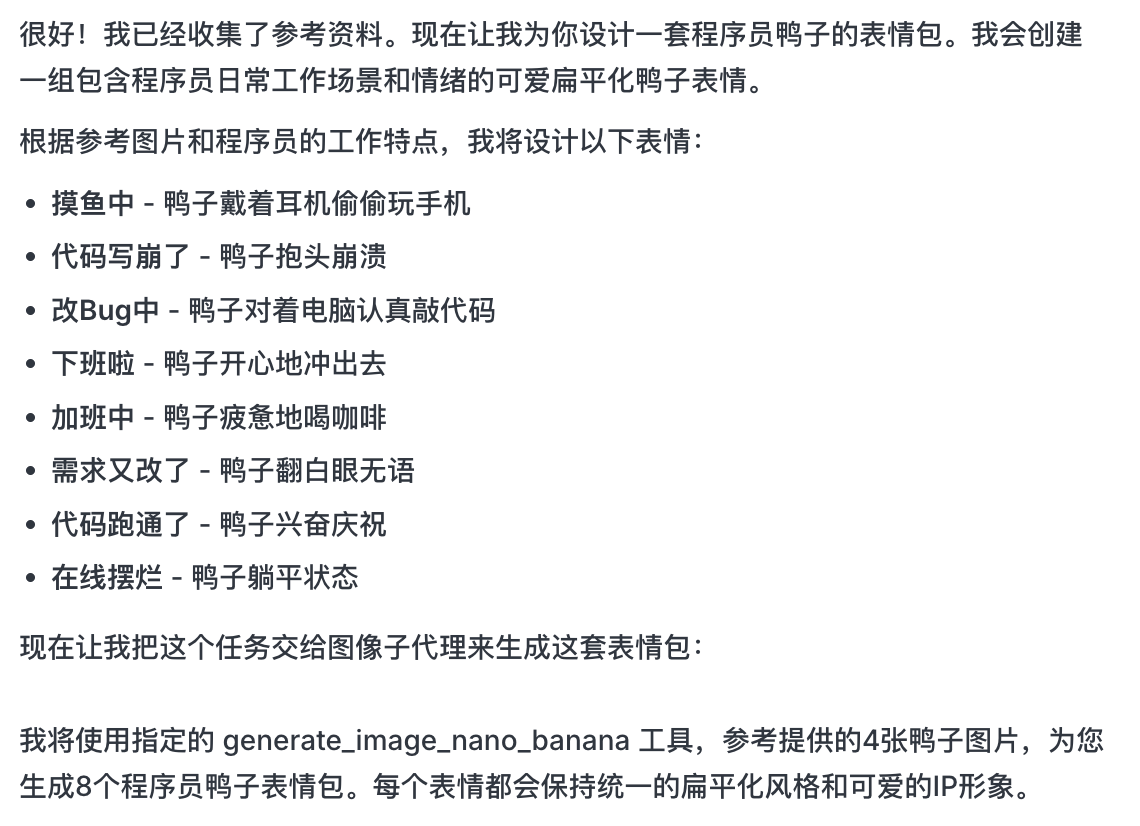
    Duck sticker design request and references.Duck sticker generation plan.

    In this step, the AI transforms from "executor" to "planner." After the AI finishes analyzing your requirements, you can see various styles and content of programmer duck images in Lovart's canvas area. You can start filtering for the styles you like.
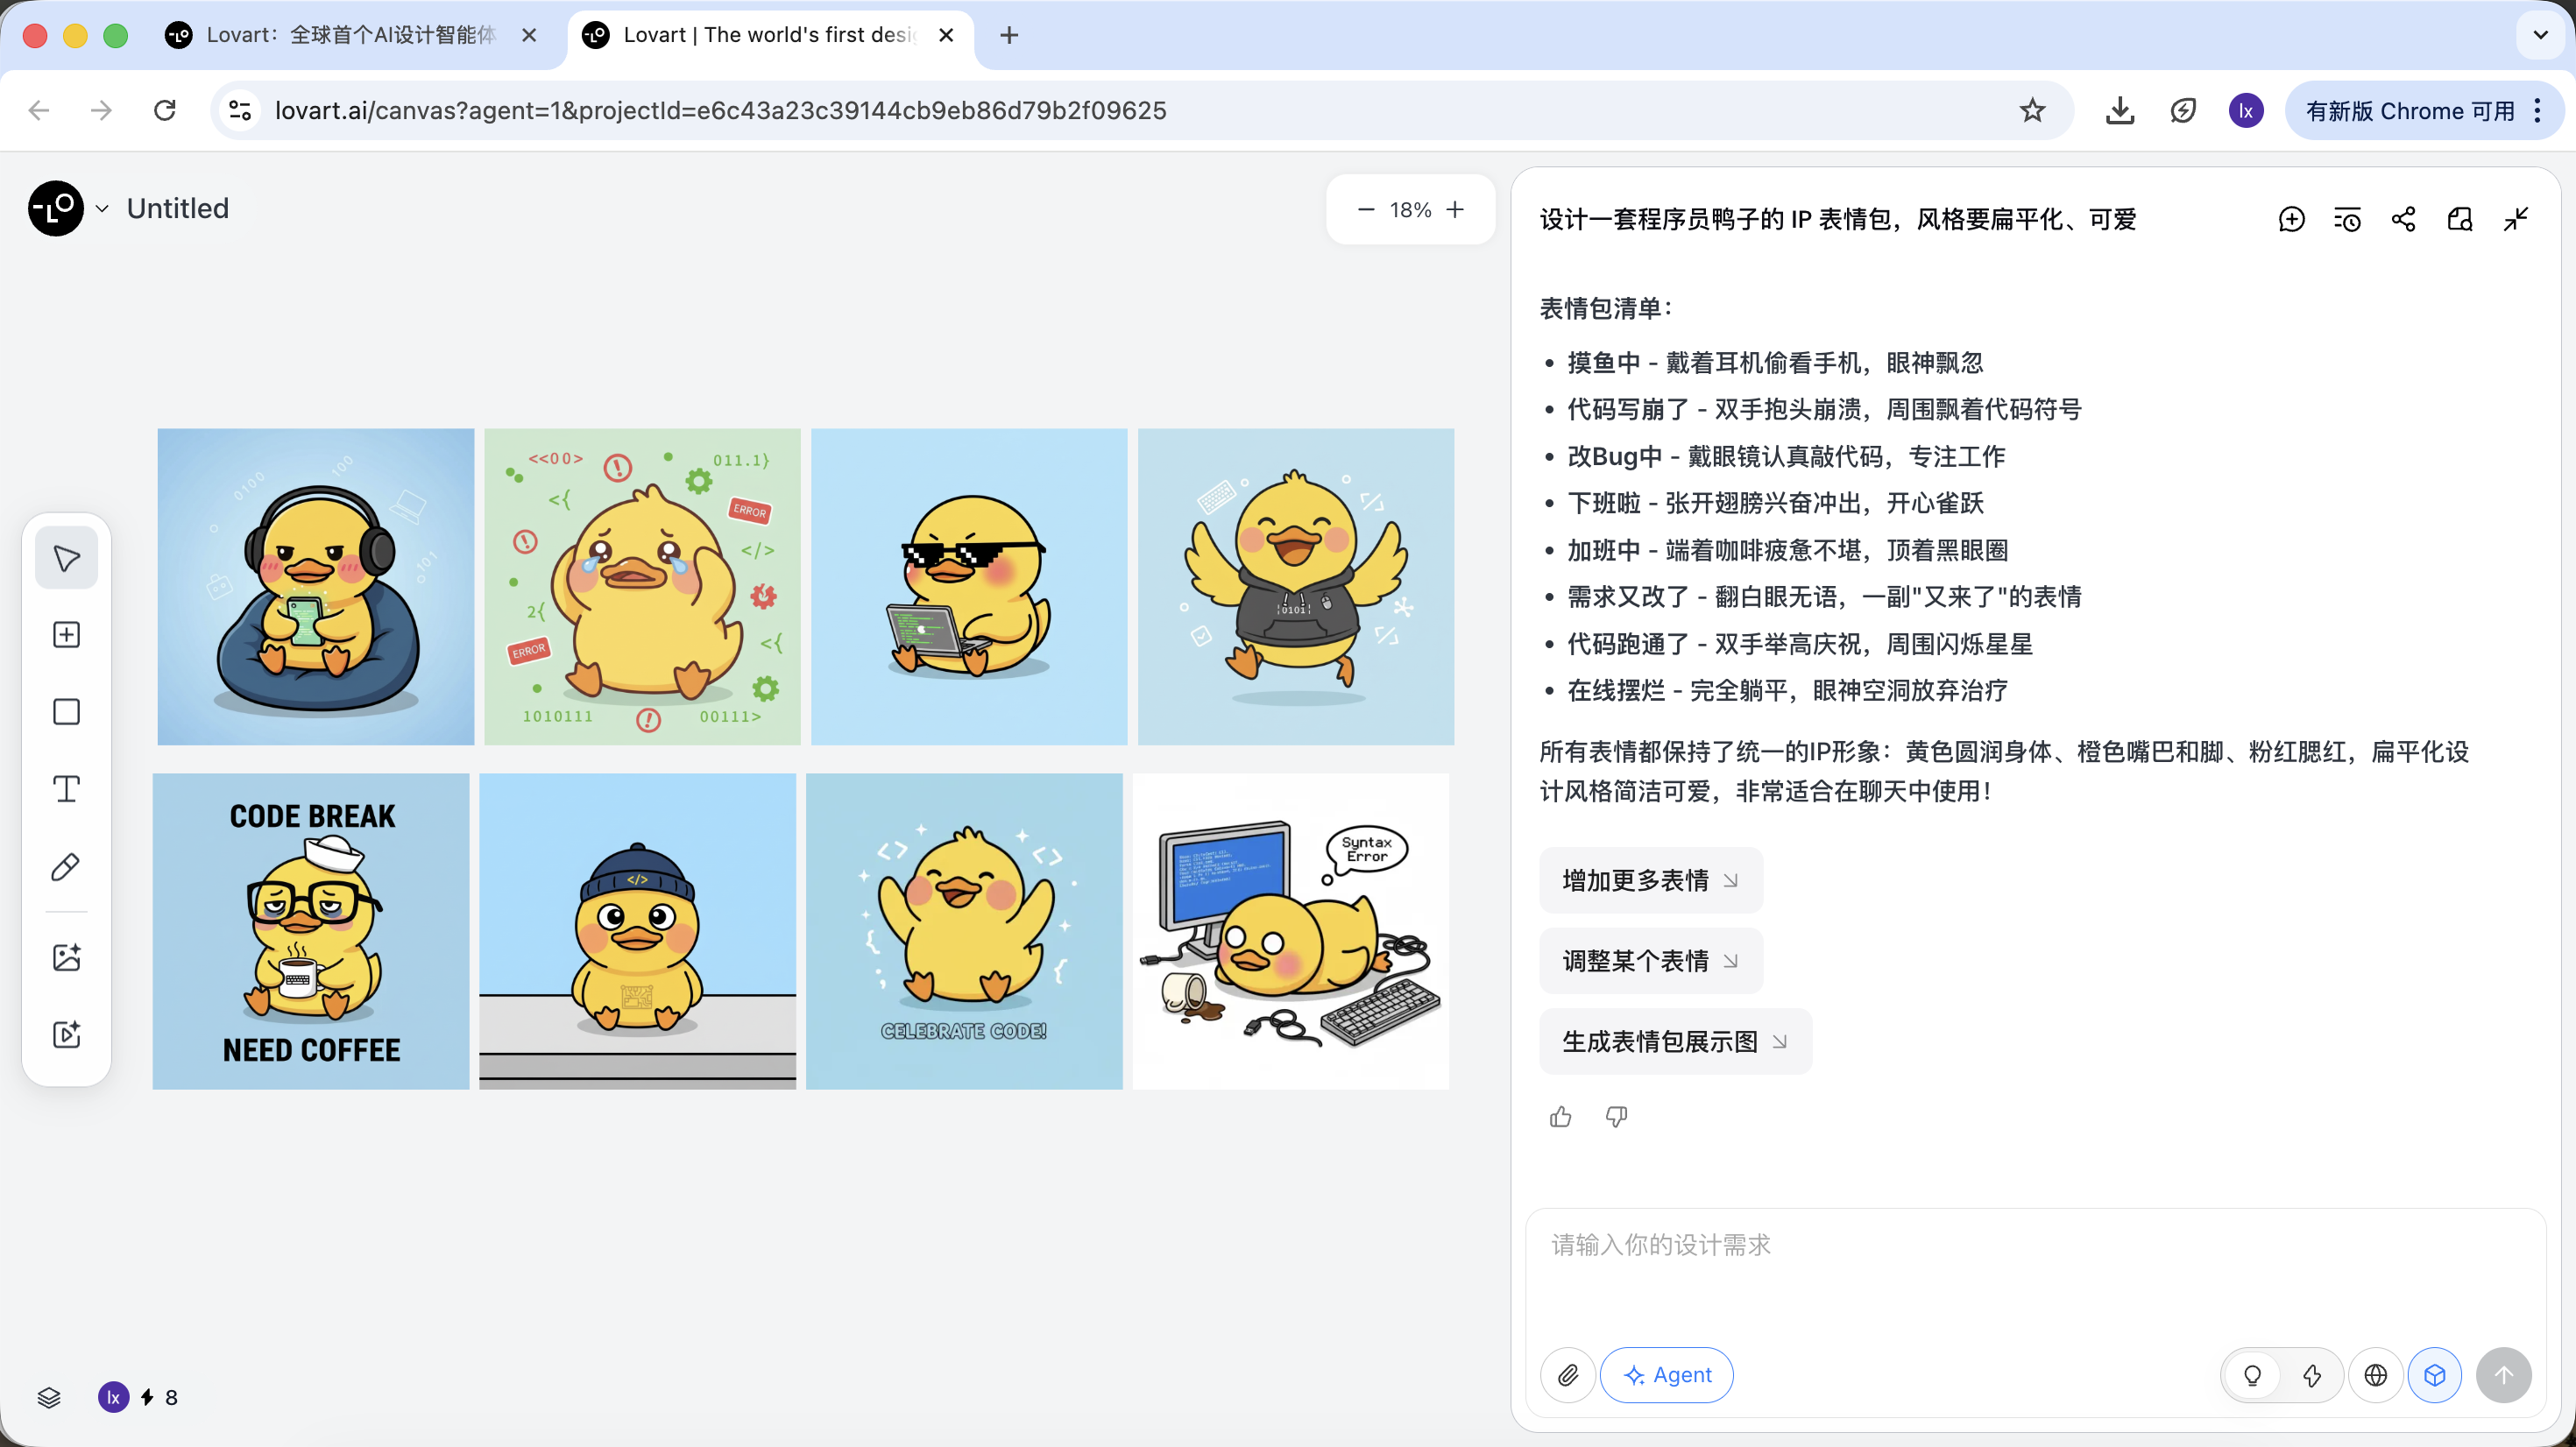
    Generated duck sticker sheet.

    Phase Two: Consistency (Reference-Based Visual Anchoring)

    Images in Lovart are not just results — they also participate in subsequent generation.
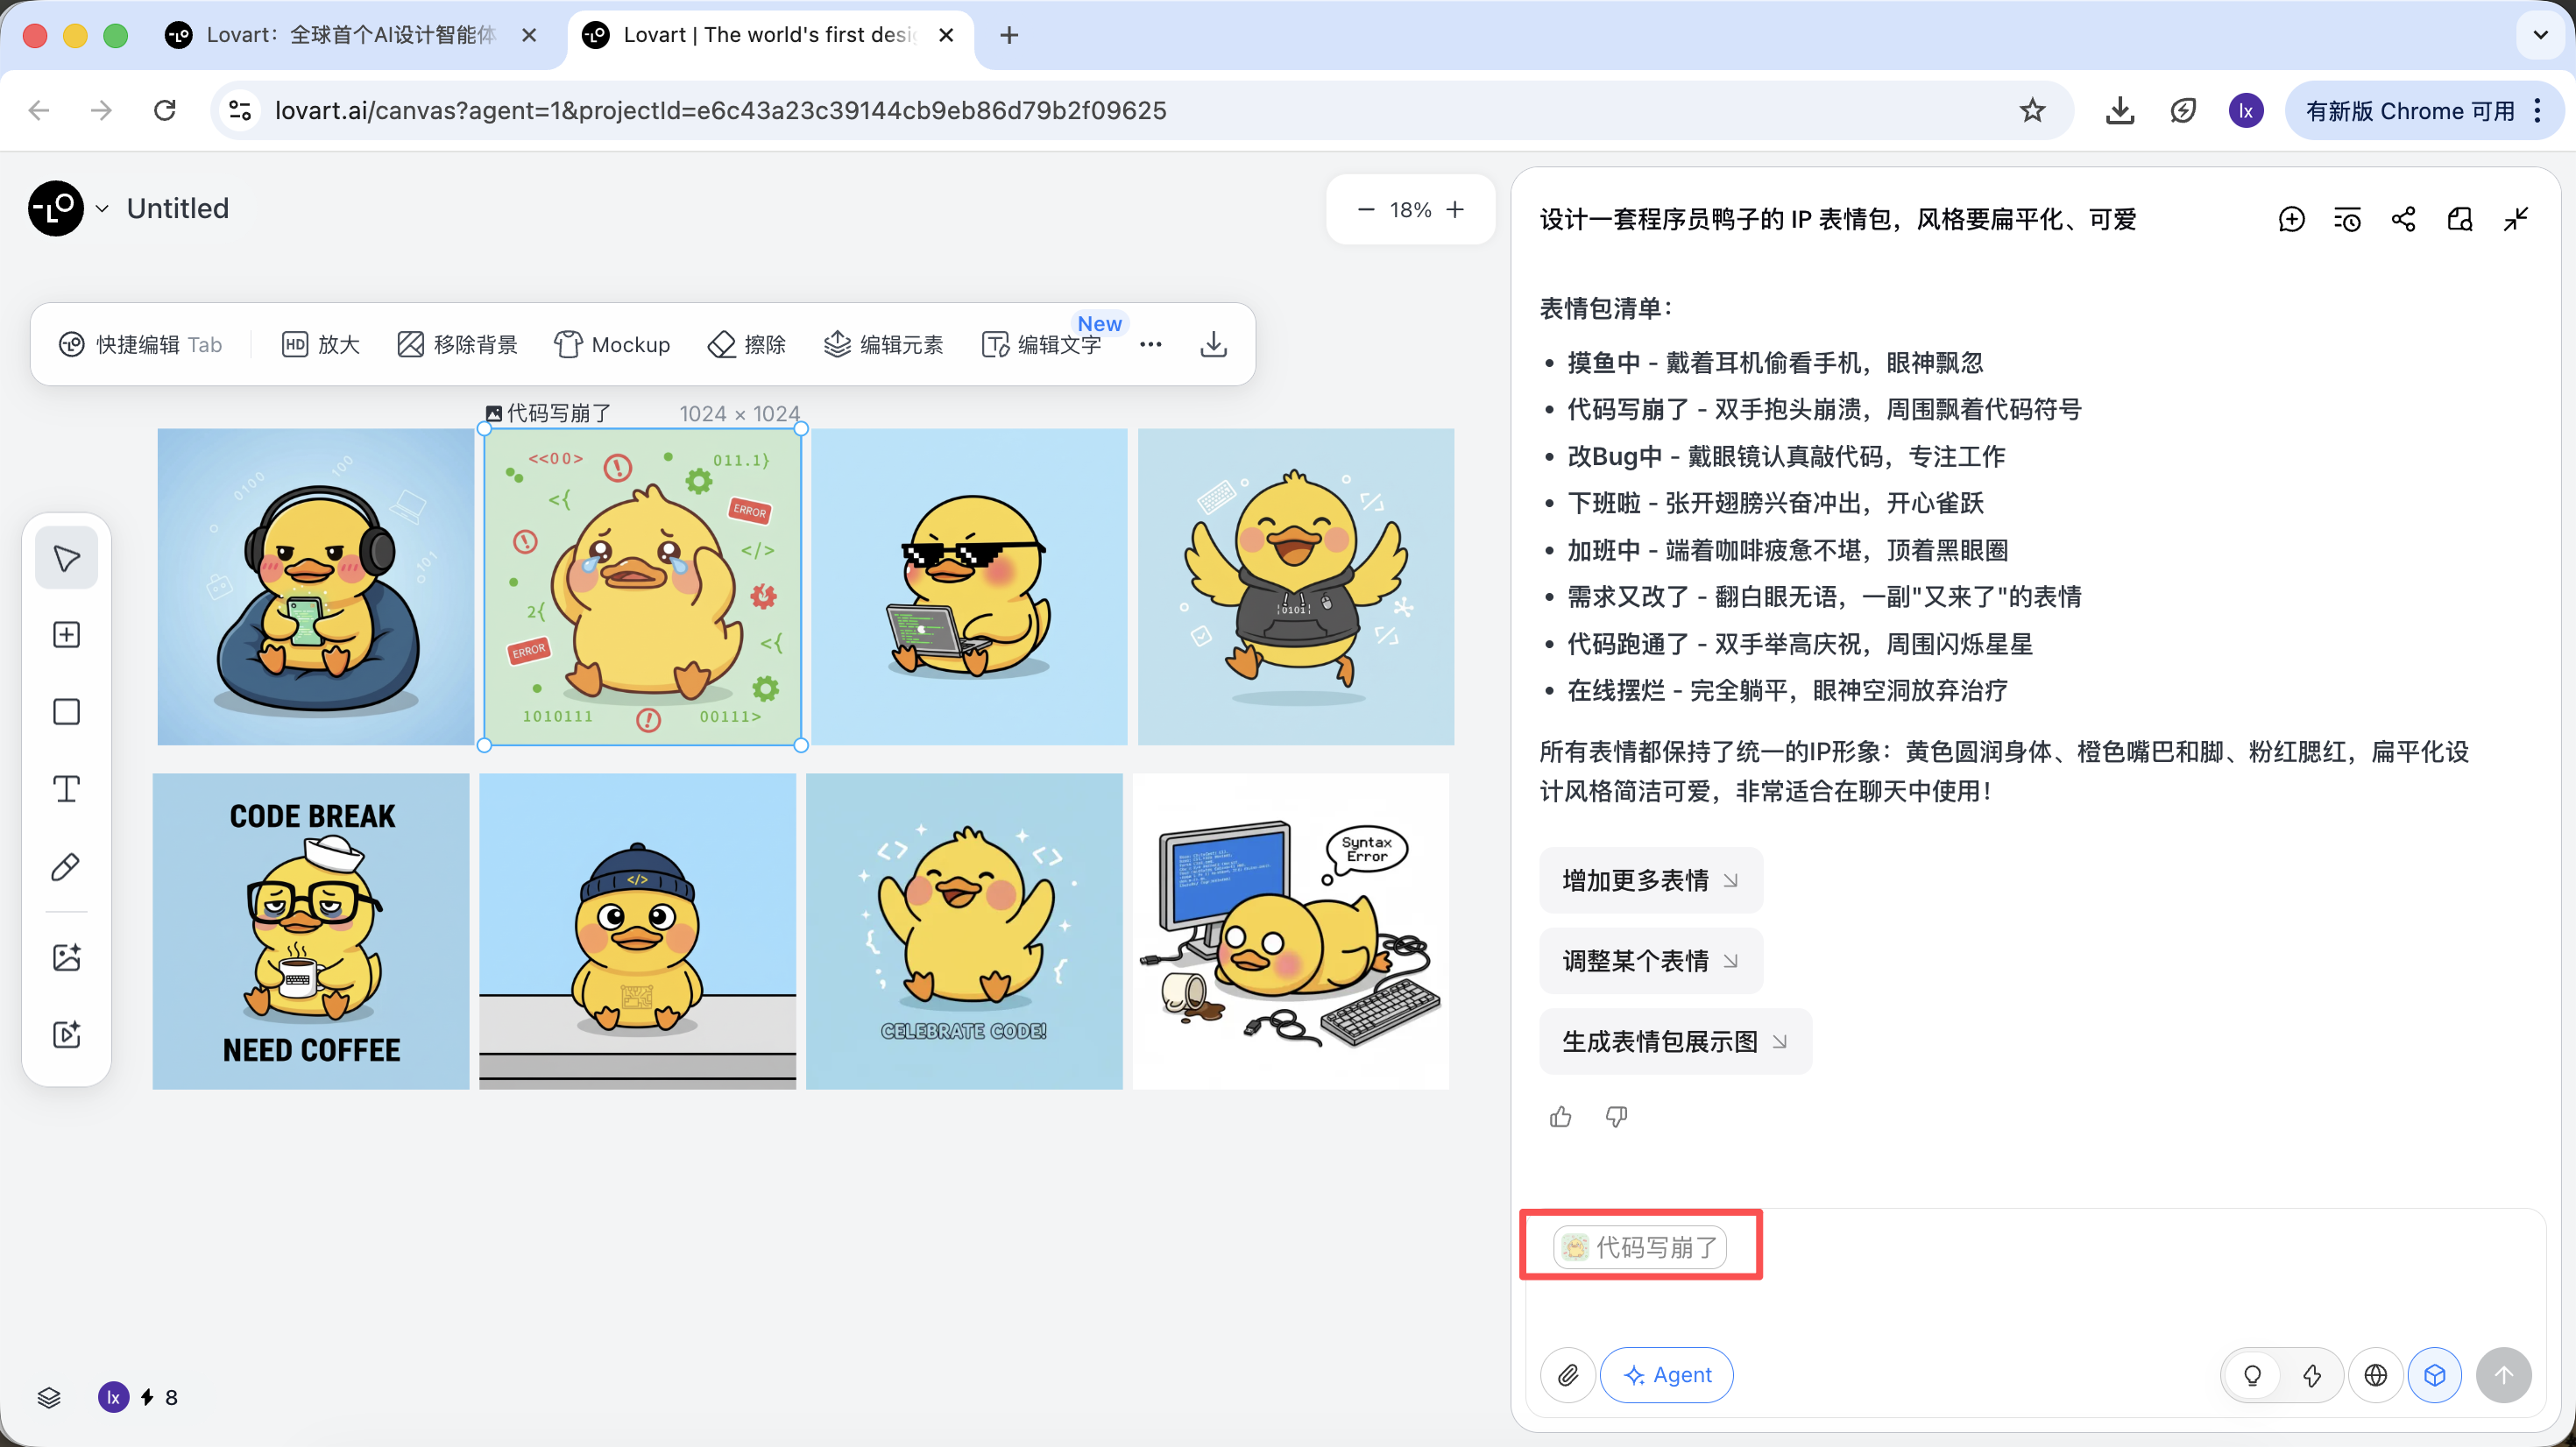
    Complete Reference Image

    • Select the most satisfactory "standard duck" from the sketches, click on the corresponding image in the canvas area
    • The image will automatically appear in the conversation area as a Reference

    Sticker sheet selection controls.

    • Enter a new action (such as happy) and generate

    The generated result will inherit the color scheme, proportions, and details of the master template.
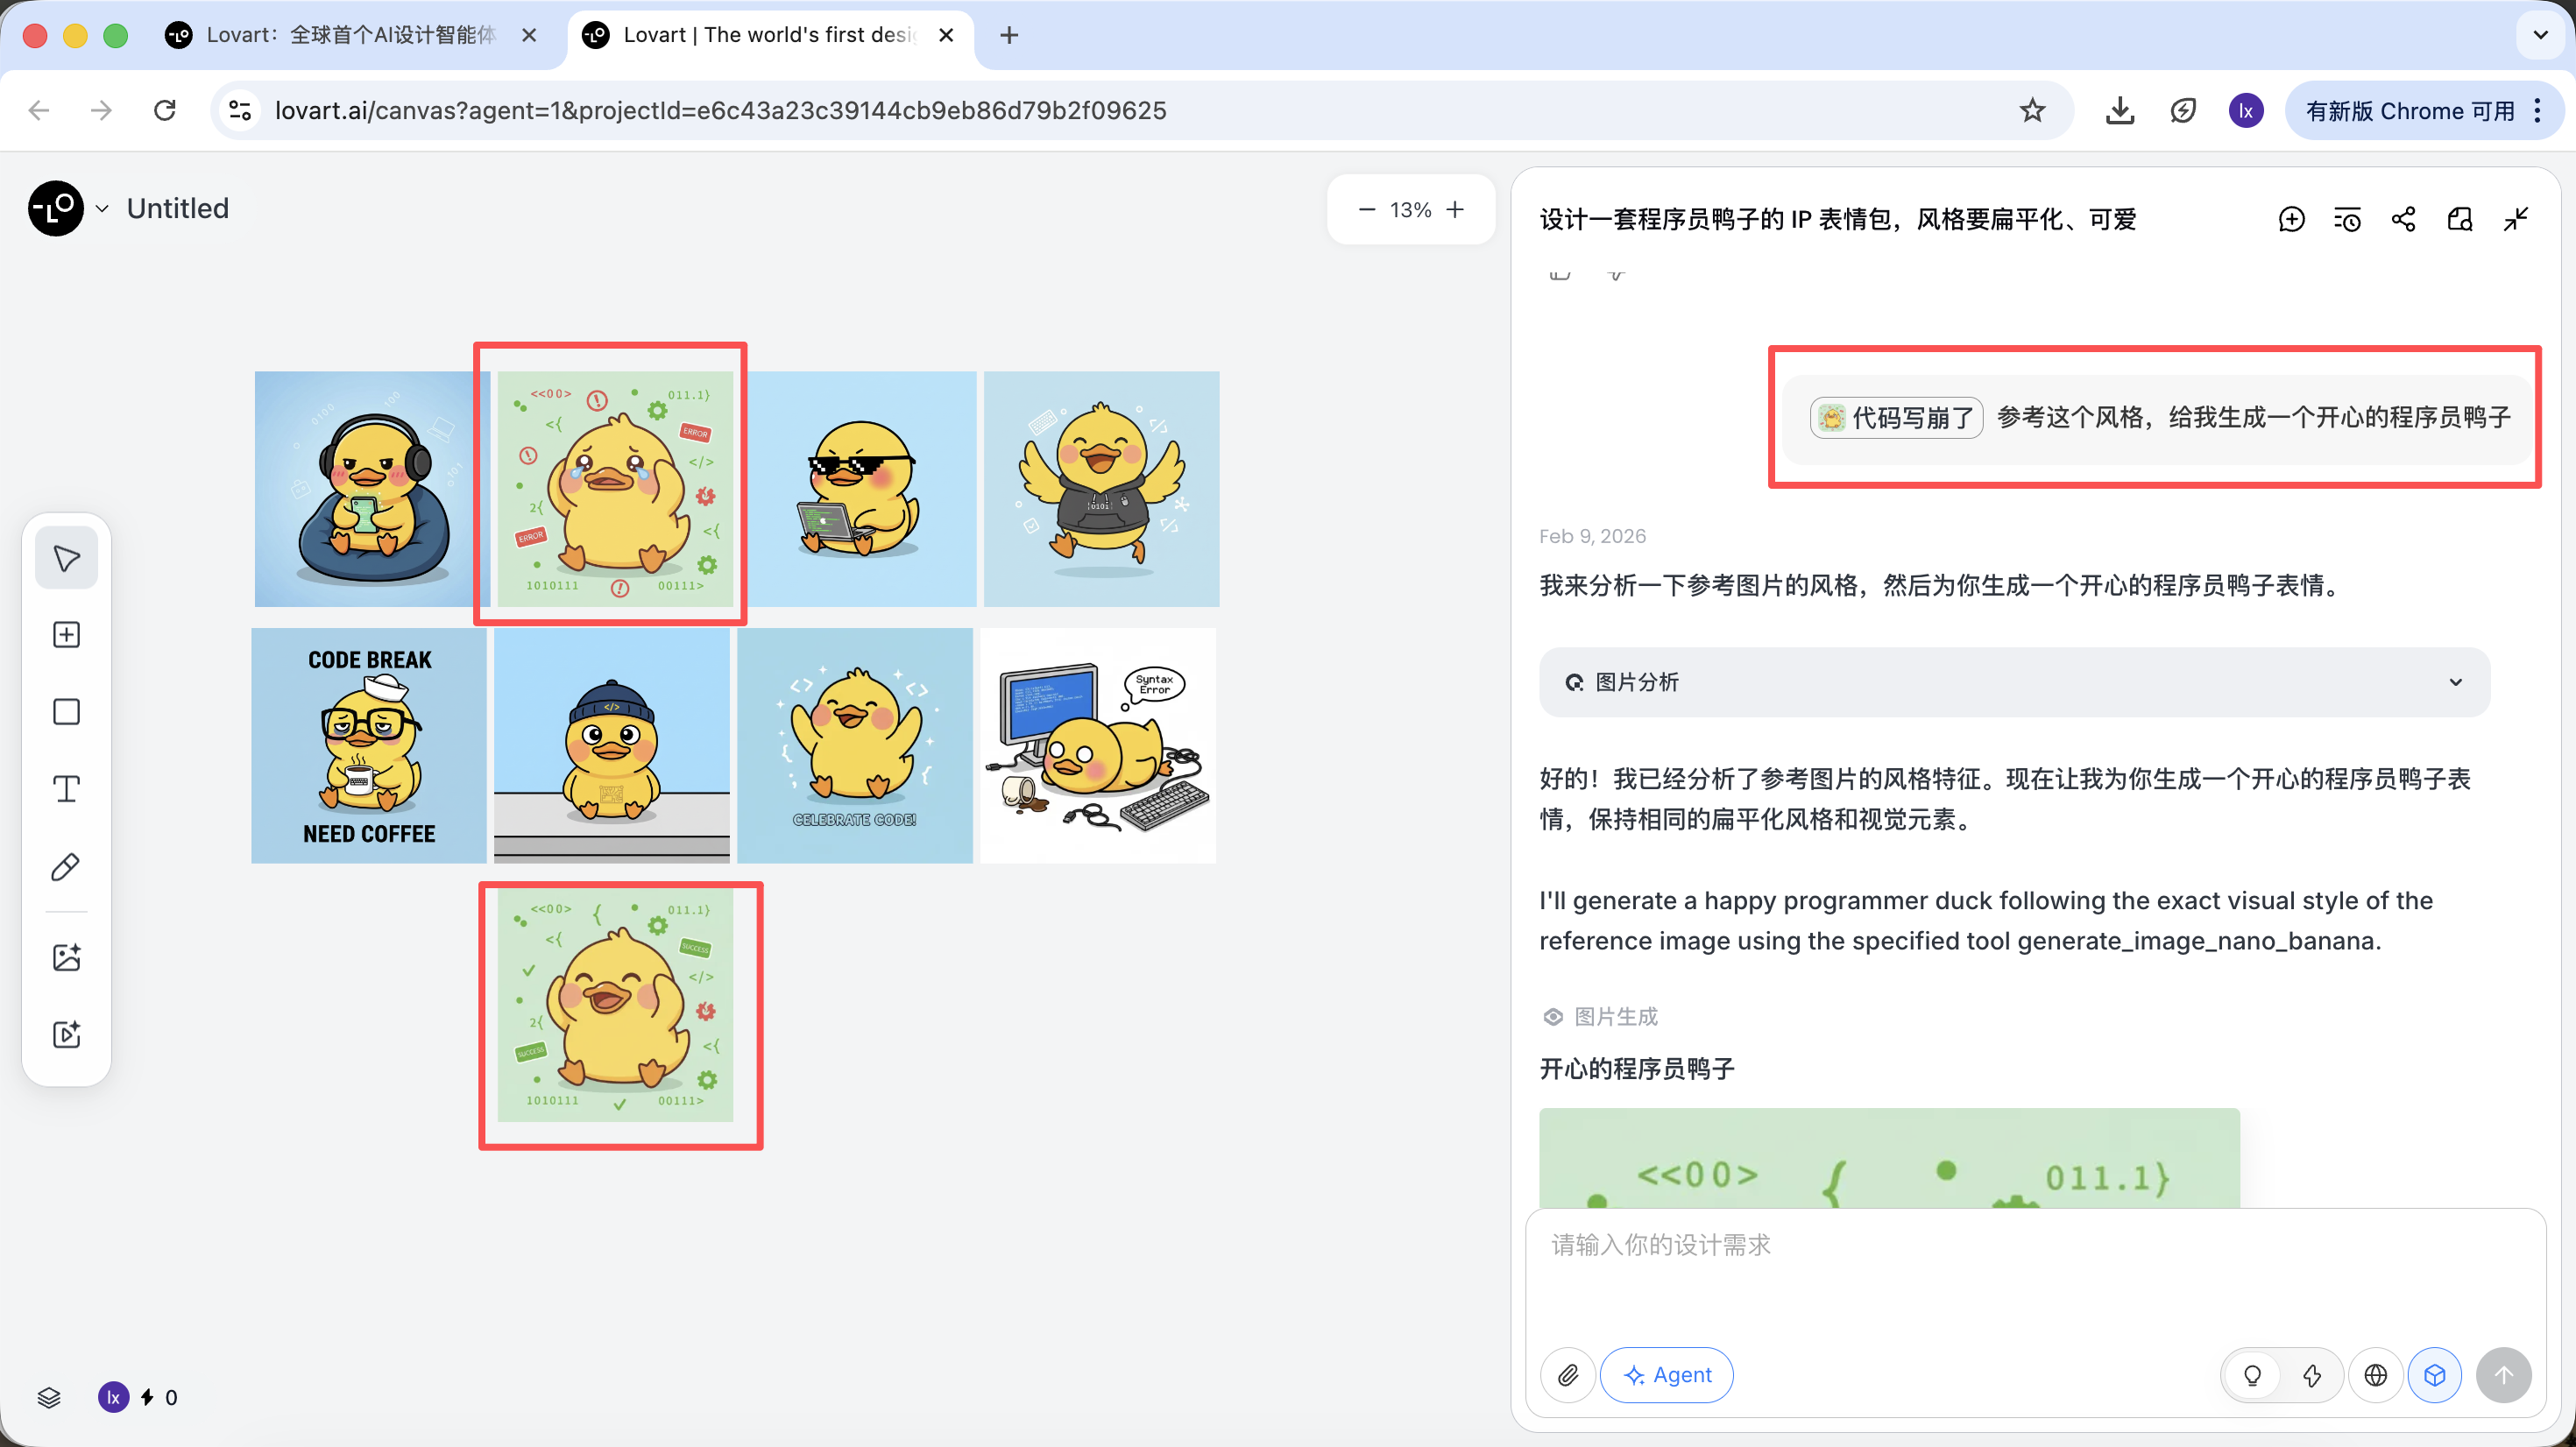
    Selected duck sticker and editing request.

    Partial Reference / Multi-Image Integration

    Besides using an entire image as a reference, Lovart also supports:

    • Selecting only a partial area of an image (for example, only referencing the hat or expression)

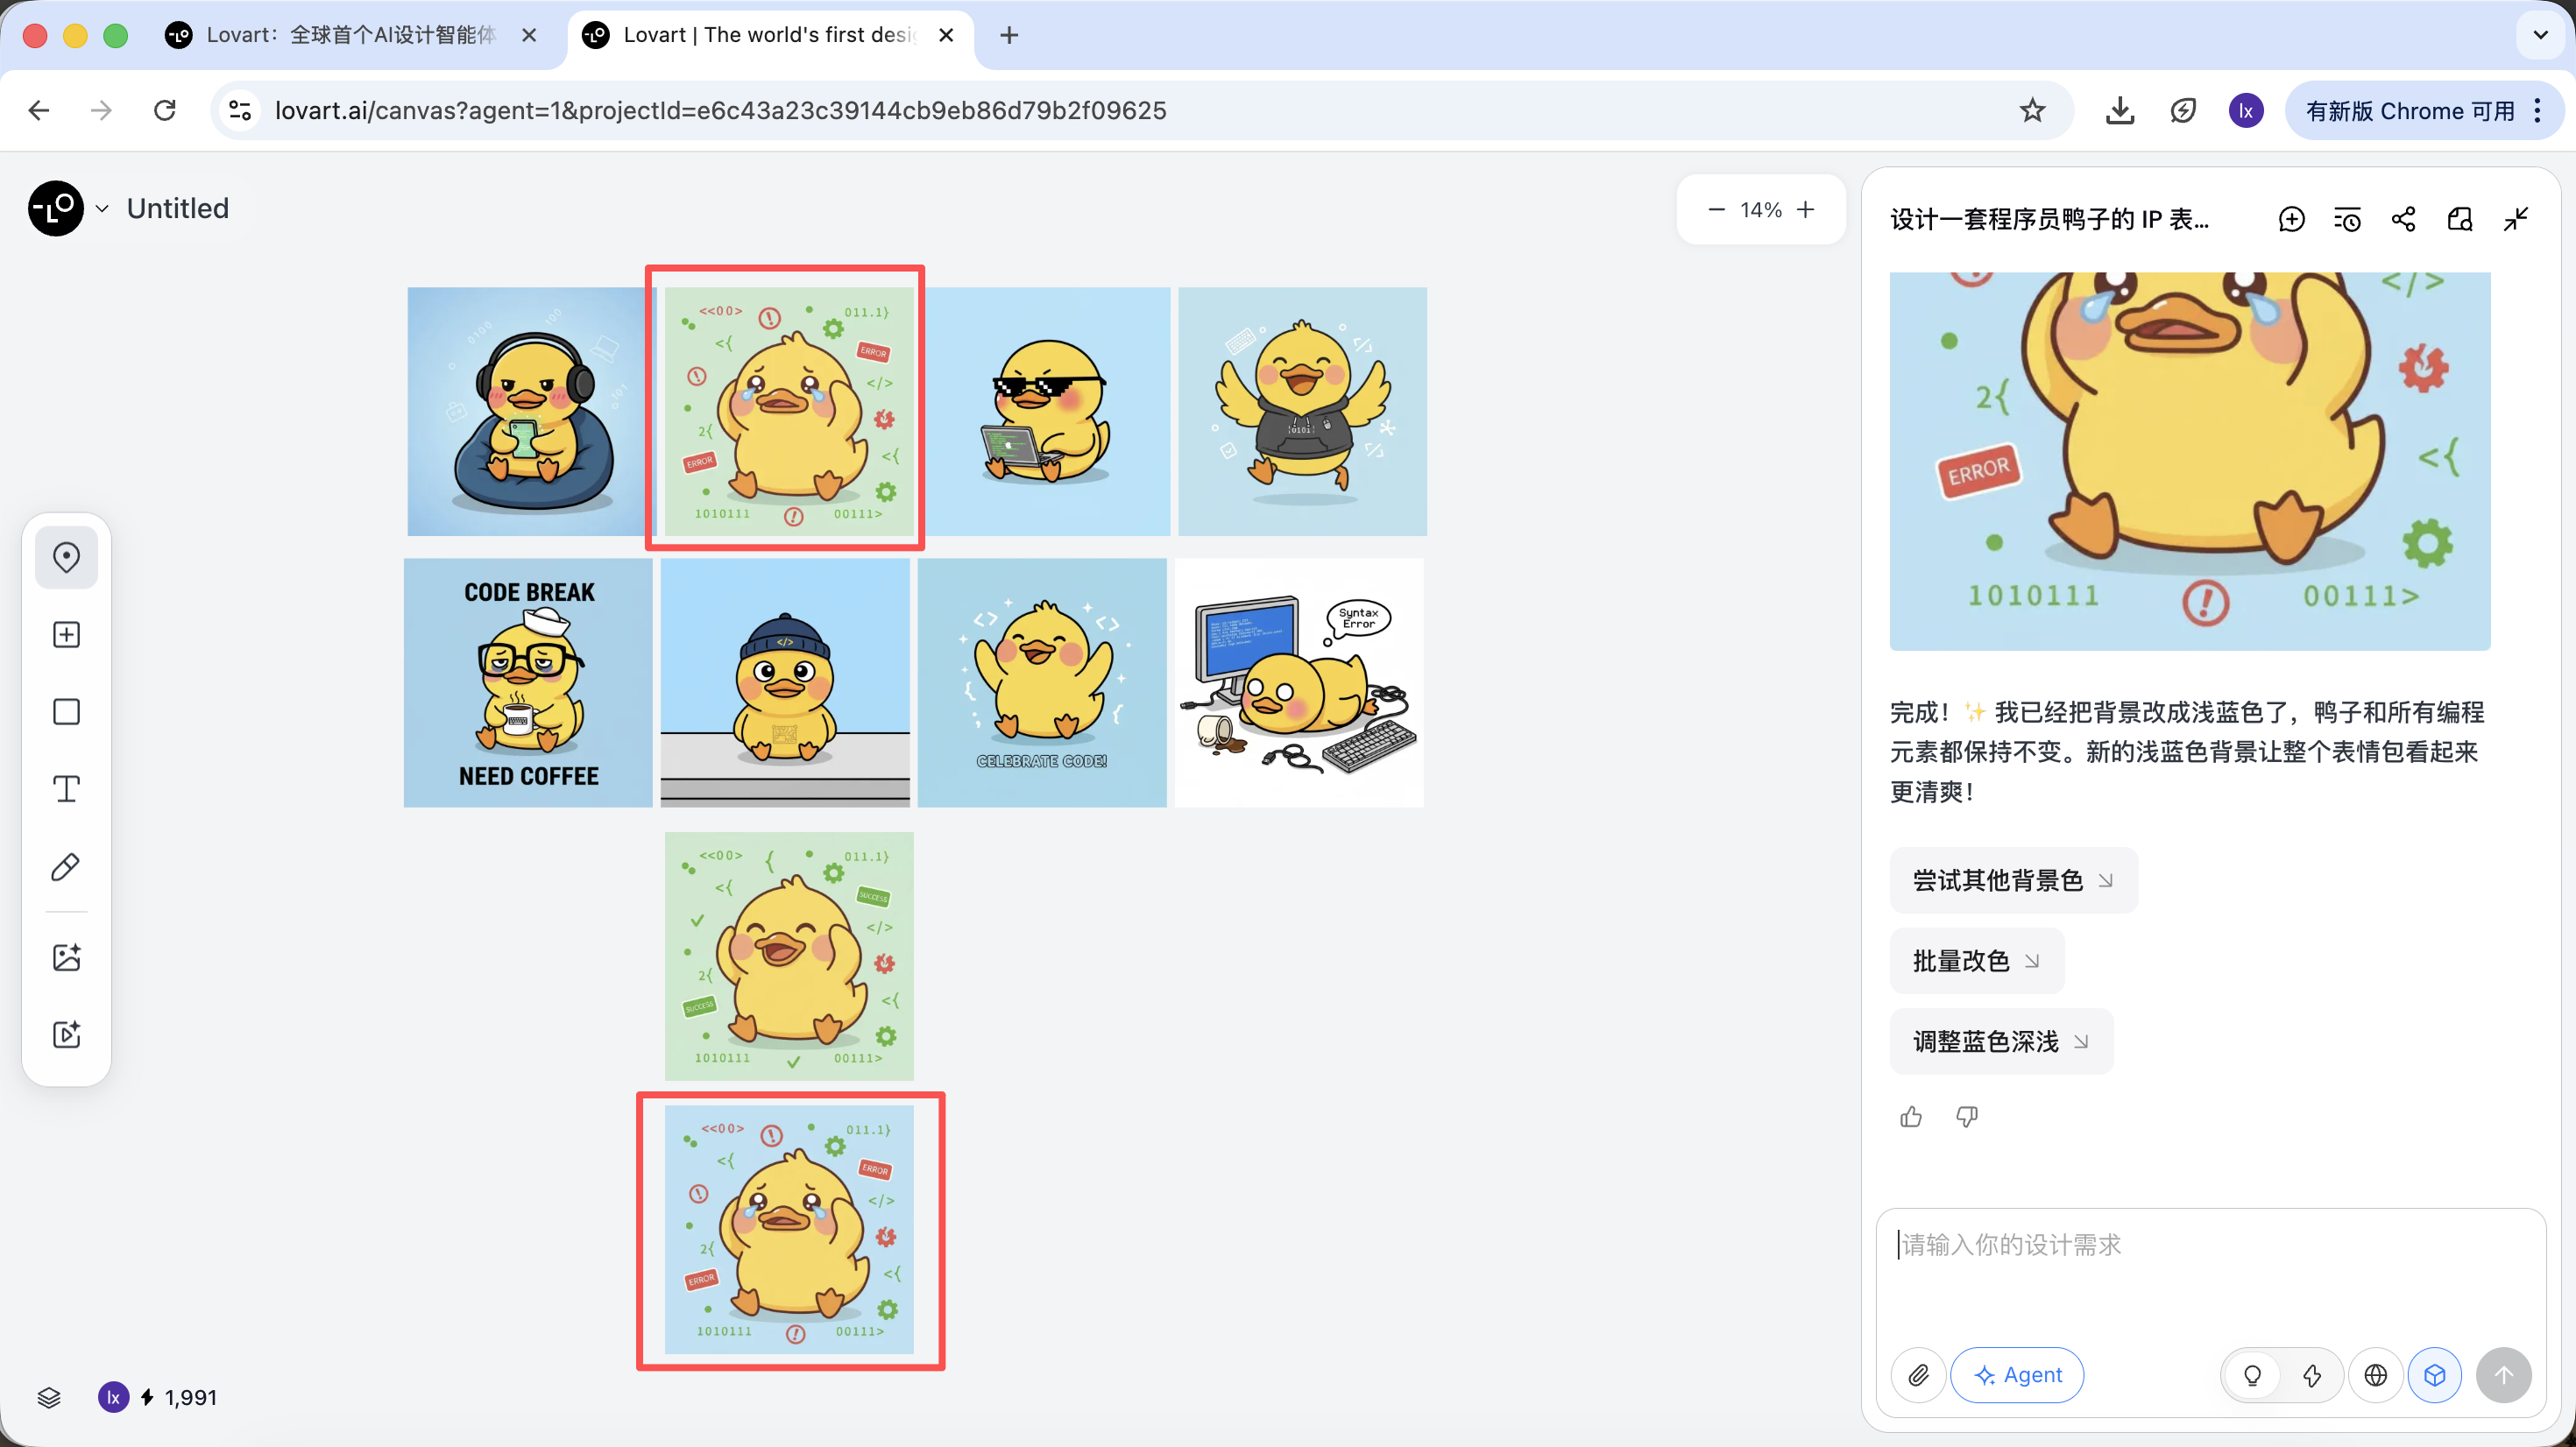
    Click the tab bar on the left side of the canvas area, select the "Mark" button, and mark the target area on the image. This content will automatically sync to the conversation box. For example, here we can choose to change the background color.
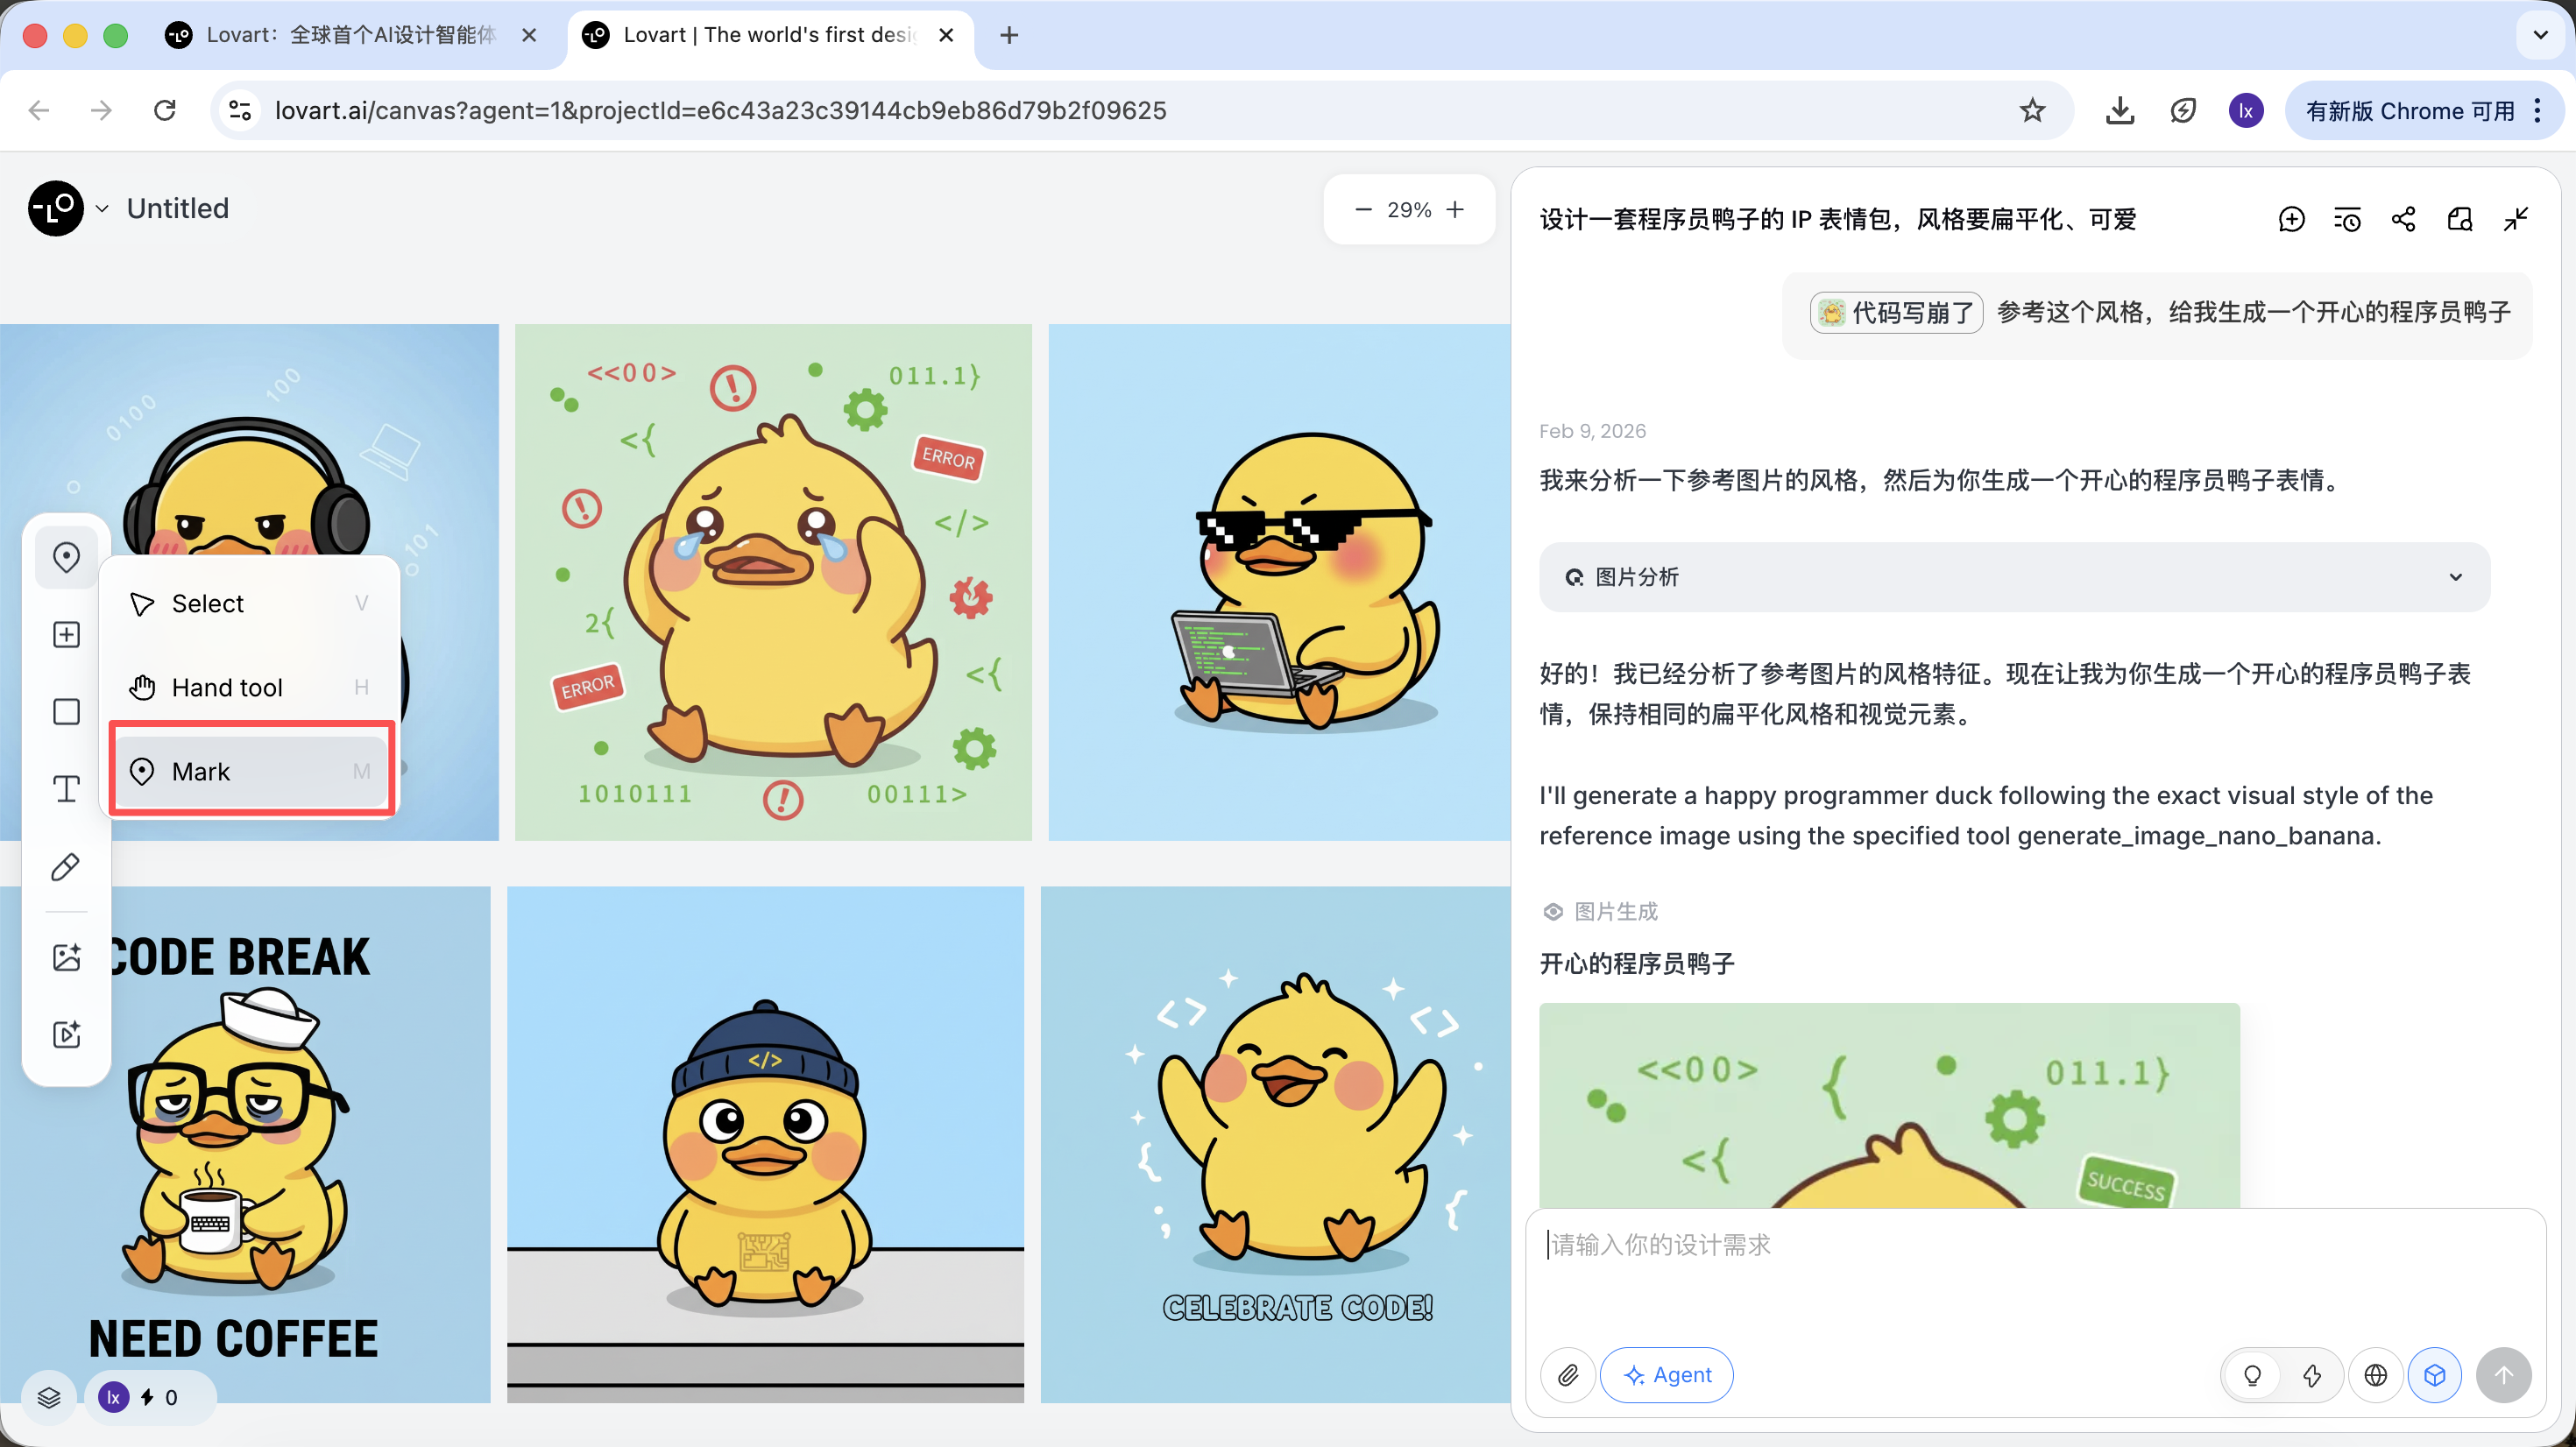
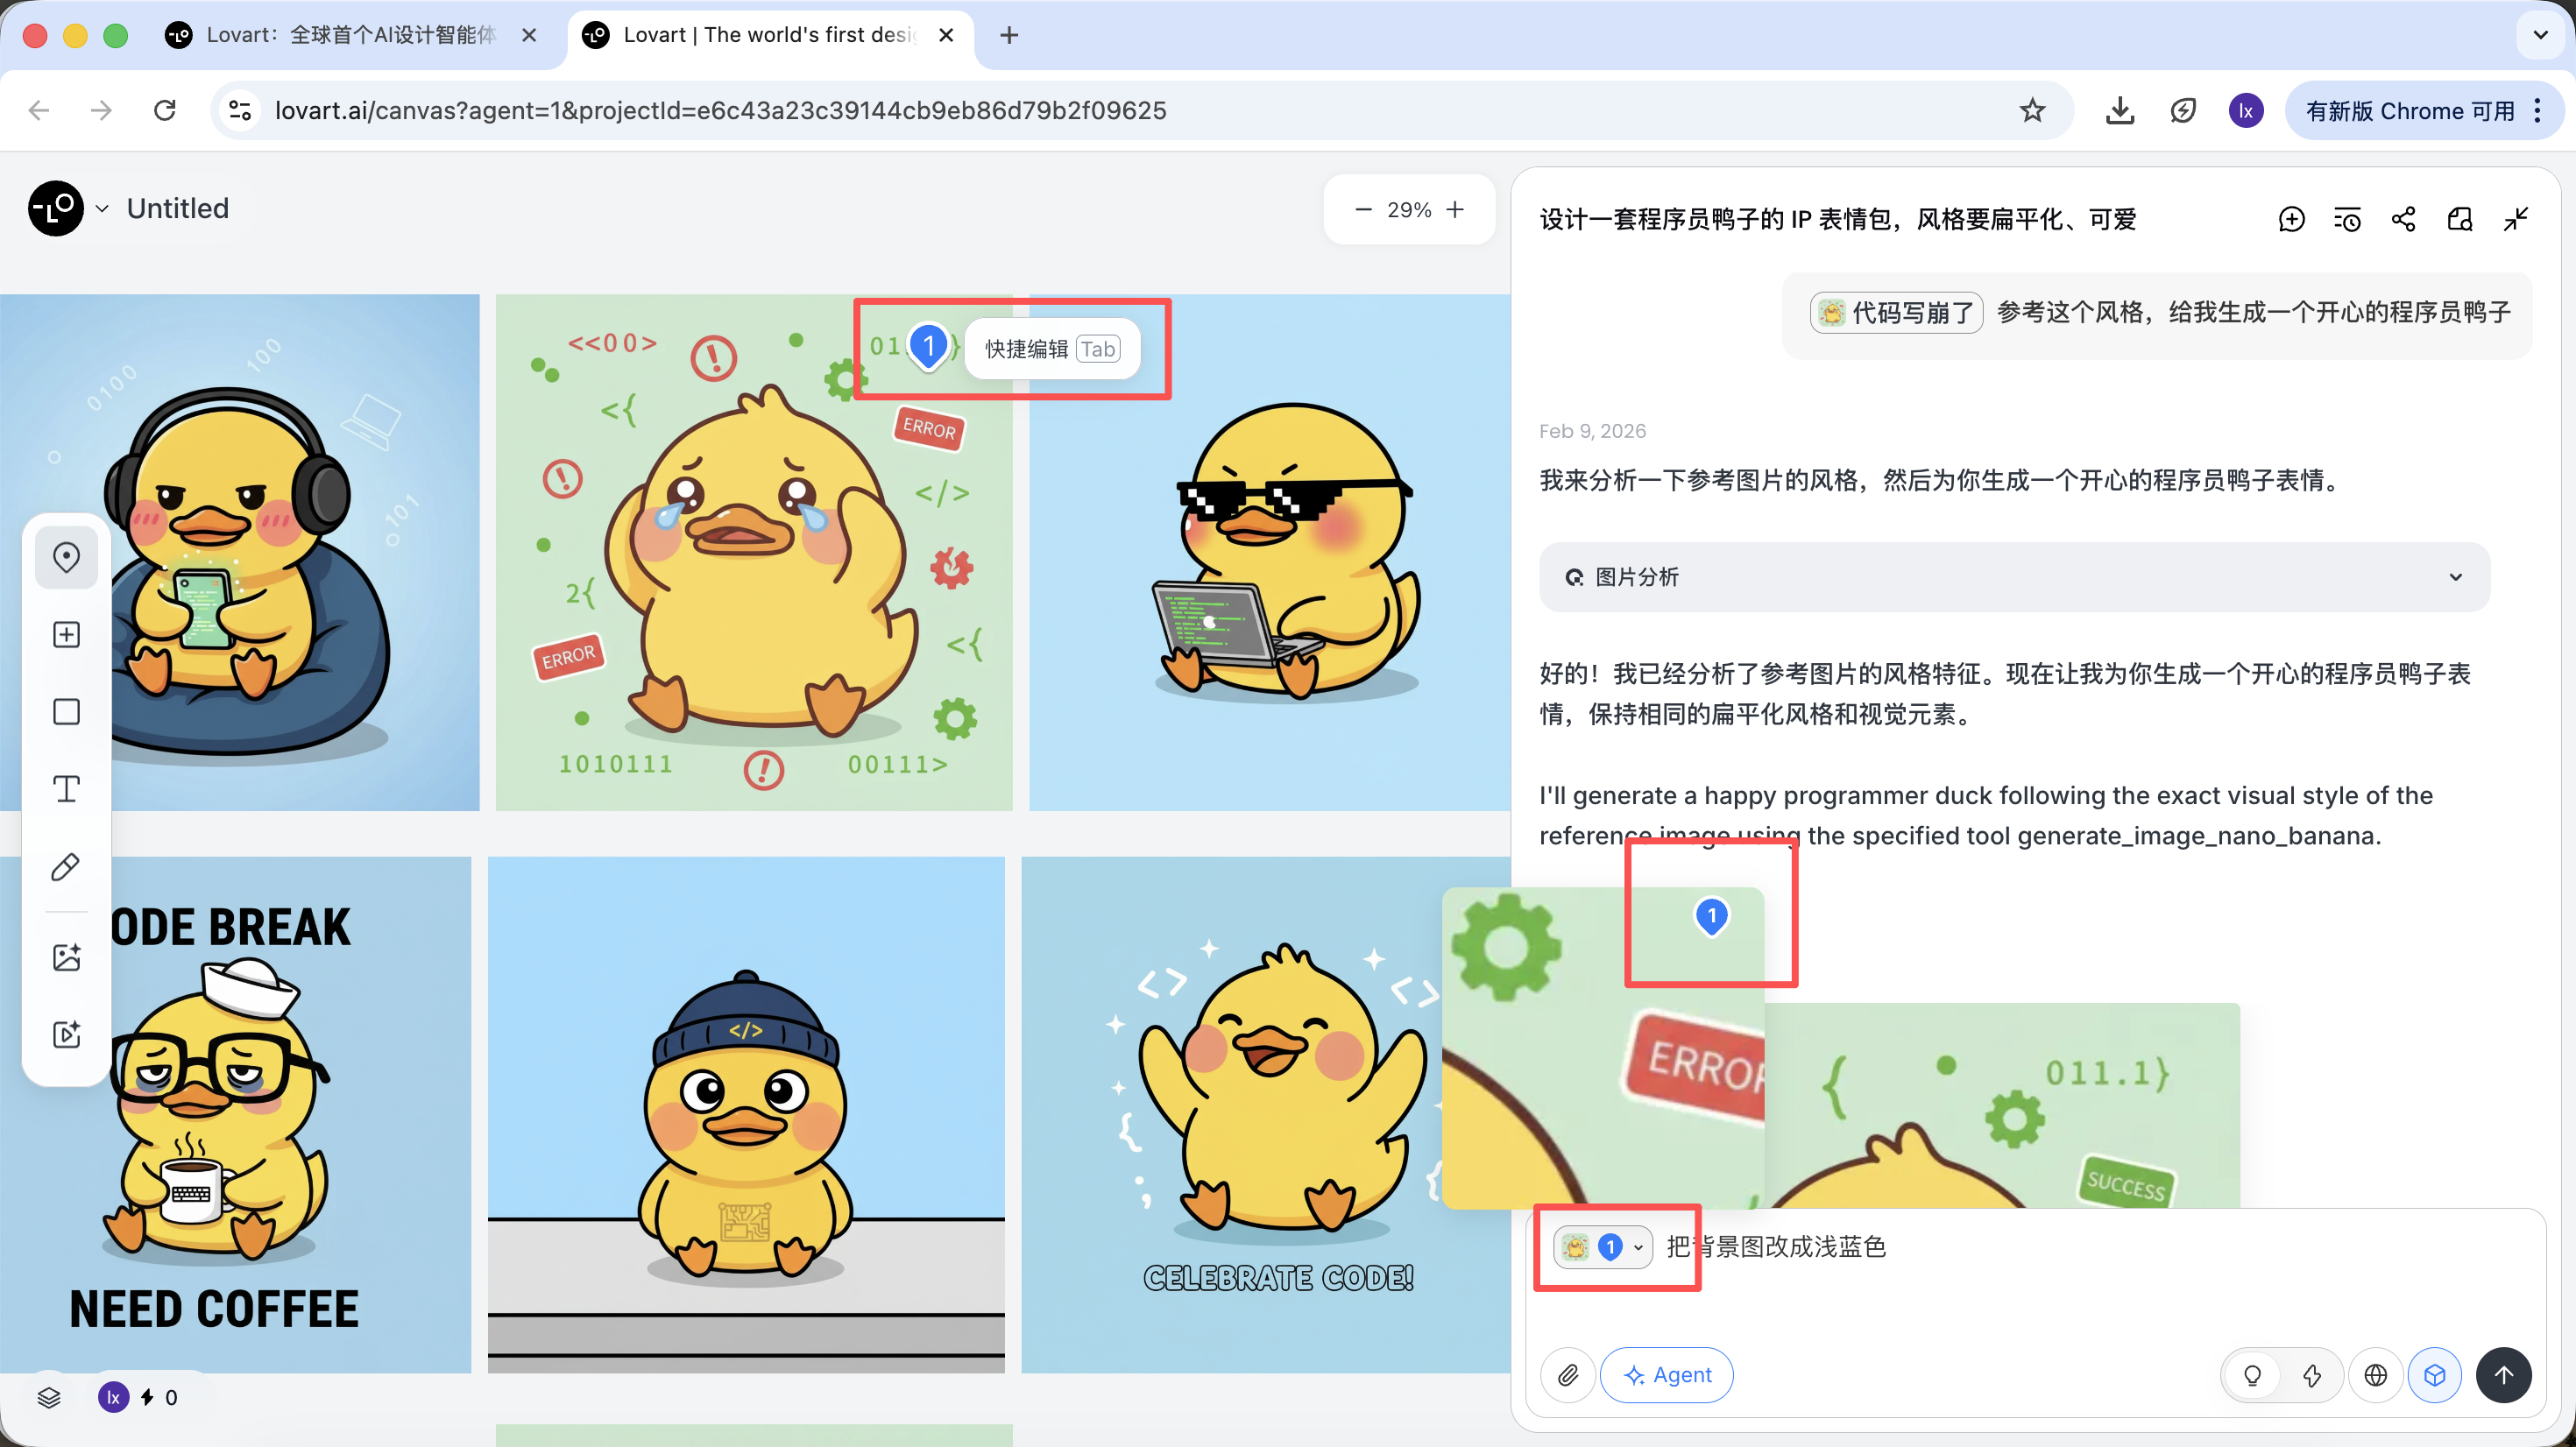
    Sticker context menu.

    Sticker edit toolbar.

    Sticker variants selected on canvas.

    You can see that the newly generated image only changed the background color, which is consistent with our input requirement.

    • Referencing sub-elements from multiple images separately, then combining them to generate new results

    For example: you can keep the character from image A as the main subject, while only replacing the hat with the style from image B. The Agent will automatically integrate these visual constraints in the background.

    Taking the programmer duck as an example, we can choose to keep the duck character from the first image and replace it as the main subject element in the second image.
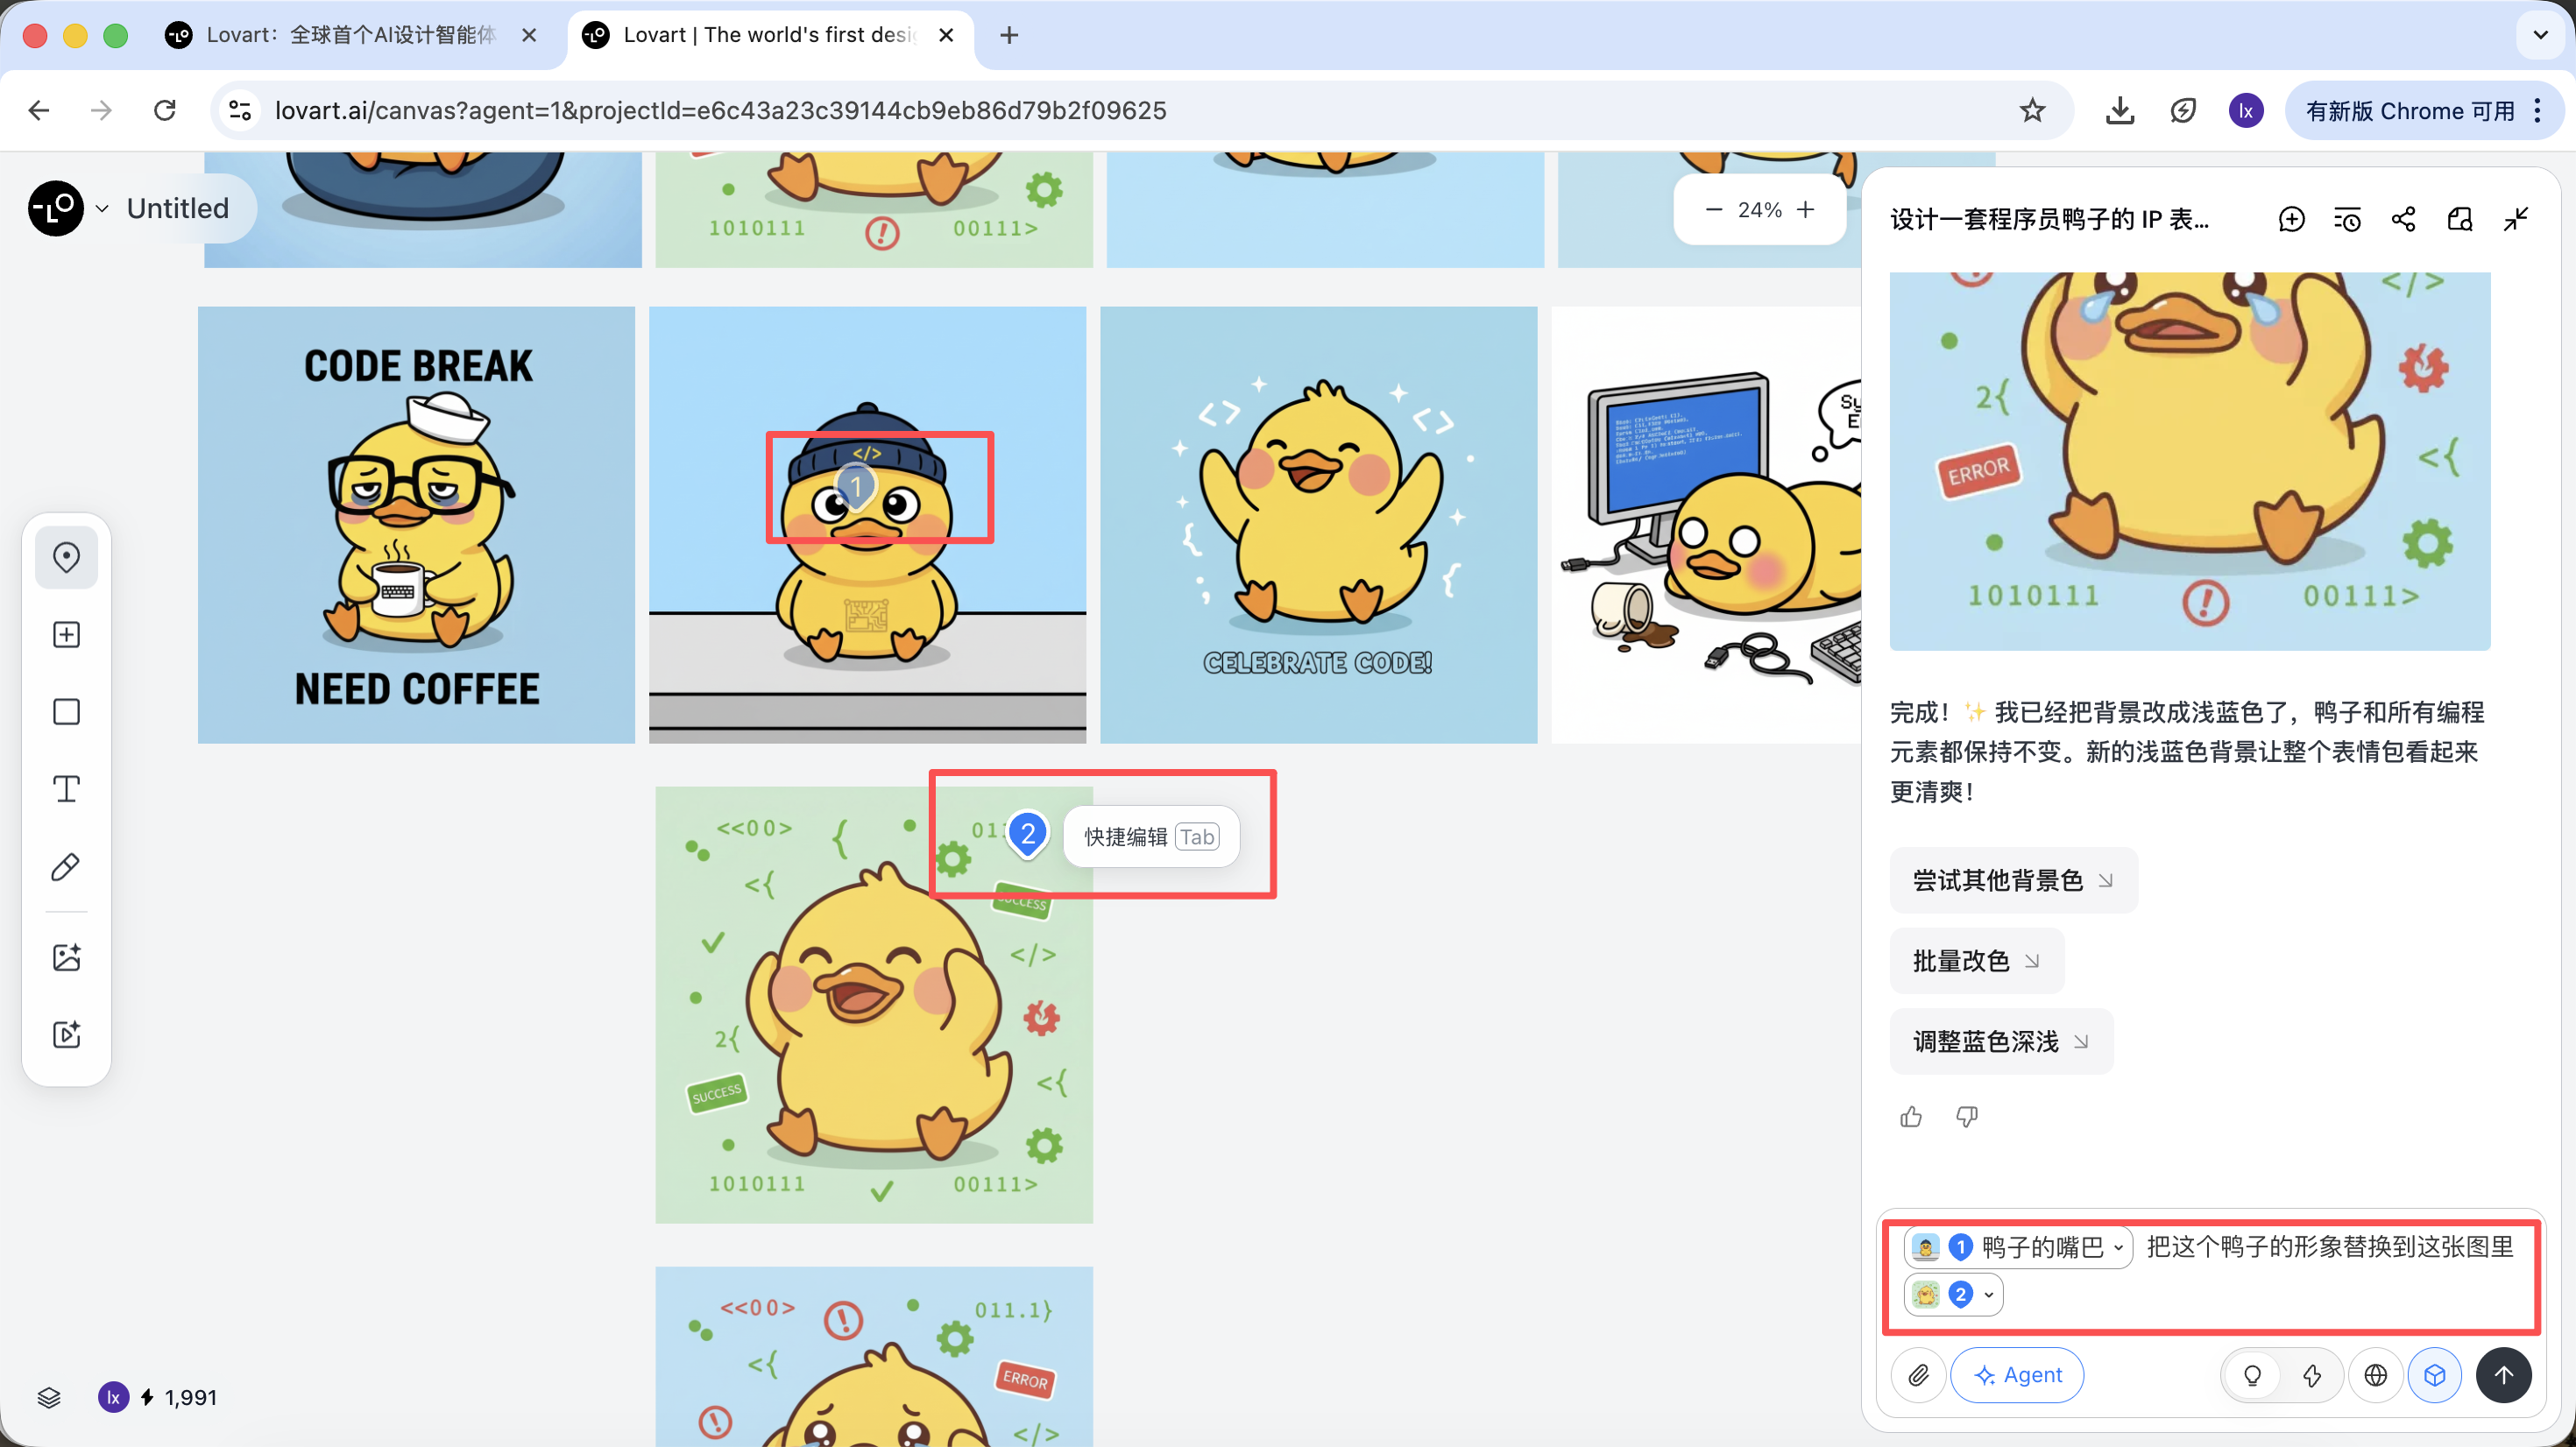
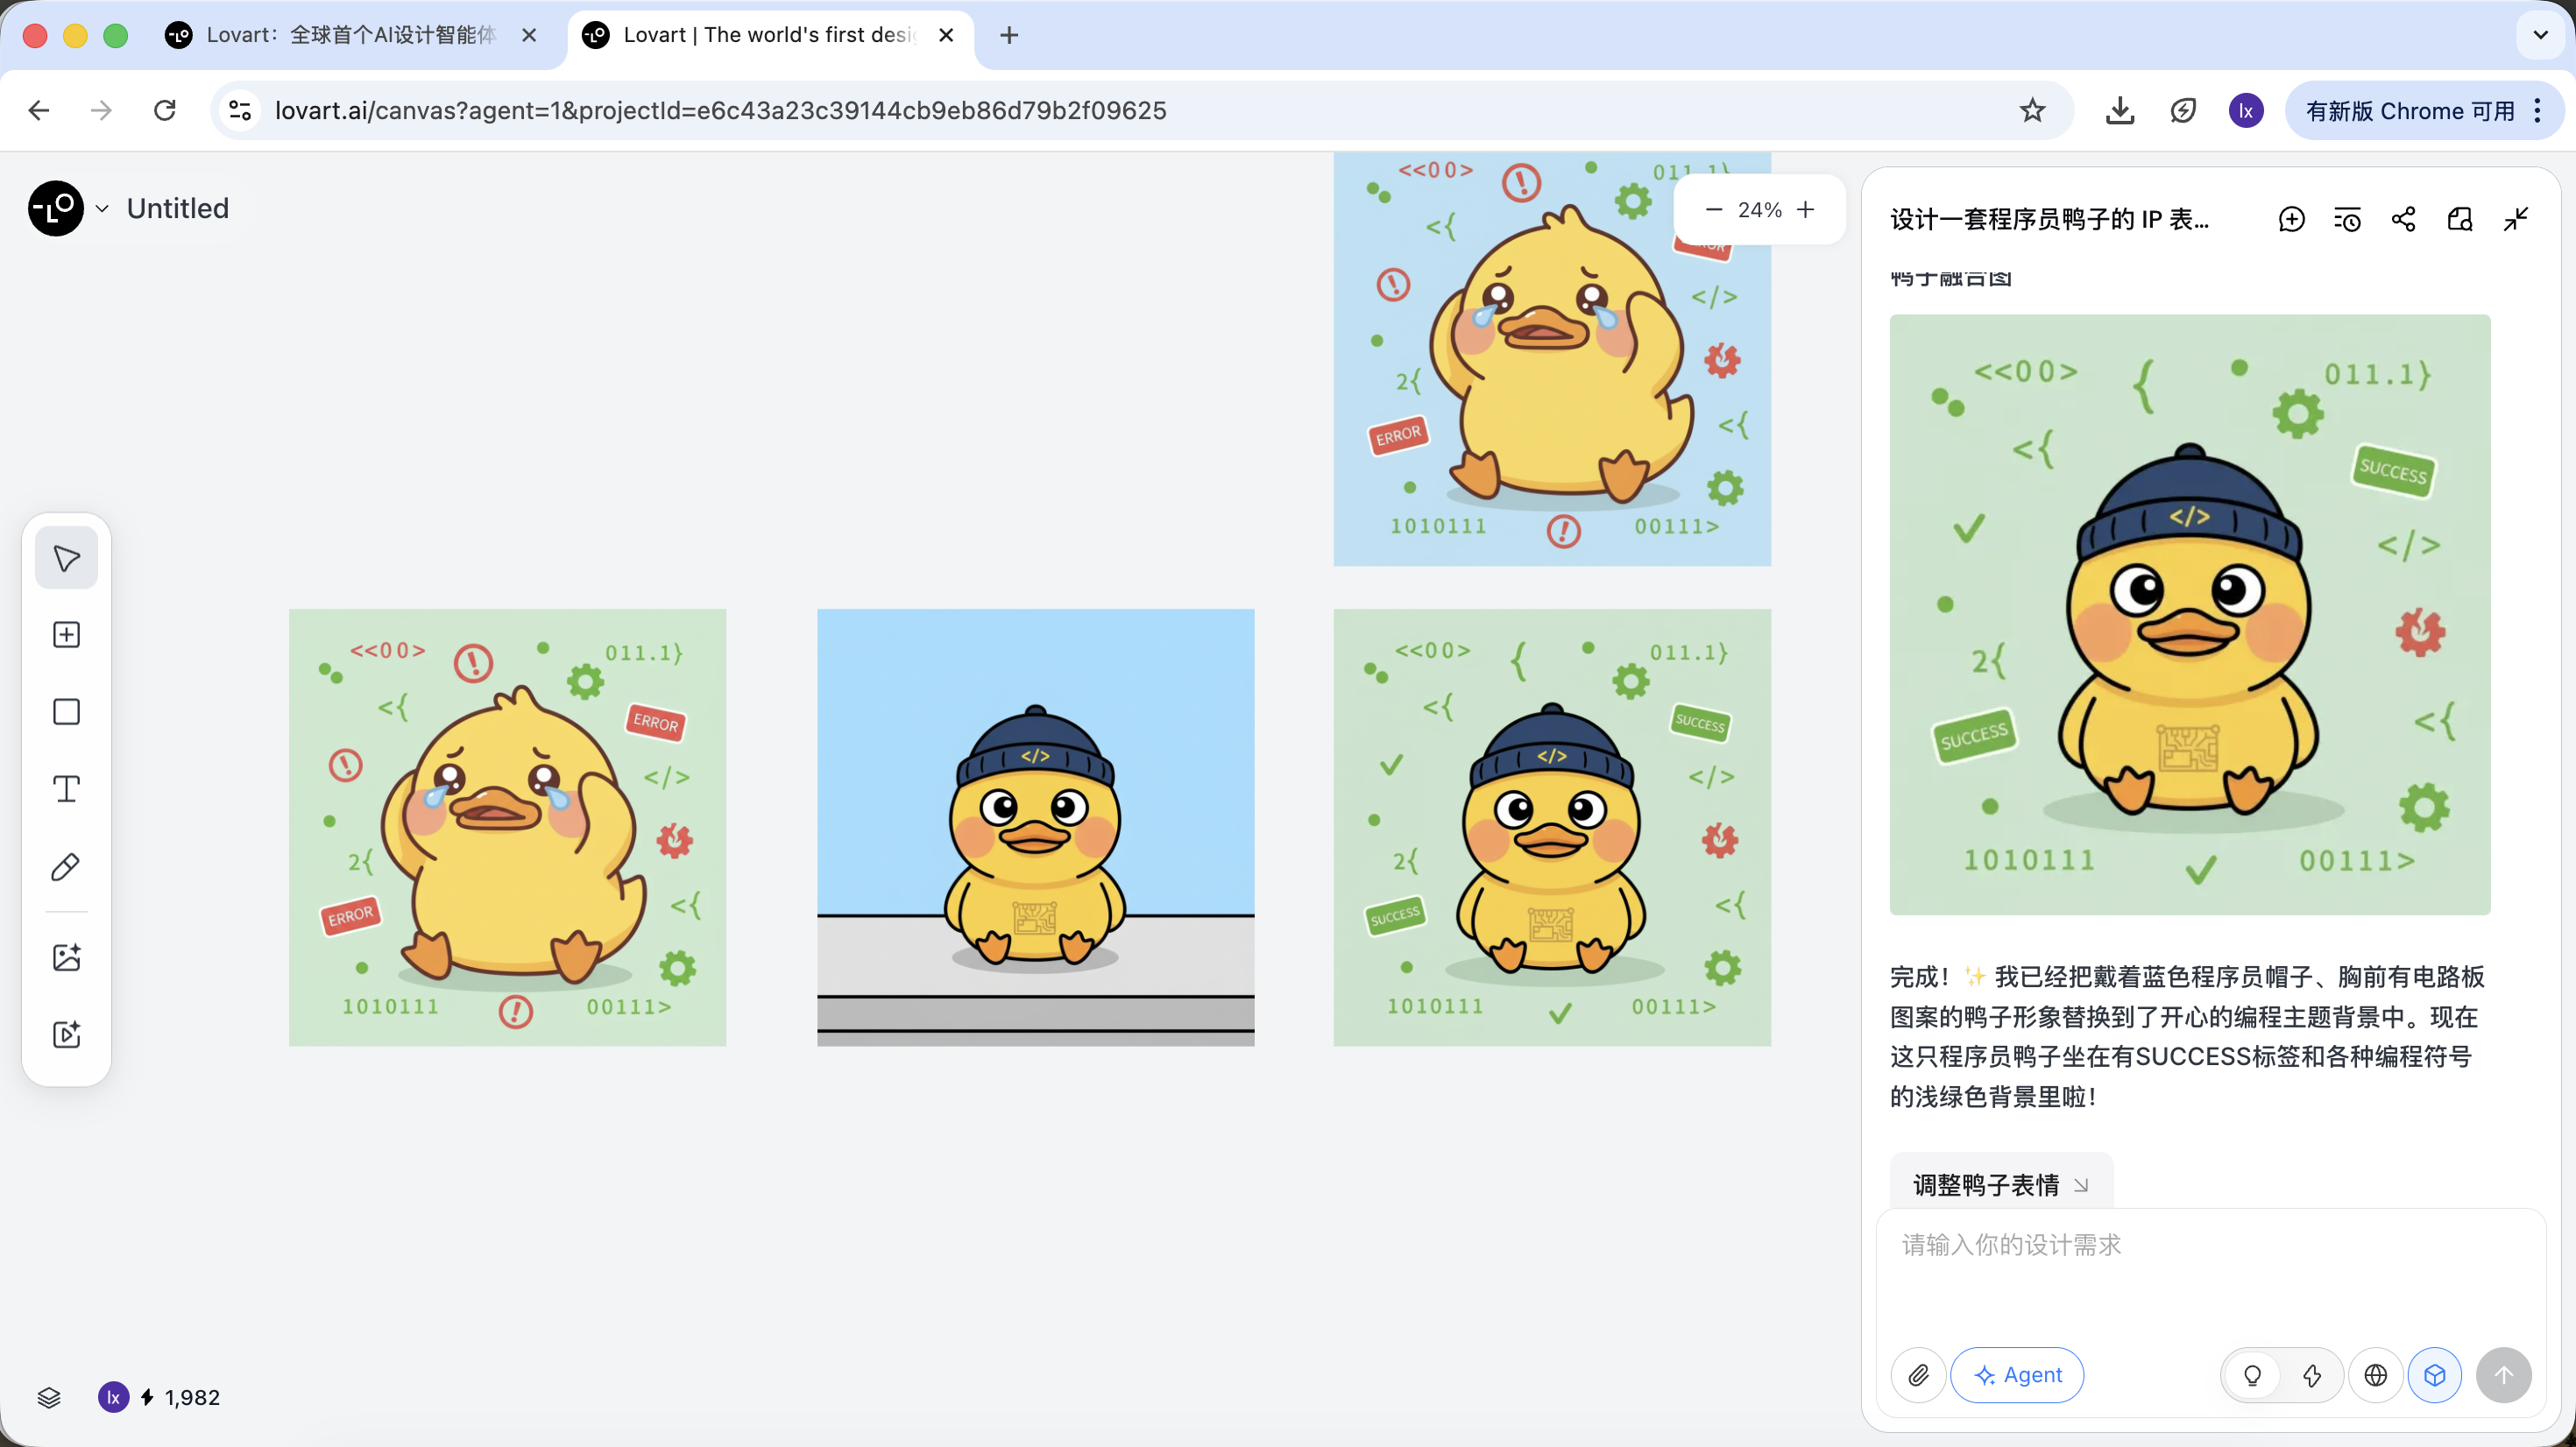
    Sticker edit prompt location.

    Regenerated sticker variants.

    The final effect is quite remarkable. You can also try other combinations!

    Phase Three: Delivery (Agent's Tool Calling)

    After generation is complete, you can directly perform: upscale, remove background, erase, and other operations.
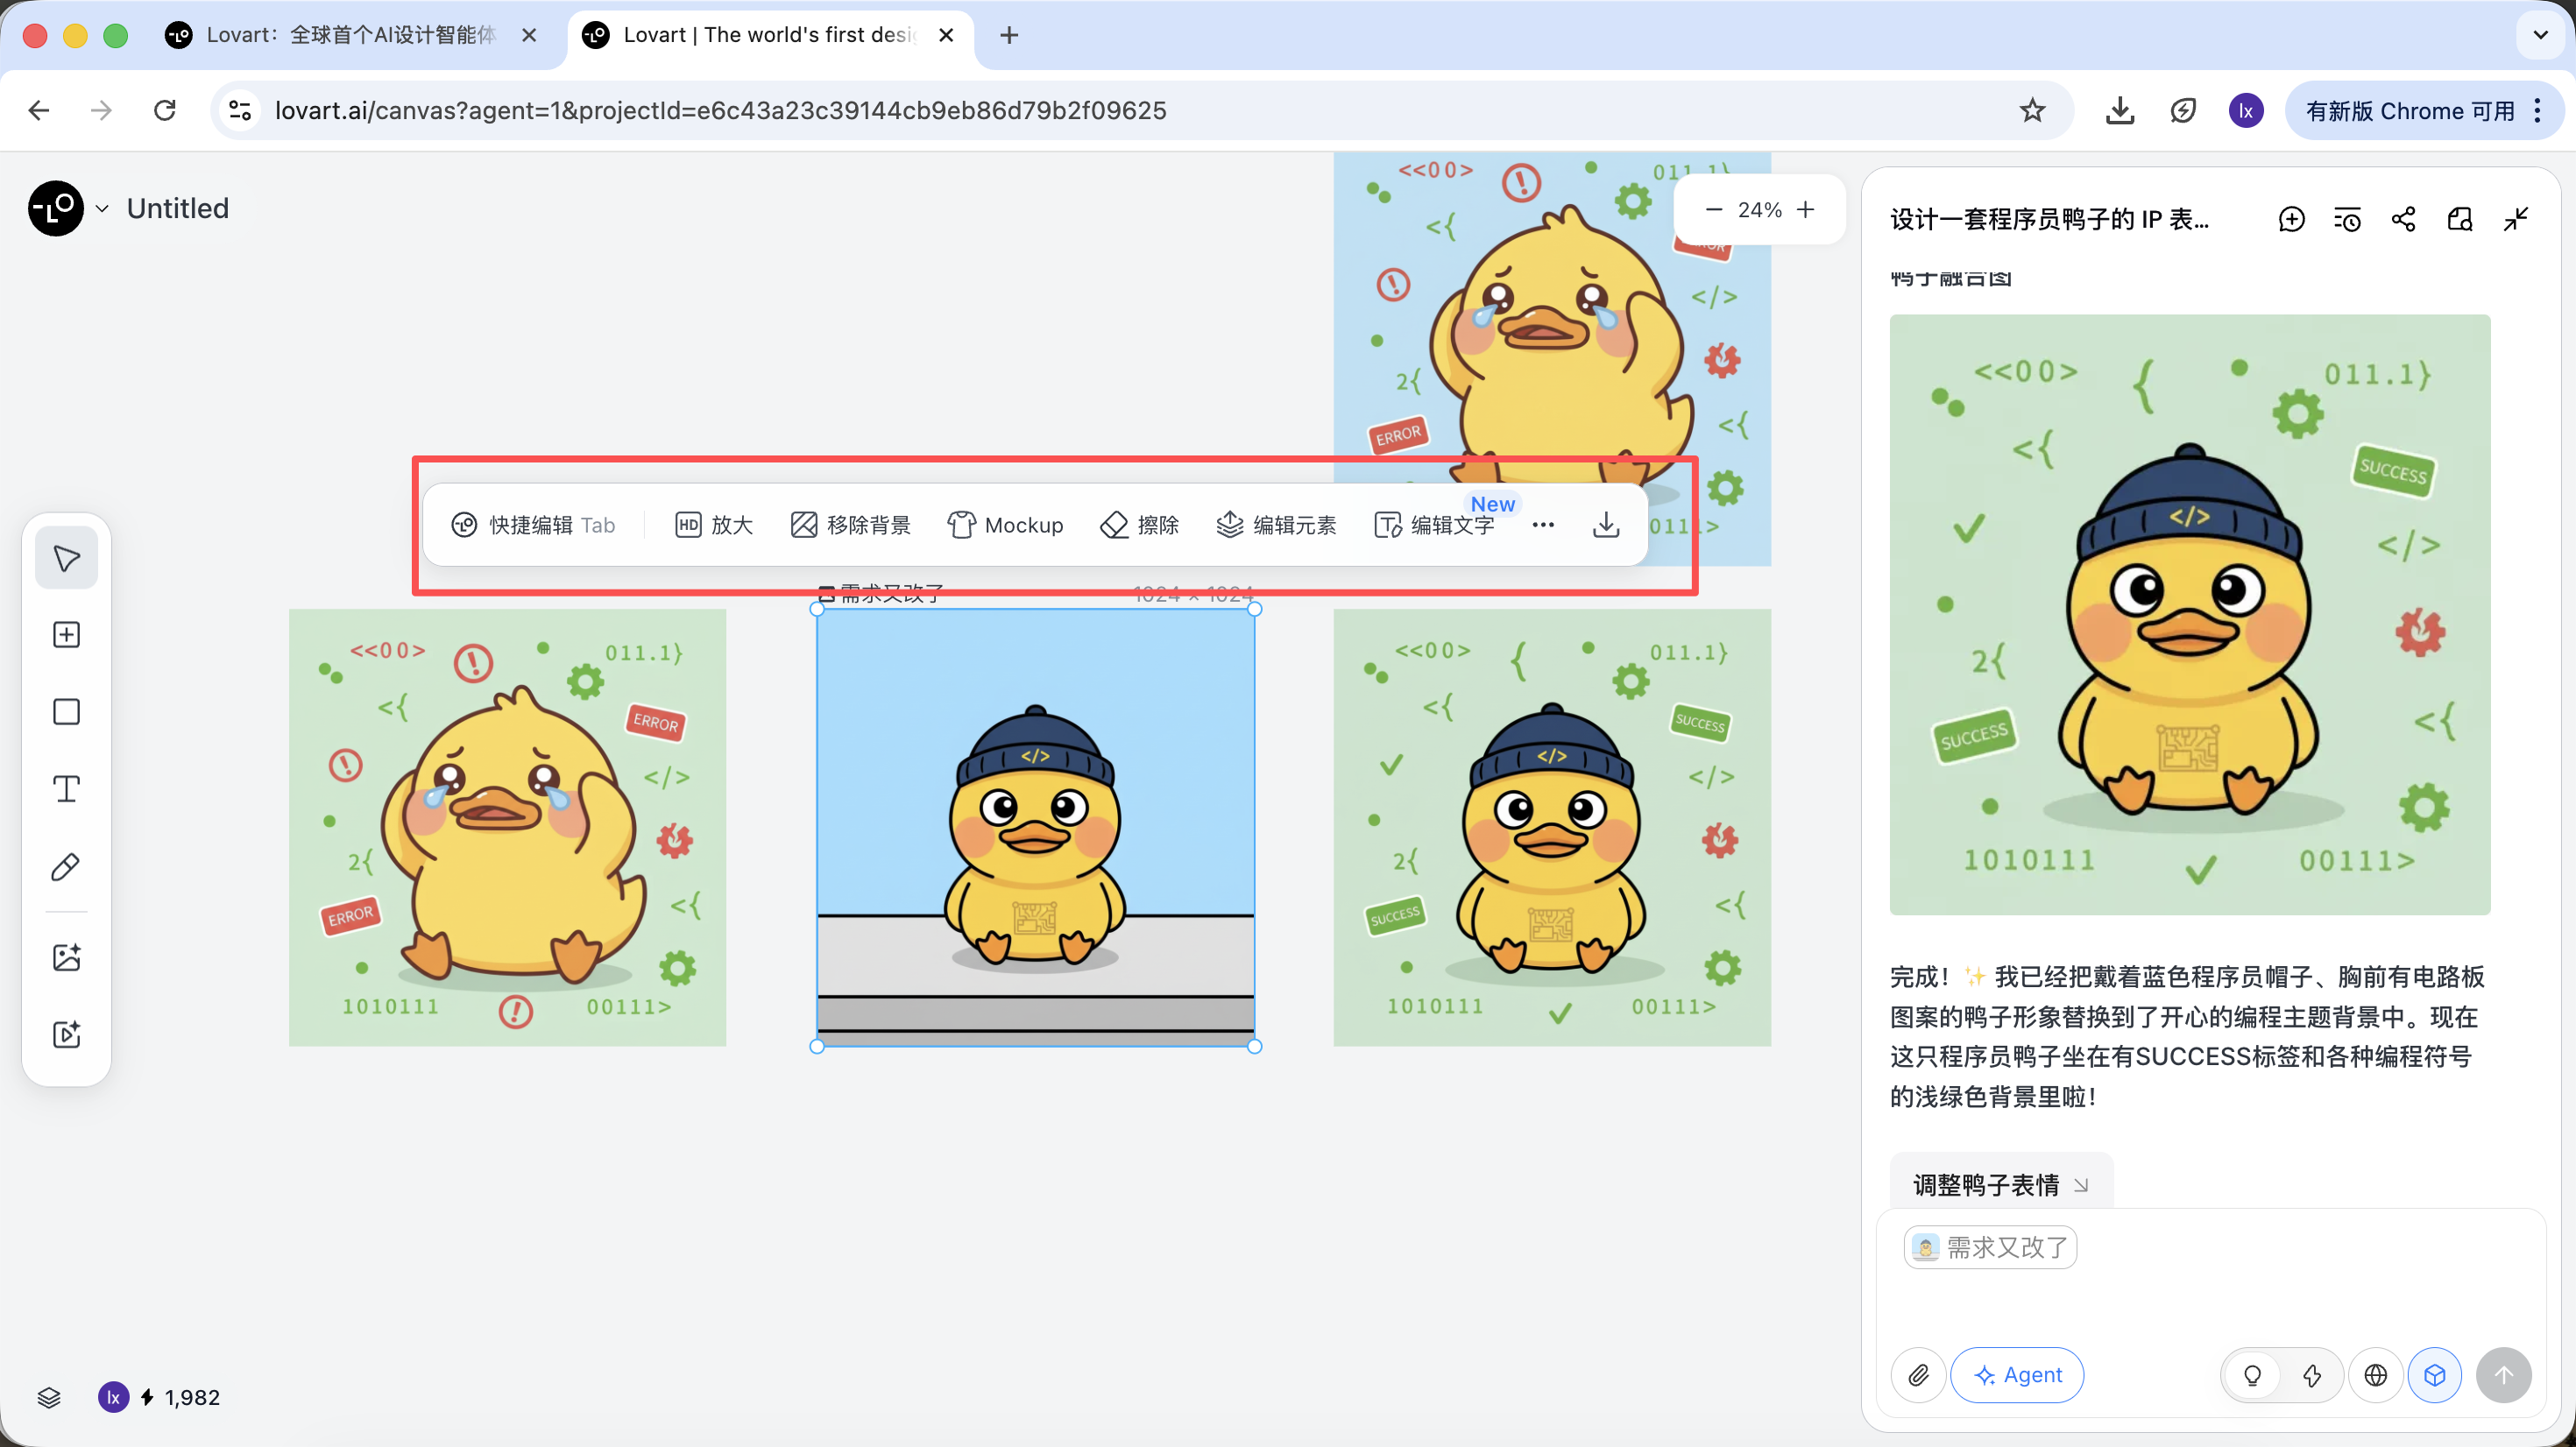
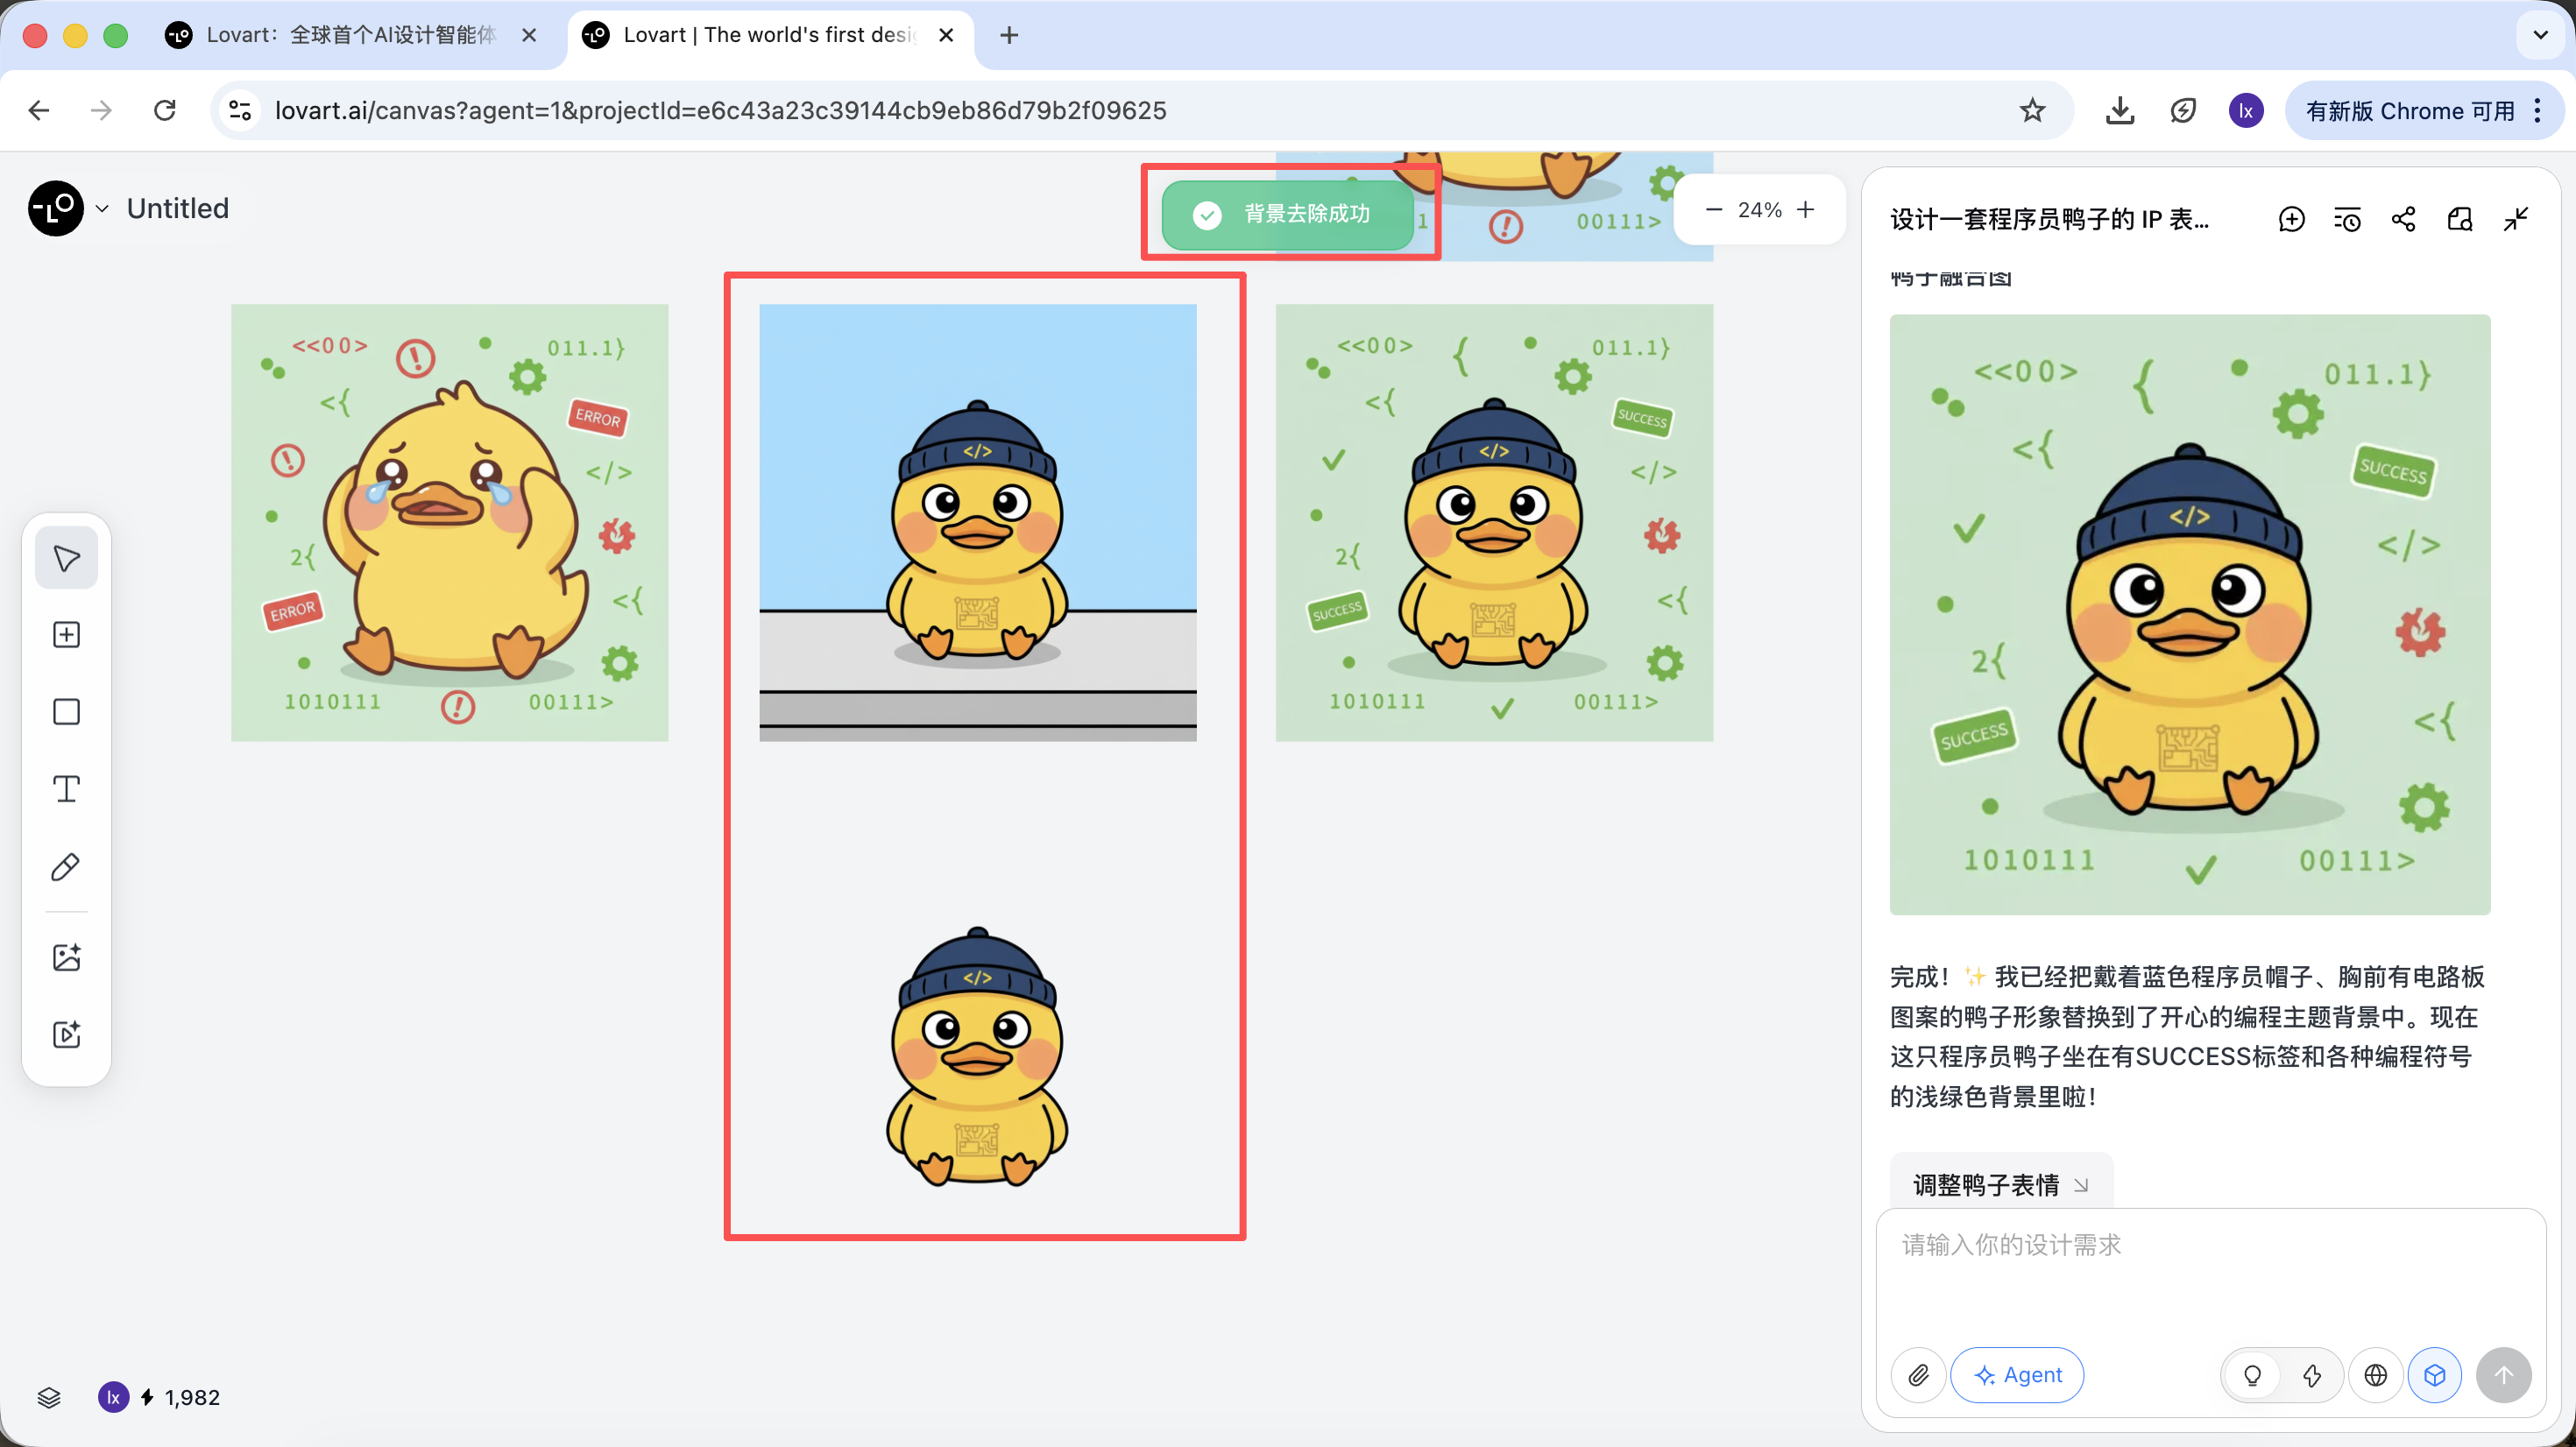
    Sticker toolbar and prompt input.

    Exporting selected stickers.

    These are not simple filters — they are results from the Agent automatically orchestrating different tools.

    Once the base style is determined, you can very quickly generate a series of sticker pack images.
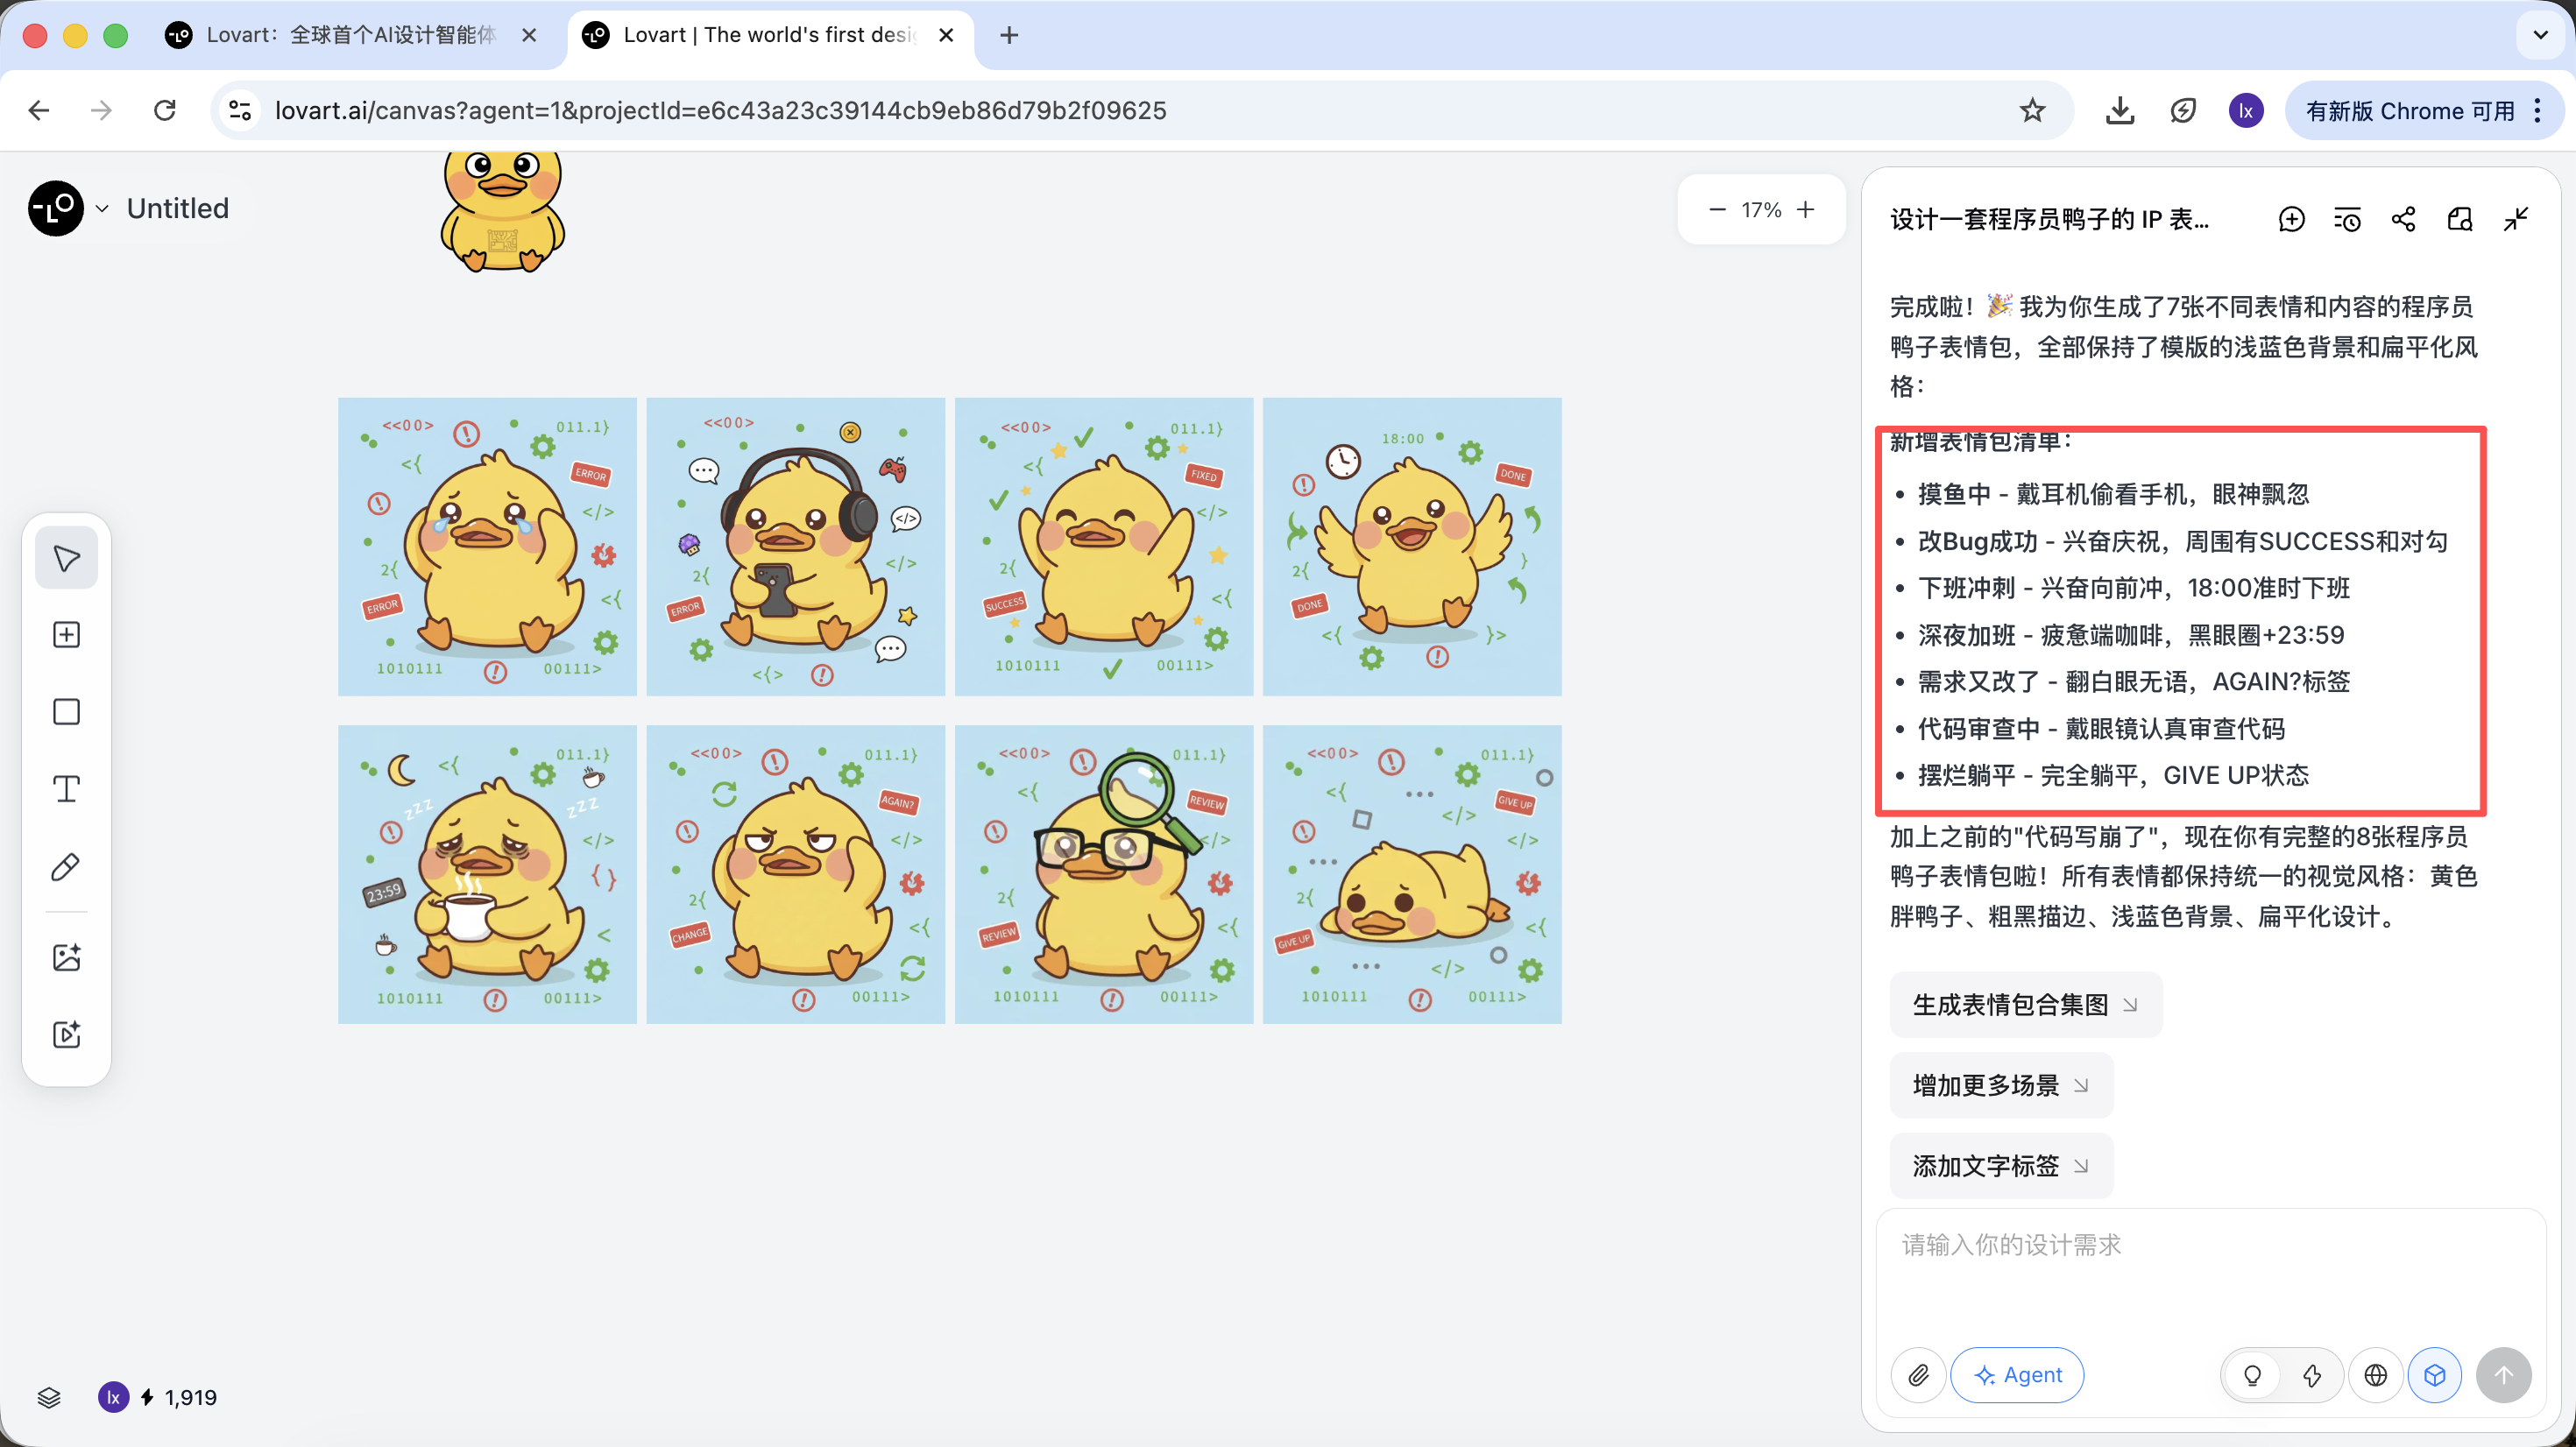
    Completed duck sticker collection.

    What we ultimately get are production-ready assets that can be directly delivered, not just a display image.

    2.3 Usage and Pricing Information

    Lovart uses a subscription-based pricing model, where different plans correspond to different usage quotas and feature permissions. Please refer to the official website for specific details.

    This tutorial does not recommend or compare any specific plans; if you have actual usage needs, you can choose to upgrade based on your personal situation. Currently, payment via Alipay and other methods is supported.
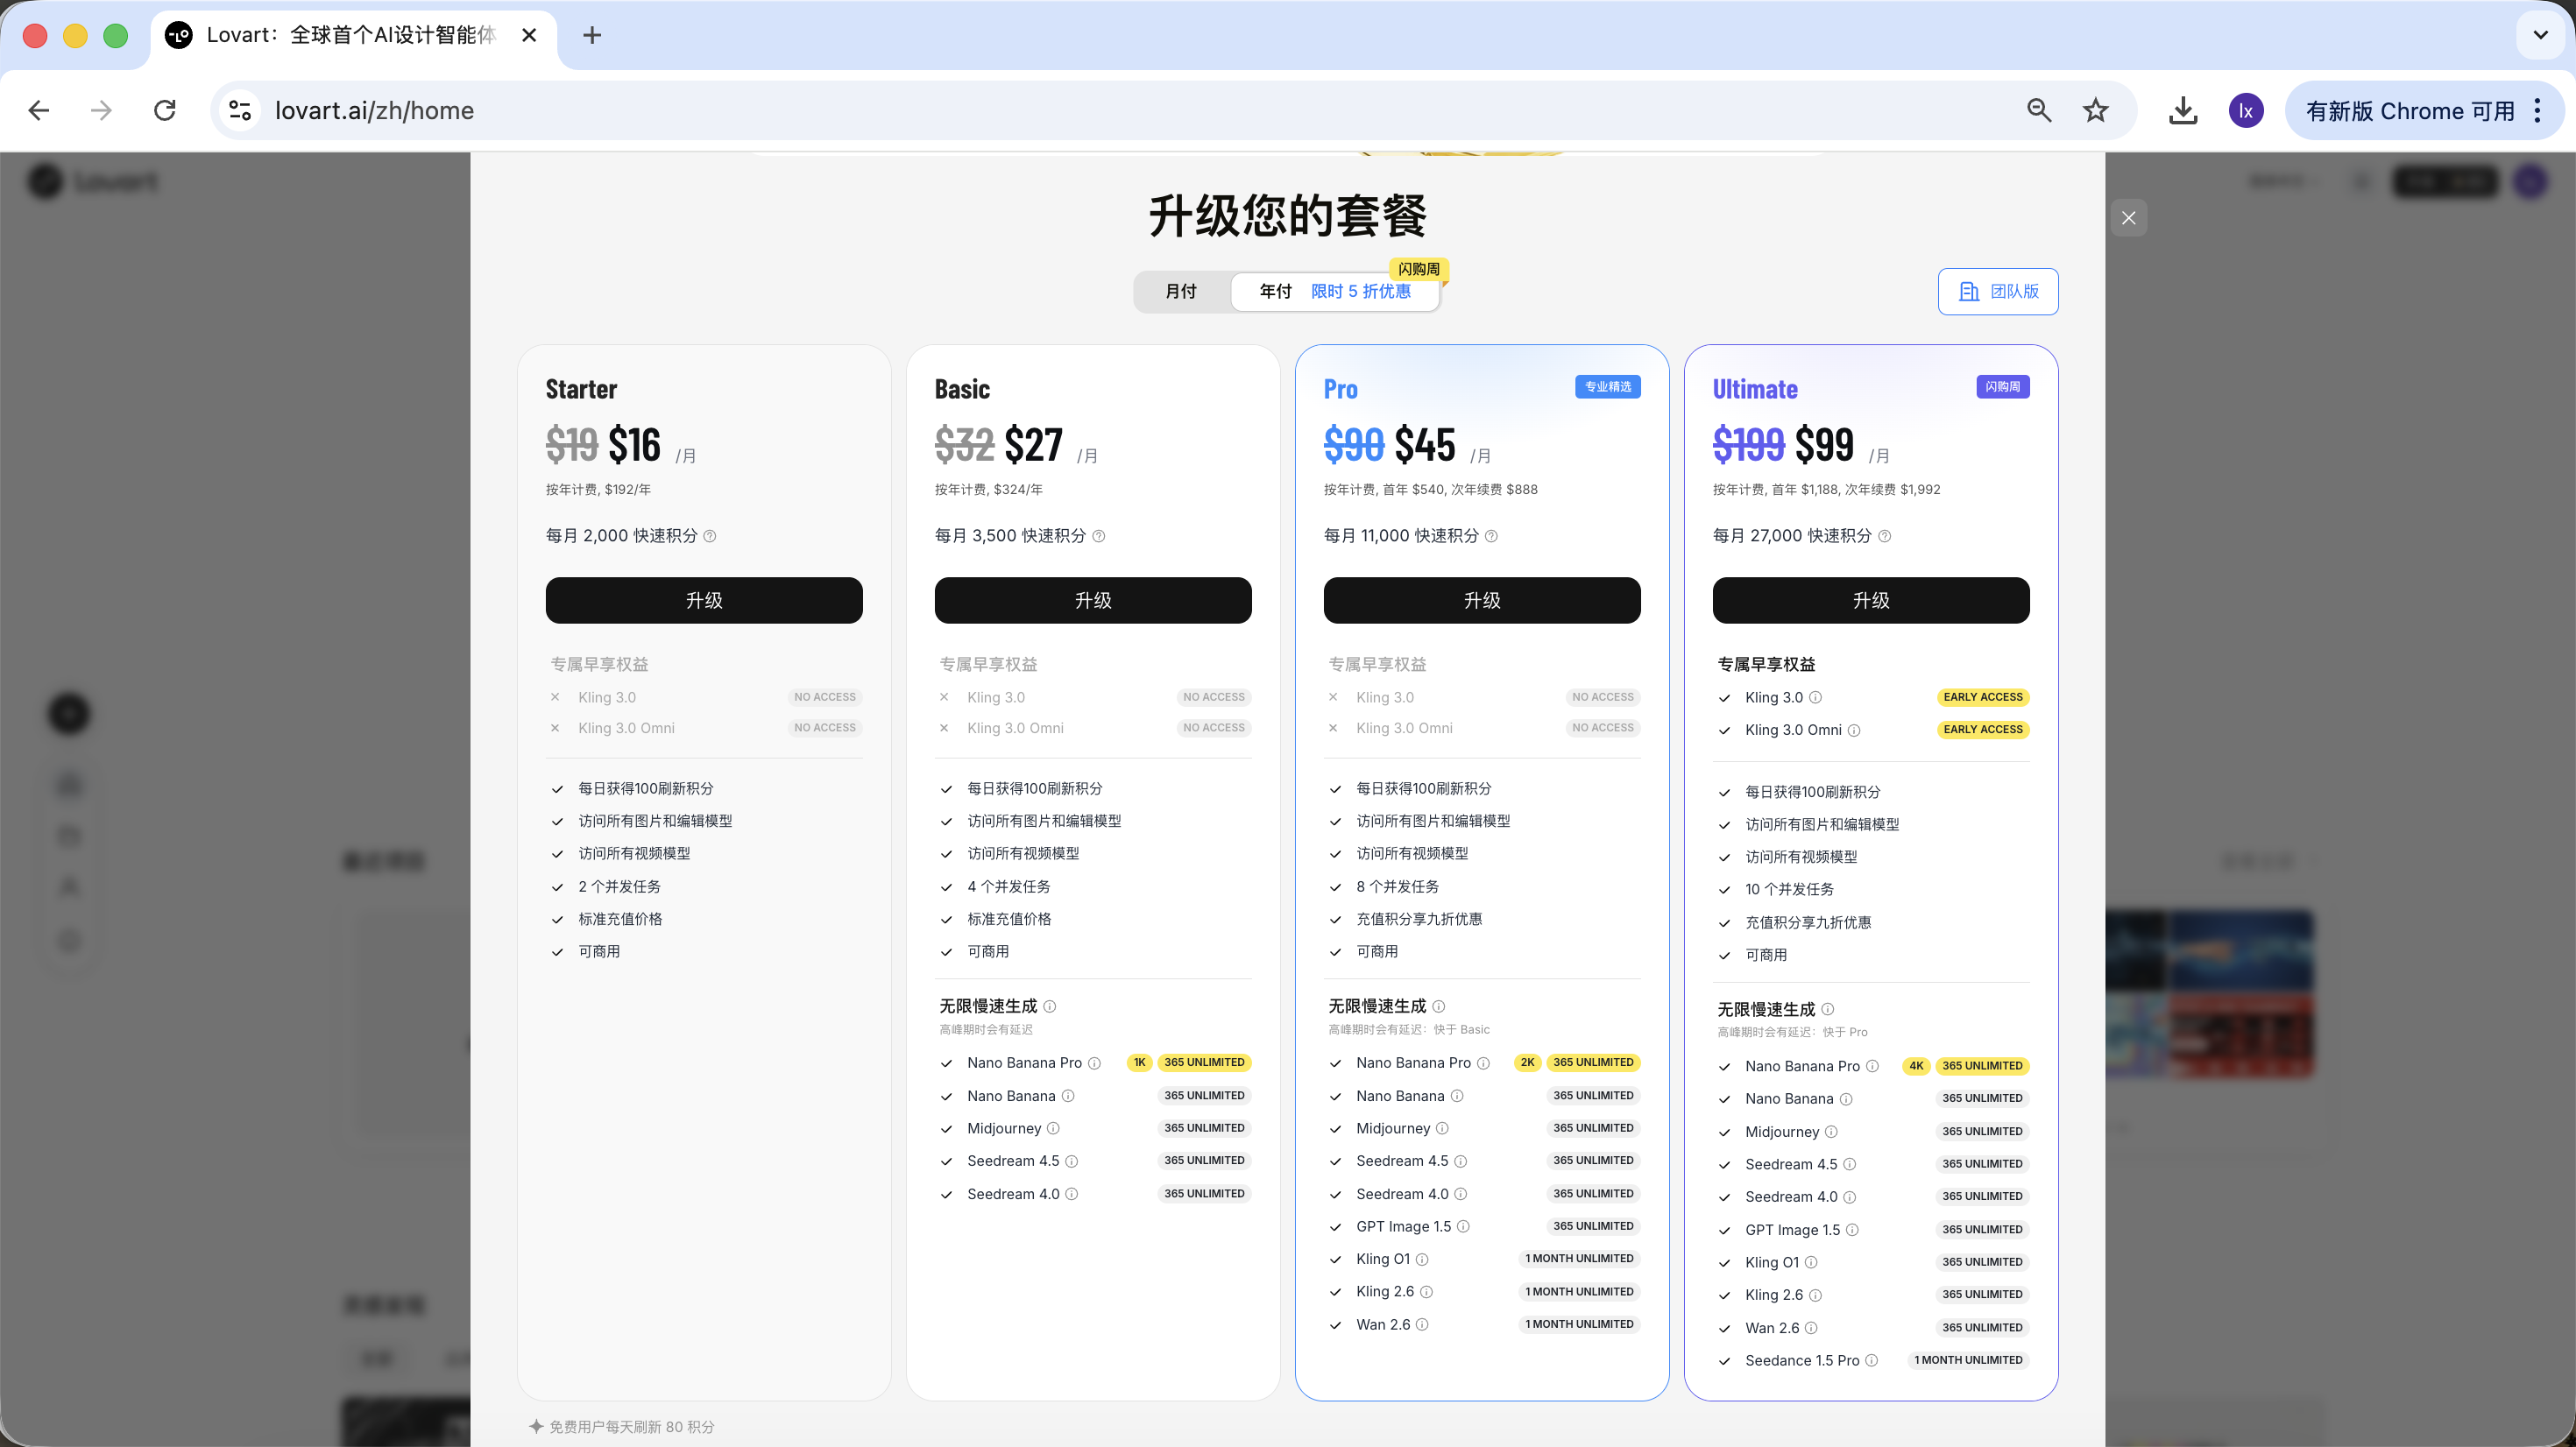
    Lovart subscription plans.

    Summary

    Lovart doesn't replace the underlying model — rather, through its Agent mechanism, it upgrades image generation from "single execution" to "continuous workflow."

    When tasks start involving planning, consistency, and delivery, the advantages of such tools become very apparent.

    Previous
    Sign in to track progress
    Next