Loading lesson…

Loading lesson…
Before we dive into design, style, or prompting, let's generate the first image with the fewest steps possible.
Before we discuss design styles and prompt engineering, let's address something even more important: confirming that you can actually generate an image.
Today's mainstream large models already possess image generation and editing capabilities. These models are commonly known as generative models.
To keep the process as simple as possible, this tutorial uses a model that already has stable image generation and editing capabilities — NanoBanana. It is an image generation model released by Google, officially named Gemini 3.1 Flash Image Preview, which supports generating images directly through natural language and also supports editing existing images.
In terms of capabilities, it is not fundamentally different from other models you may have heard of (such as GPT-4o, Claude, Qwen, Midjourney, etc.): you provide a description, and the model generates the result.
You can think of it as a "paintbrush." In this chapter, we only care about one thing: 👉 Whether this paintbrush can make its first stroke in your hands.
In practice, NanoBanana can be used directly through official platforms like Google AI Studio, or integrated into development workflows via API. This tutorial uses the API approach. The NanoBanana 2 model has also been released, and you can try using the latest large model.
Before you start, you only need to complete these three steps:
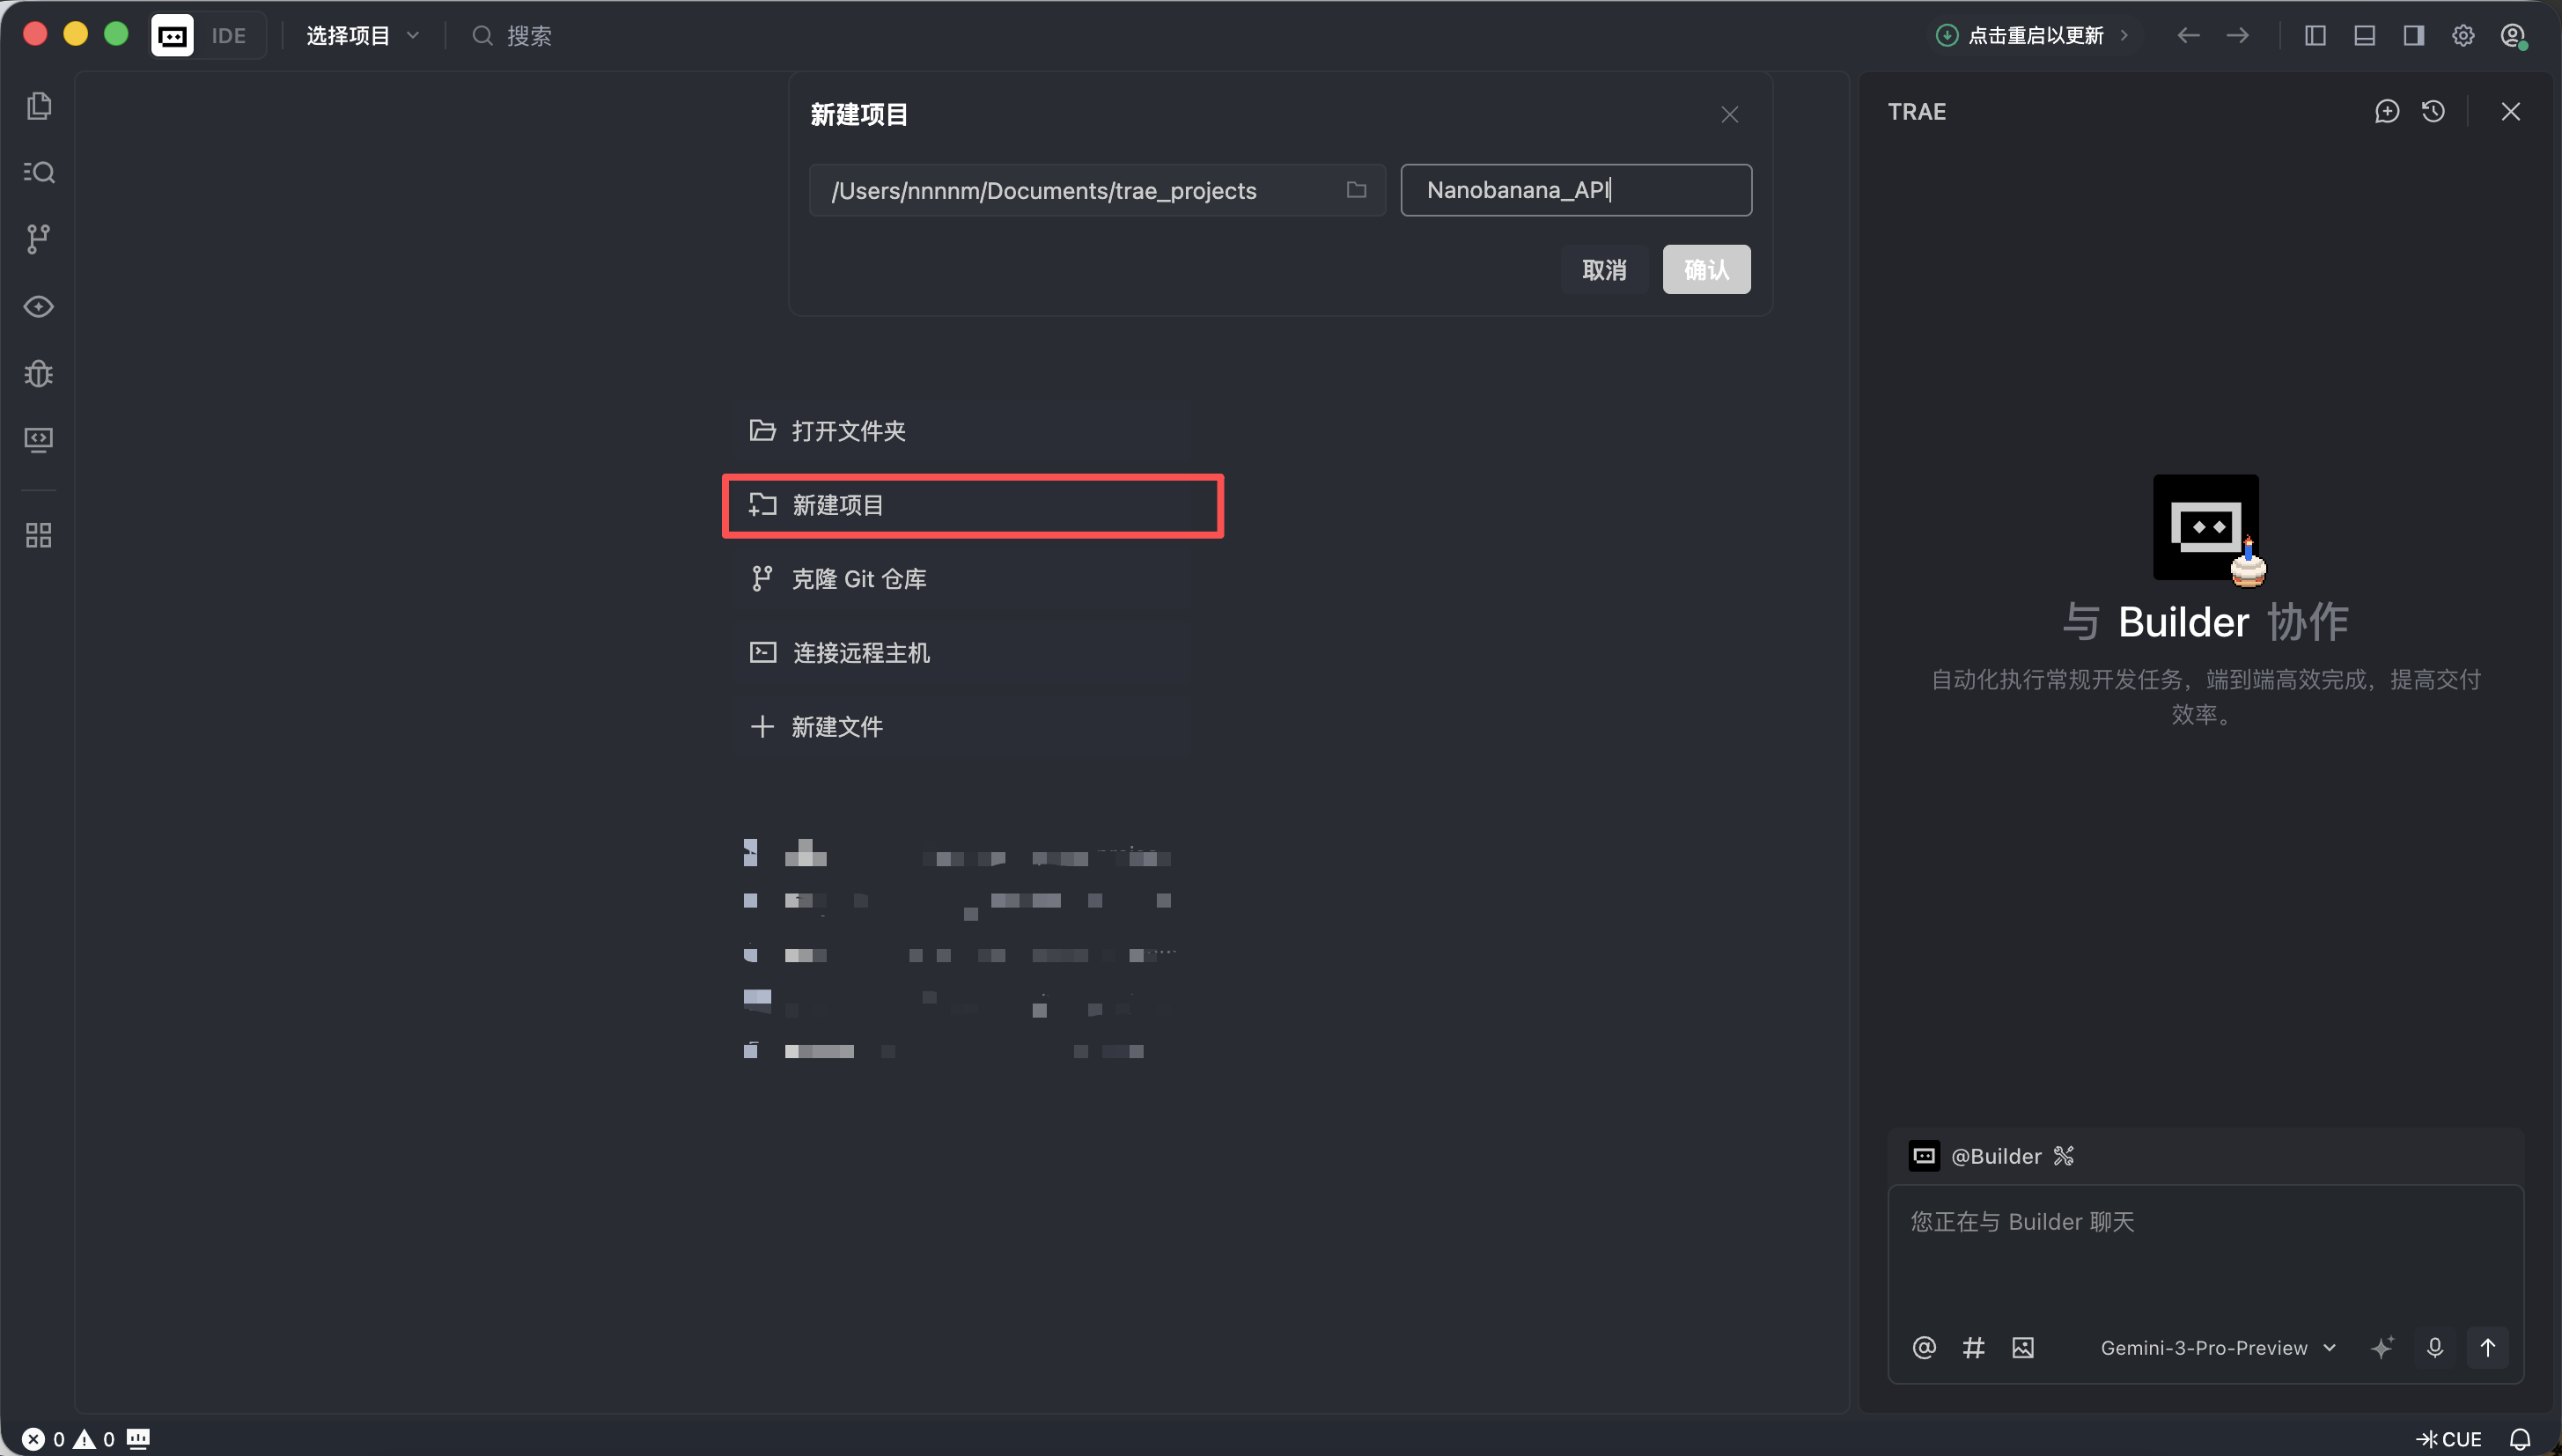
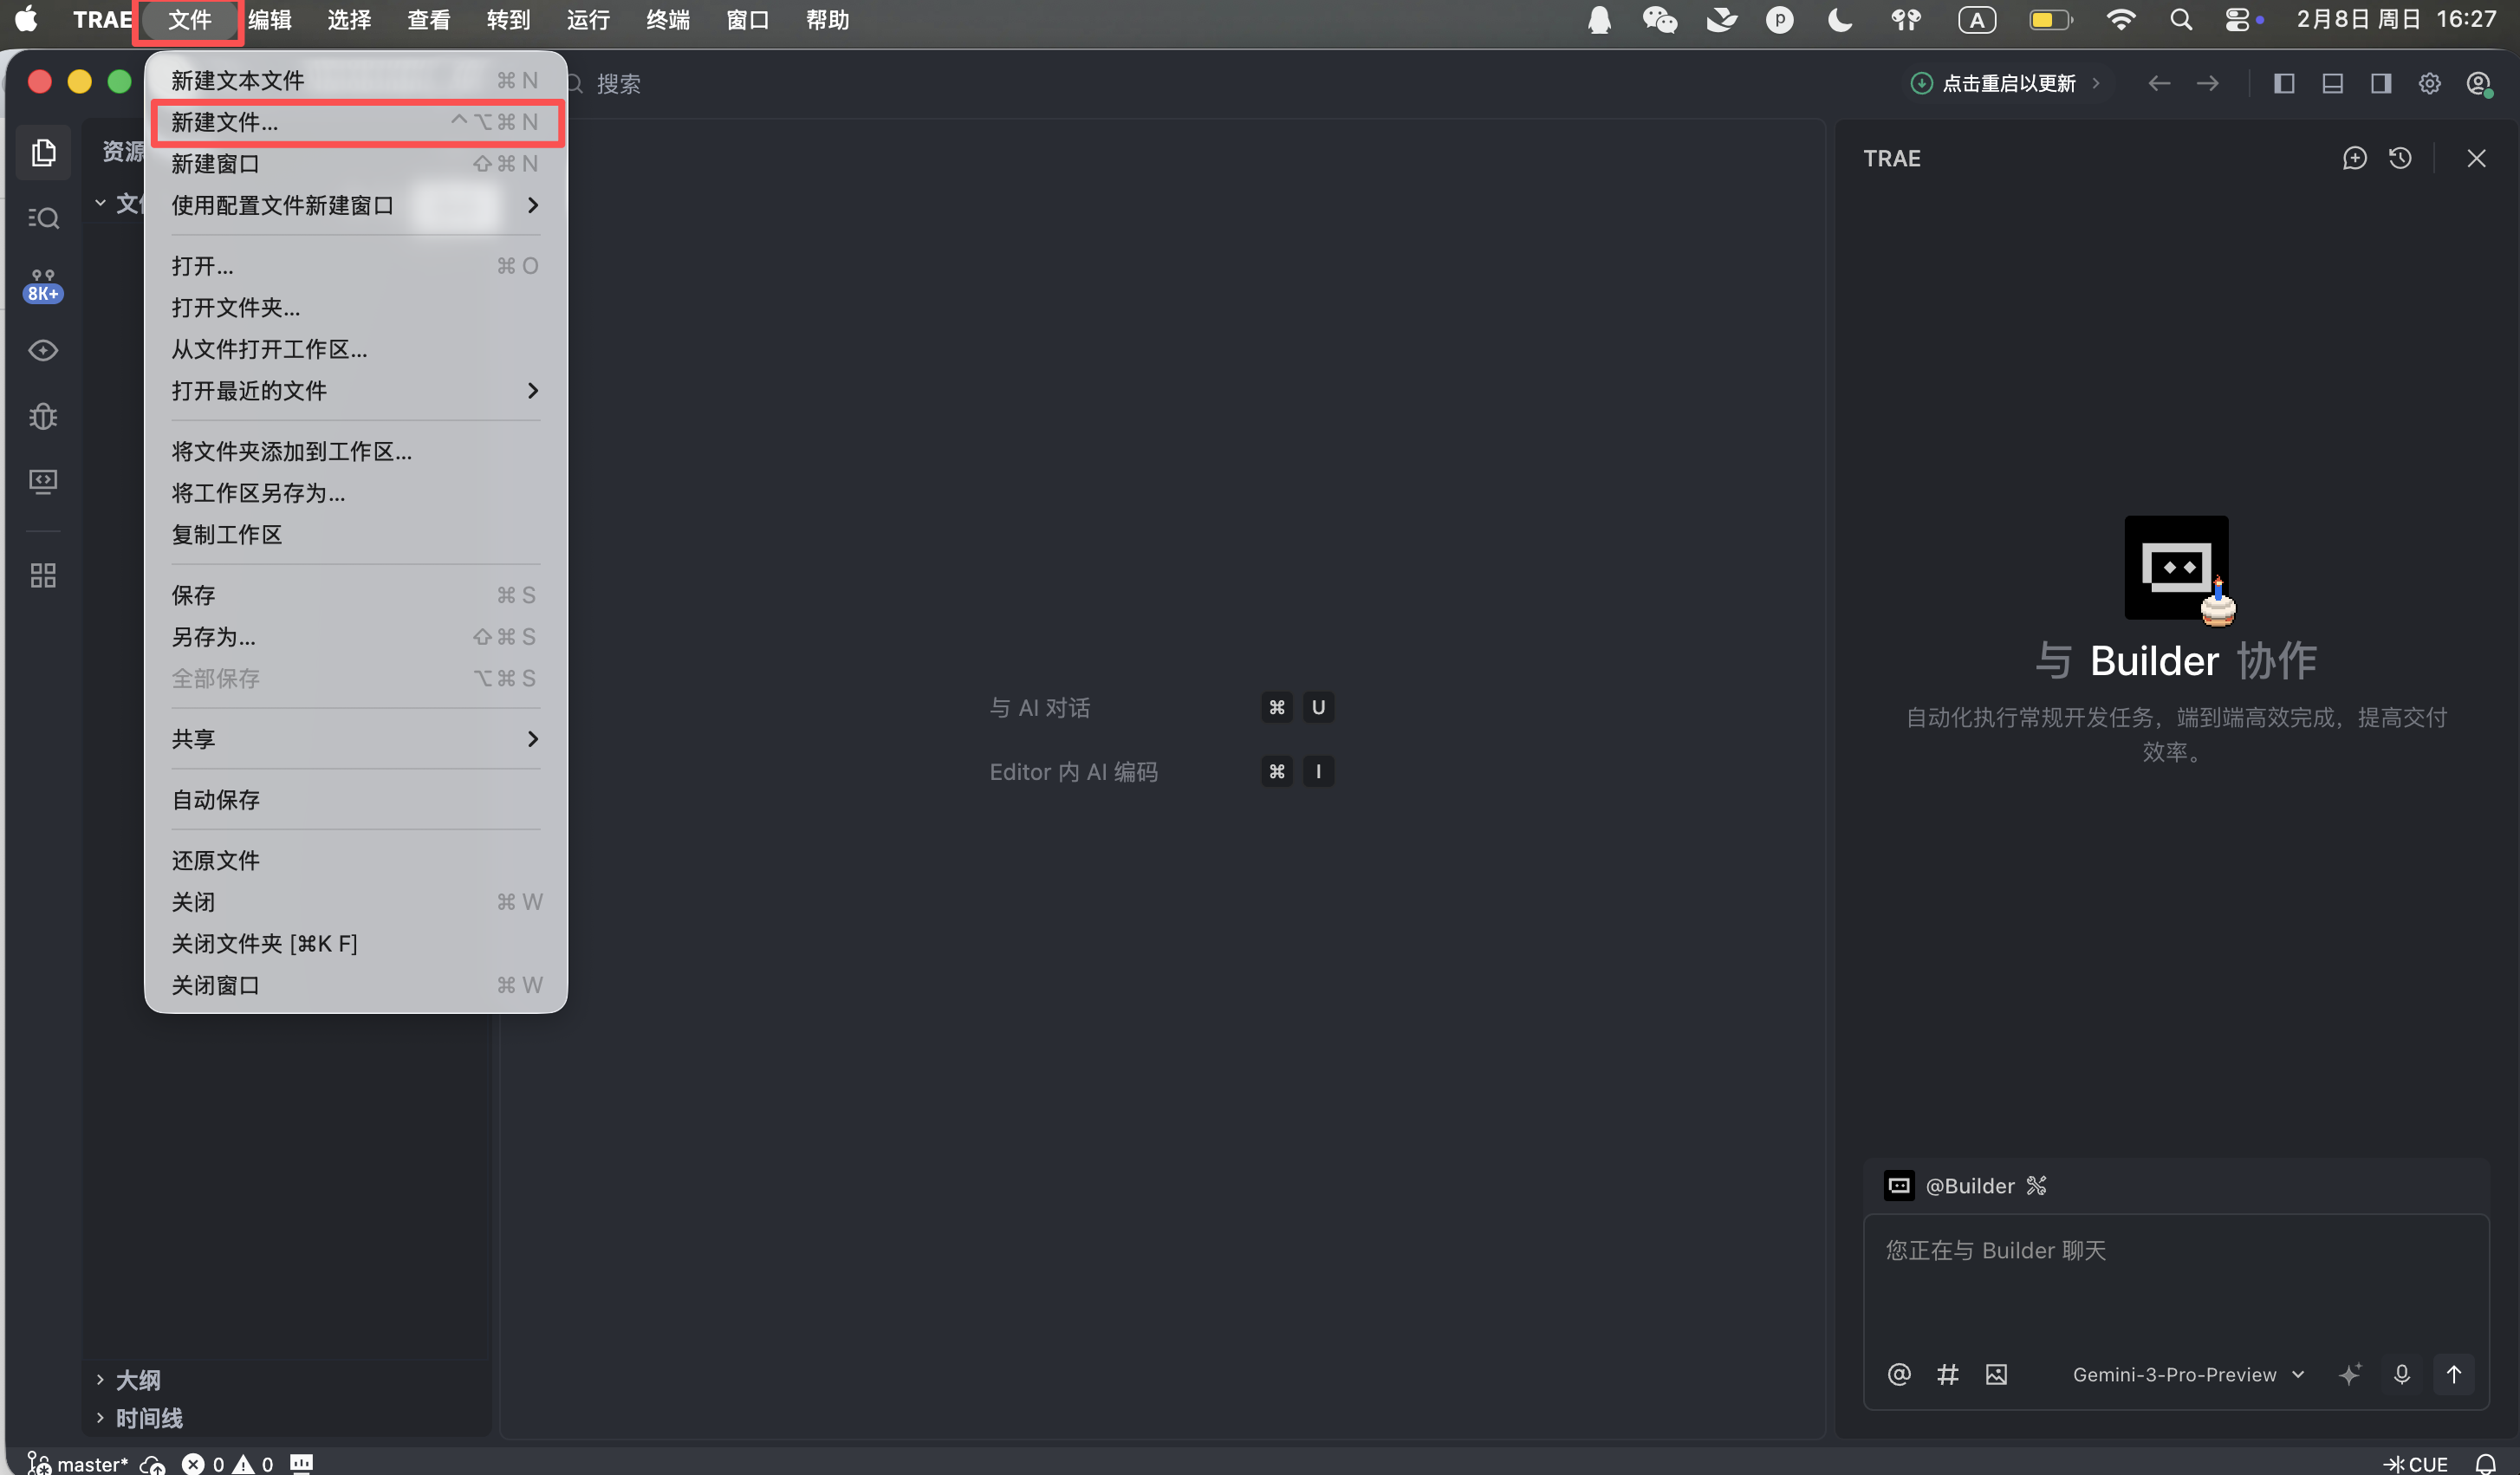
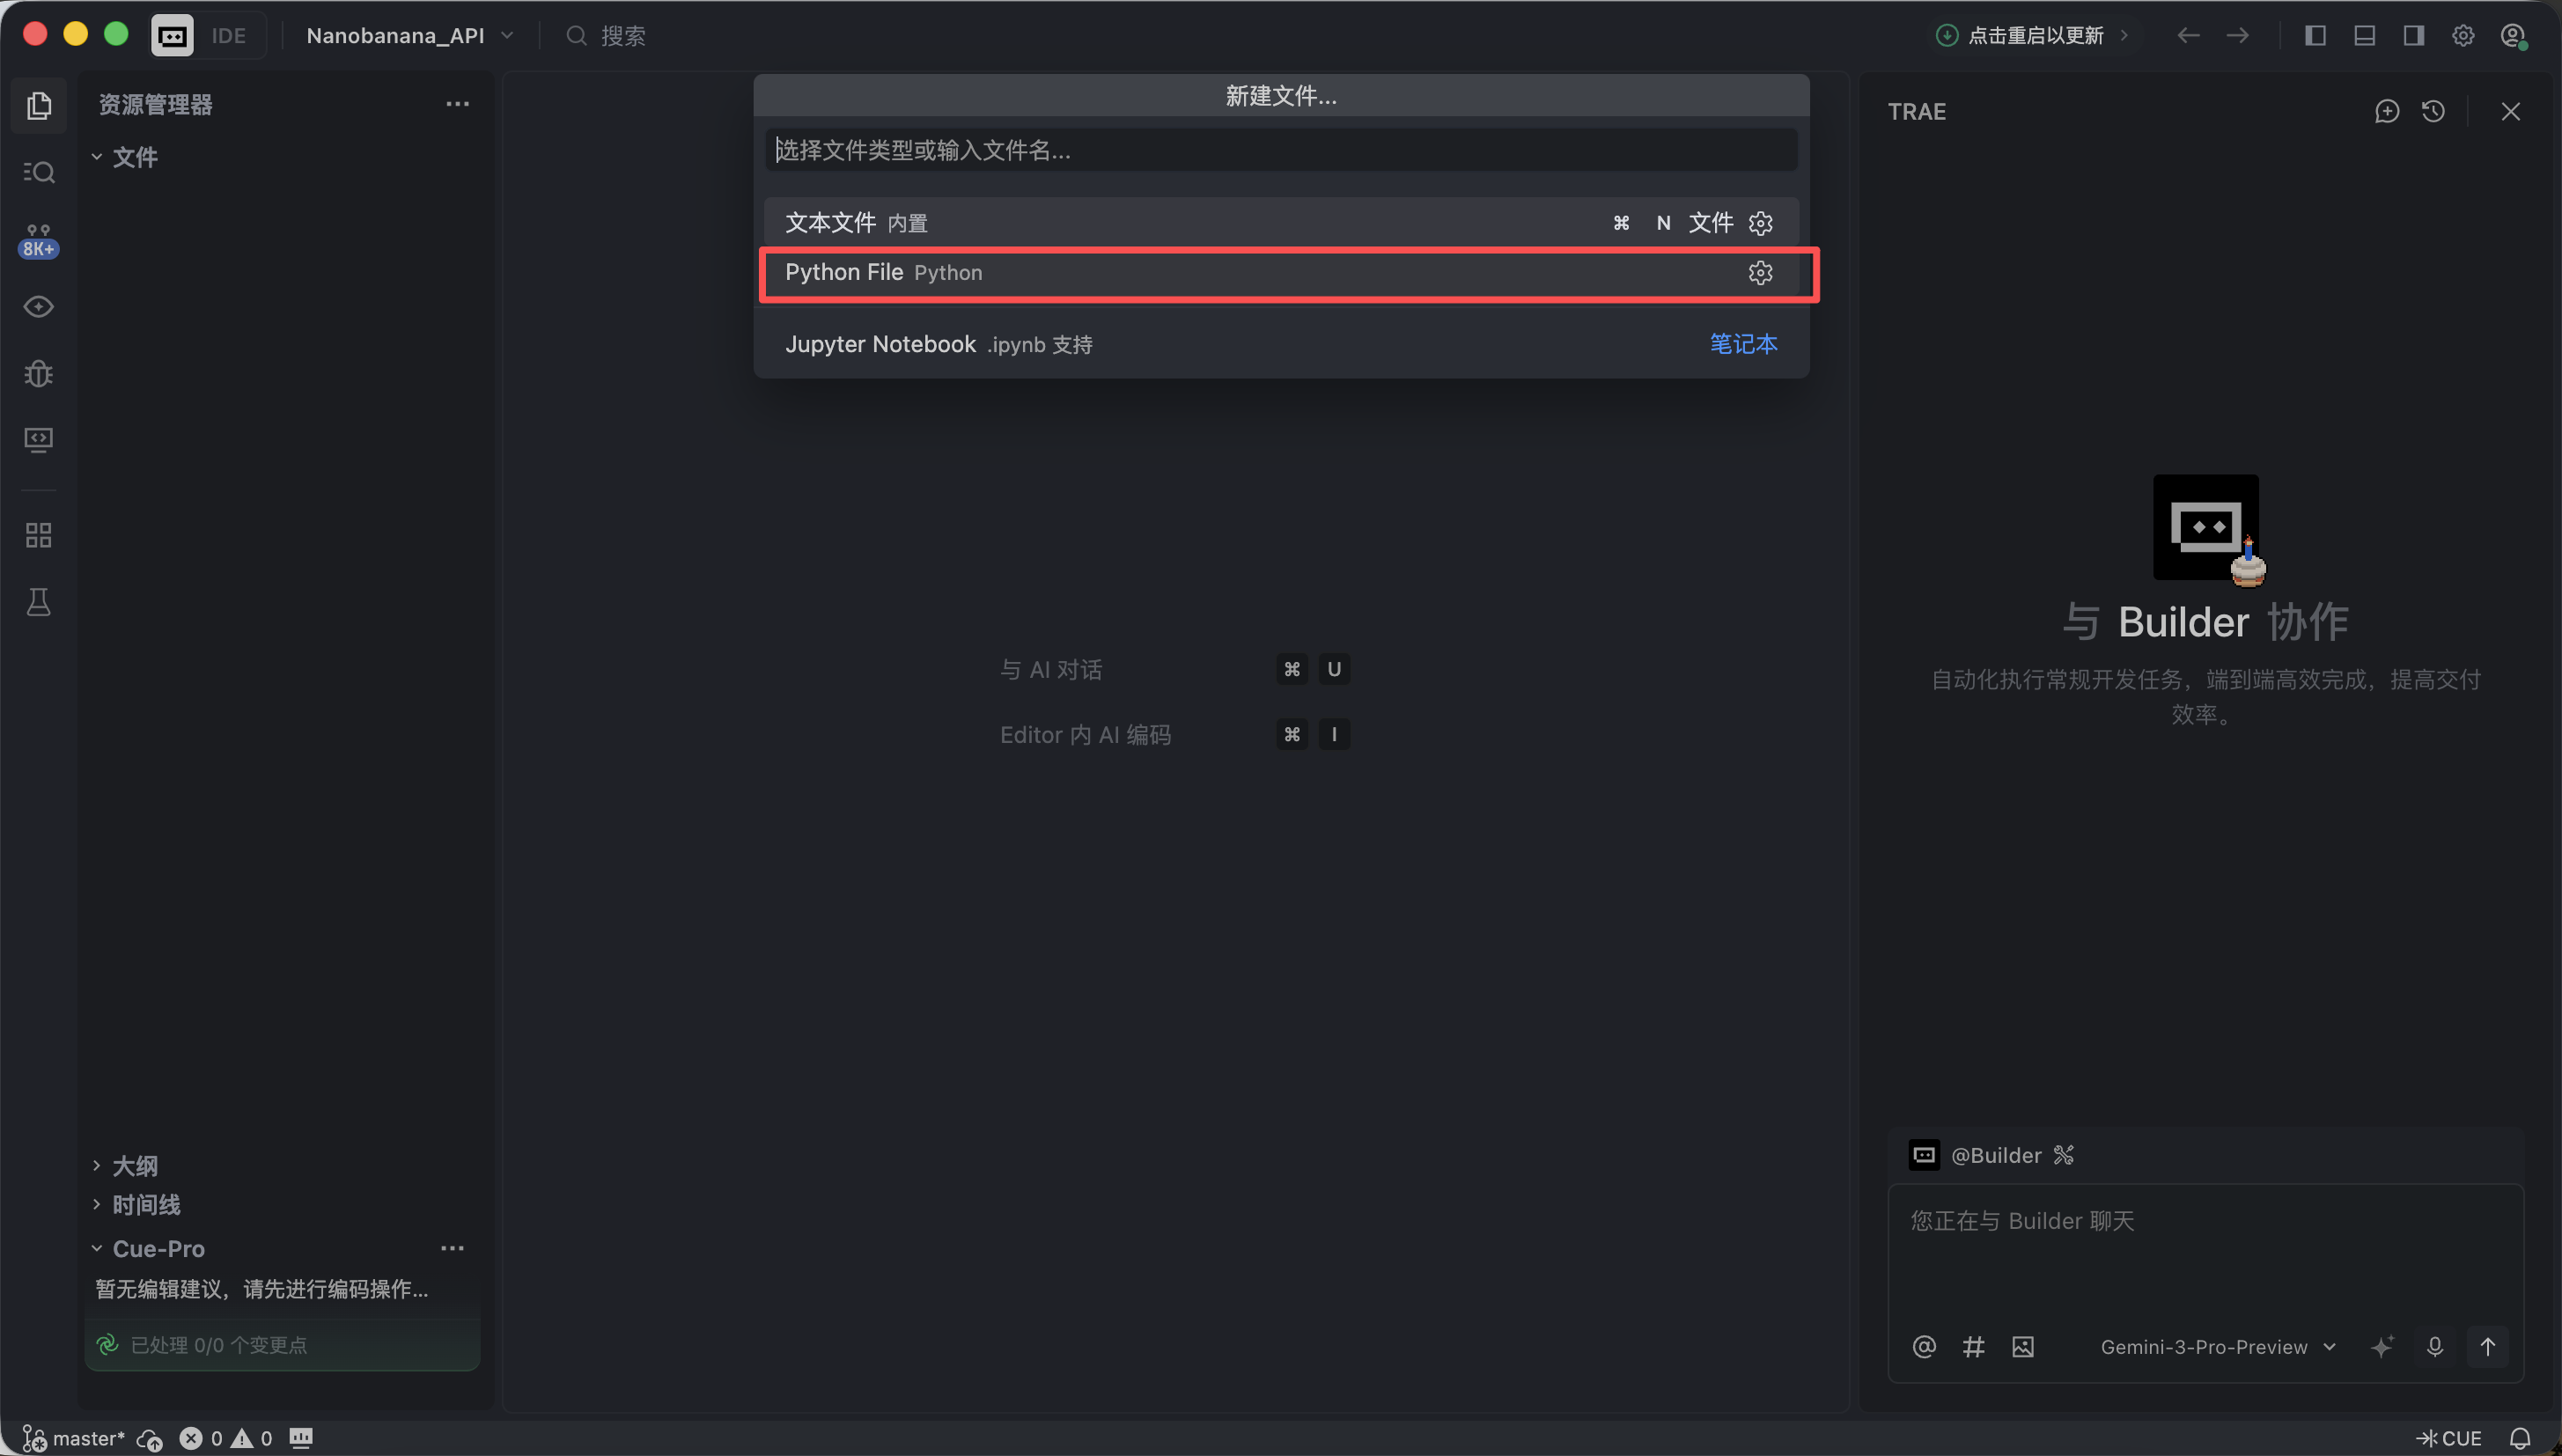
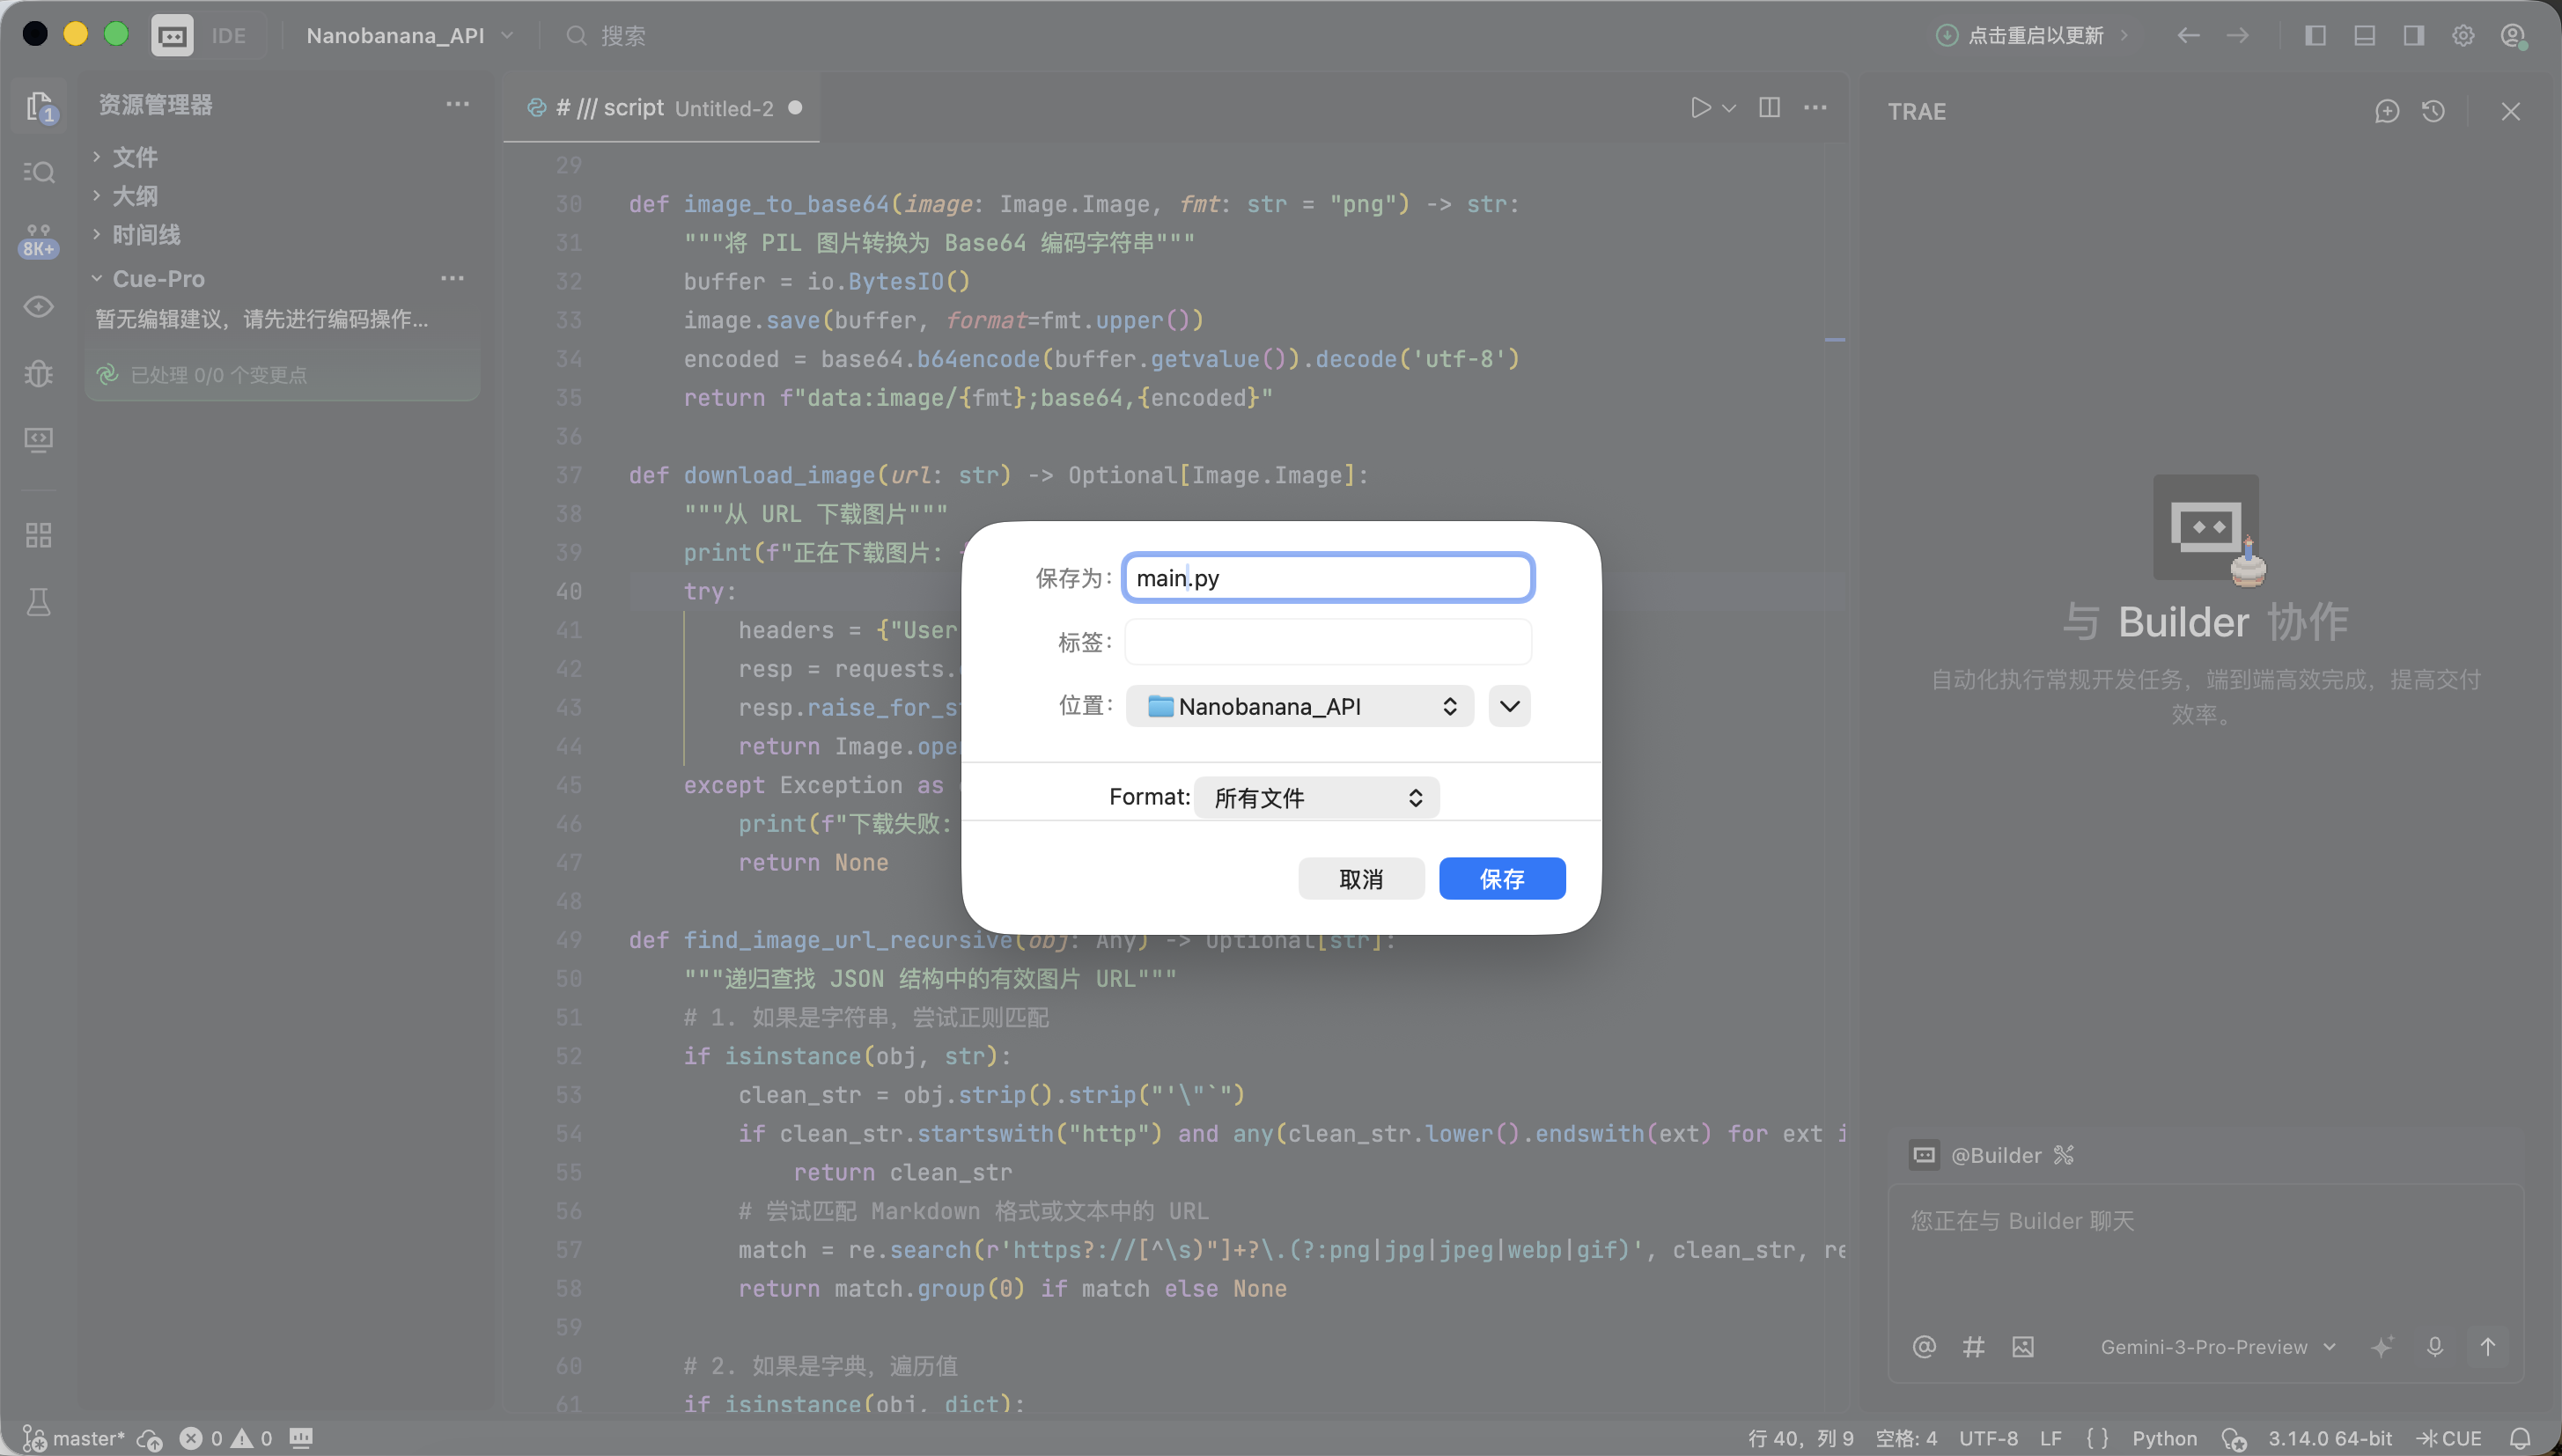
Trae will automatically handle the required environment setup and dependency installation — no additional configuration needed.
The code uses NanoBanana's API Key. We won't go into the application process here — as long as you can obtain and fill in the corresponding parameters, you're good. At this stage, we don't aim to understand every line of code, just that it runs successfully.
# /// script
# dependencies = [
# "gradio>=4.0.0",
# "pillow>=10.0.0",
# "requests>=2.31.0",
# ]
# ///
import gradio as gr
import requests
import base64
from PIL import Image
import io
import os
import time
import re
from typing import Optional, Dict, Any, List
# Configure API information
NANOBANANA_API_URL: str = "YOUR API URL"
NANOBANANA_API_KEY: str = "YOUR API KEY"
OUTPUT_DIR: str = "outputs"
# Ensure output directory exists
os.makedirs(OUTPUT_DIR, exist_ok=True)
def image_to_base64_data_uri(image: Image.Image) -> str:
"""
Convert a PIL image to an OpenAI API compatible data URI format.
"""
buffer = io.BytesIO()
# Convert to PNG for compatibility
image.save(buffer, format="PNG")
encoded = base64.b64encode(buffer.getvalue()).decode('utf-8')
return f"data:image/png;base64,{encoded}"
def base64_to_image(base64_str: str) -> Optional[Image.Image]:
"""
Convert a pure base64 string to a PIL Image.
"""
try:
image_bytes = base64.b64decode(base64_str)
return Image.open(io.BytesIO(image_bytes))
except Exception as e:
print(f"Base64 decoding failed: {e}")
return None
def extract_base64_from_response(content: Any) -> Optional[str]:
"""
Core parsing logic: Extract image Base64 data from API response content.
Compatible with both Markdown format and structured list format.
"""
if not content:
return None
base64_data = None
# 1. Try structured extraction (List)
# Corresponding response format: [{"type": "image_url", "image_url": {"url": "data:..."}}]
if isinstance(content, list):
for part in reversed(content): # Search in reverse, latest images are usually at the end
if isinstance(part, dict):
# Check image_url or output_image field
img_field = part.get("image_url") or part.get("image") or part.get("output_image")
if isinstance(img_field, dict):
url = img_field.get("url", "")
if url.startswith("data:image/") and "," in url:
return url.split(",", 1)[1].strip()
# If no structured images in list, try concatenating text from list items to find Markdown
text_parts = [
str(p.get("text", ""))
for p in content
if isinstance(p, dict) and p.get("type") in ["text", "input_text"]
]
content_str = "".join(text_parts)
else:
content_str = str(content)
# 2. Try Markdown regex extraction (String)
# Corresponding response format: "Here is your image: "
pattern = re.compile(r"!\[.*?\]\((data:image/[^;]+;base64,[^)]+)\)", re.IGNORECASE)
match = pattern.search(content_str)
if match:
data_url = match.group(1)
if "," in data_url:
return data_url.split(",", 1)[1].strip()
return None
def synthesize(prompt: str, input_image: Optional[Image.Image]) -> Optional[Image.Image]:
"""
Call the Nanobanana API for generation.
"""
if not prompt or not prompt.strip():
gr.Warning("Please enter a prompt")
return None
print(f">>> Starting task: {prompt[:50]}...")
headers = {
"Content-Type": "application/json",
"Authorization": f"Bearer {NANOBANANA_API_KEY}"
}
# Build payload conforming to OpenAI Vision / Chat standard
messages = []
if input_image is not None:
# Image-to-image / multimodal input mode
print(">>> Input image detected, using multimodal mode")
img_base64 = image_to_base64_data_uri(input_image)
messages.append({
"role": "user",
"content": [
{"type": "text", "text": prompt},
{"type": "image_url", "image_url": {"url": img_base64}}
]
})
else:
# Text-to-image mode
messages.append({
"role": "user",
"content": prompt
})
payload = {
"messages": messages,
# Use the model verified in the first code section
"model": "gemini-2.5-flash-image",
# Optional parameters, depending on API support
"stream": False
}
try:
# Increase timeout, image generation is usually slower
response = requests.post(NANOBANANA_API_URL, headers=headers, json=payload, timeout=120)
# Check HTTP status
if response.status_code != 200:
error_msg = f"API request failed: {response.status_code} - {response.text}"
print(error_msg)
gr.Error(error_msg)
return None
result = response.json()
# Debug: Print first part of response for debugging
print(f"API raw response (truncated): {str(result)[:200]}...")
# Extract Content
content = None
if "choices" in result and len(result["choices"]) > 0:
content = result["choices"][0].get("message", {}).get("content")
if not content:
gr.Warning("No content field in API response")
return None
# Use the previously verified logic to extract Base64
base64_str = extract_base64_from_response(content)
if base64_str:
output_image = base64_to_image(base64_str)
if output_image:
return output_image
# If no image was extracted, the model may have refused or only returned text
text_content = str(content) if not isinstance(content, list) else " ".join([str(x) for x in content])
gr.Info(f"No image generated, model returned text: {text_content[:100]}...")
return None
except requests.exceptions.Timeout:
gr.Error("Request timed out, please try again later")
return None
except Exception as e:
import traceback
traceback.print_exc()
gr.Error(f"An unknown error occurred: {str(e)}")
return None
# Gradio interface configuration
with gr.Blocks(title="Nanobanana Image Generator") as app:
gr.Markdown("# 🍌 Nanobanana Text/Image to Image")
gr.Markdown("Based on Gemini-2.5-Flash-Image model, supports text-to-image and image-to-image.")
with gr.Row():
with gr.Column():
prompt_input = gr.Textbox(
label="Prompt",
placeholder="e.g.: A cyberpunk cat holding a neon sign...",
lines=3
)
image_input = gr.Image(
label="Reference Image (optional, for image-to-image)",
type="pil",
height=300
)
submit_btn = gr.Button("Start Generation", variant="primary")
with gr.Column():
image_output = gr.Image(label="Generation Result", format="png")
submit_btn.click(
fn=synthesize,
inputs=[prompt_input, image_input],
outputs=image_output
)
if __name__ == "__main__":
app.launch(share=True)
When Trae indicates a successful run, click the local link it provides (usually http://127.0.0.1:7860).
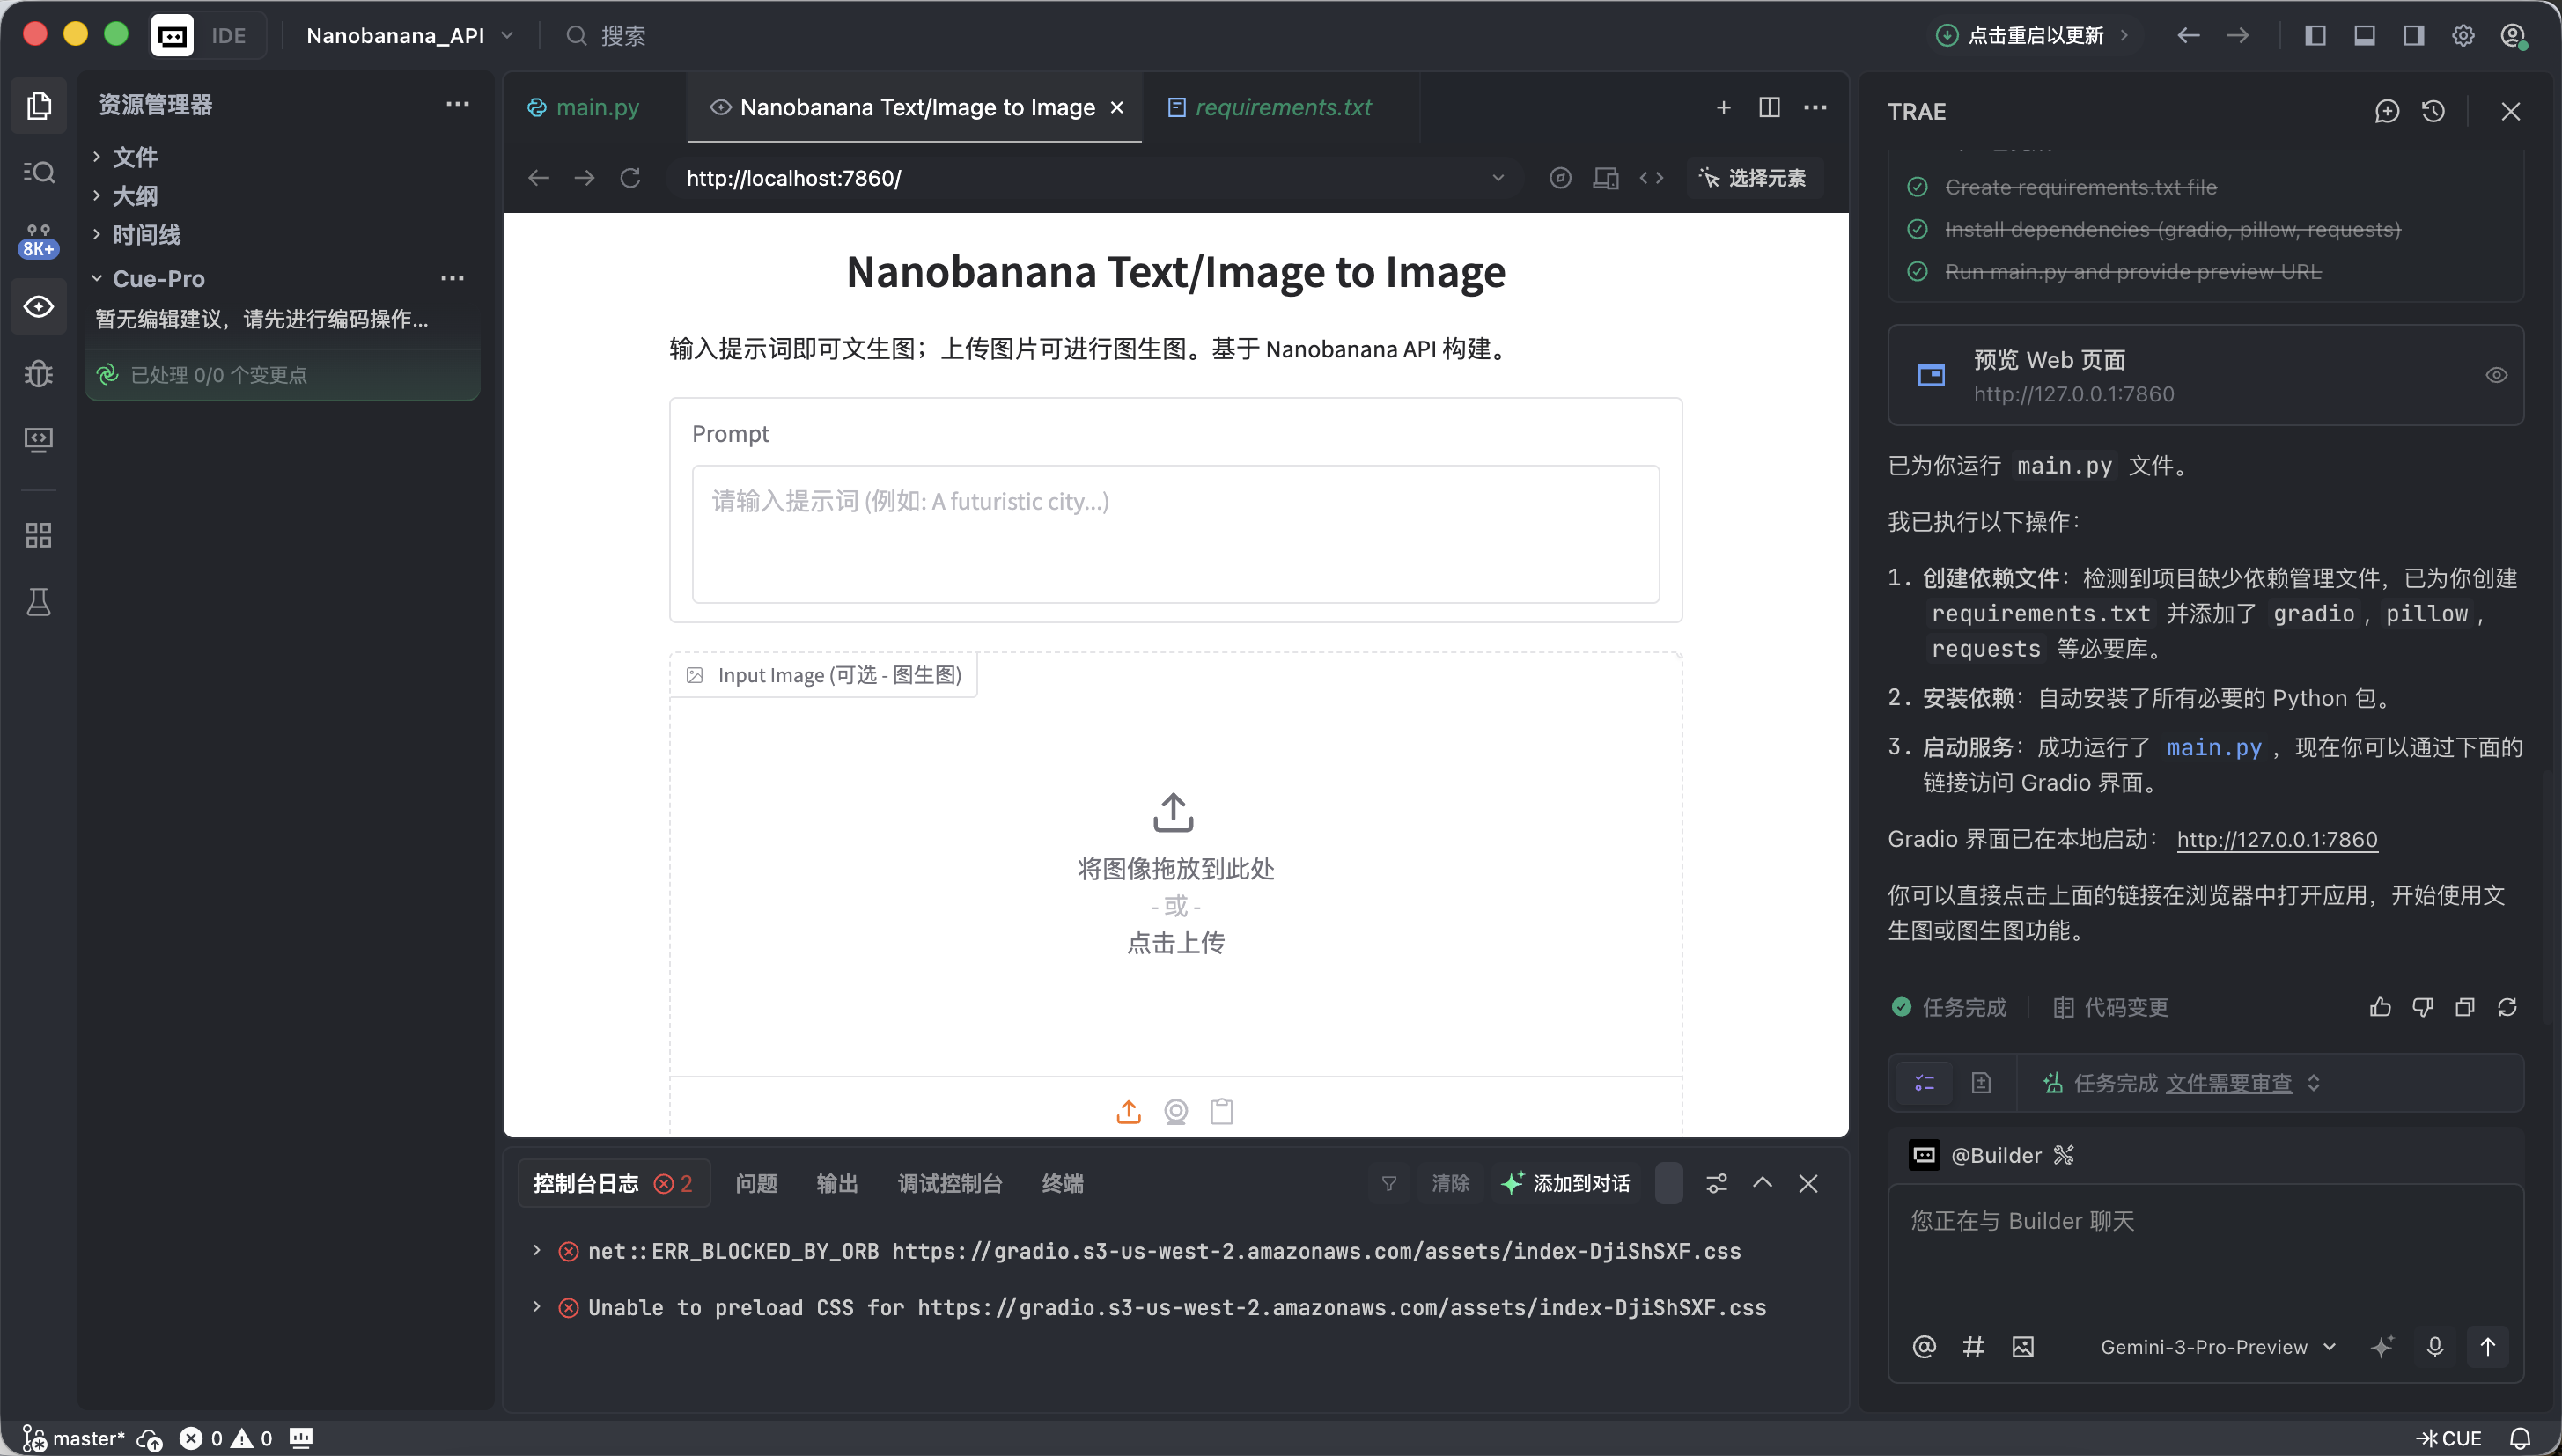
If everything is working correctly, you'll see a functional AI drawing interface.
This interface may look simple, but it already has the two most core capabilities of commercial-grade drawing tools: text-to-image and image-to-image.
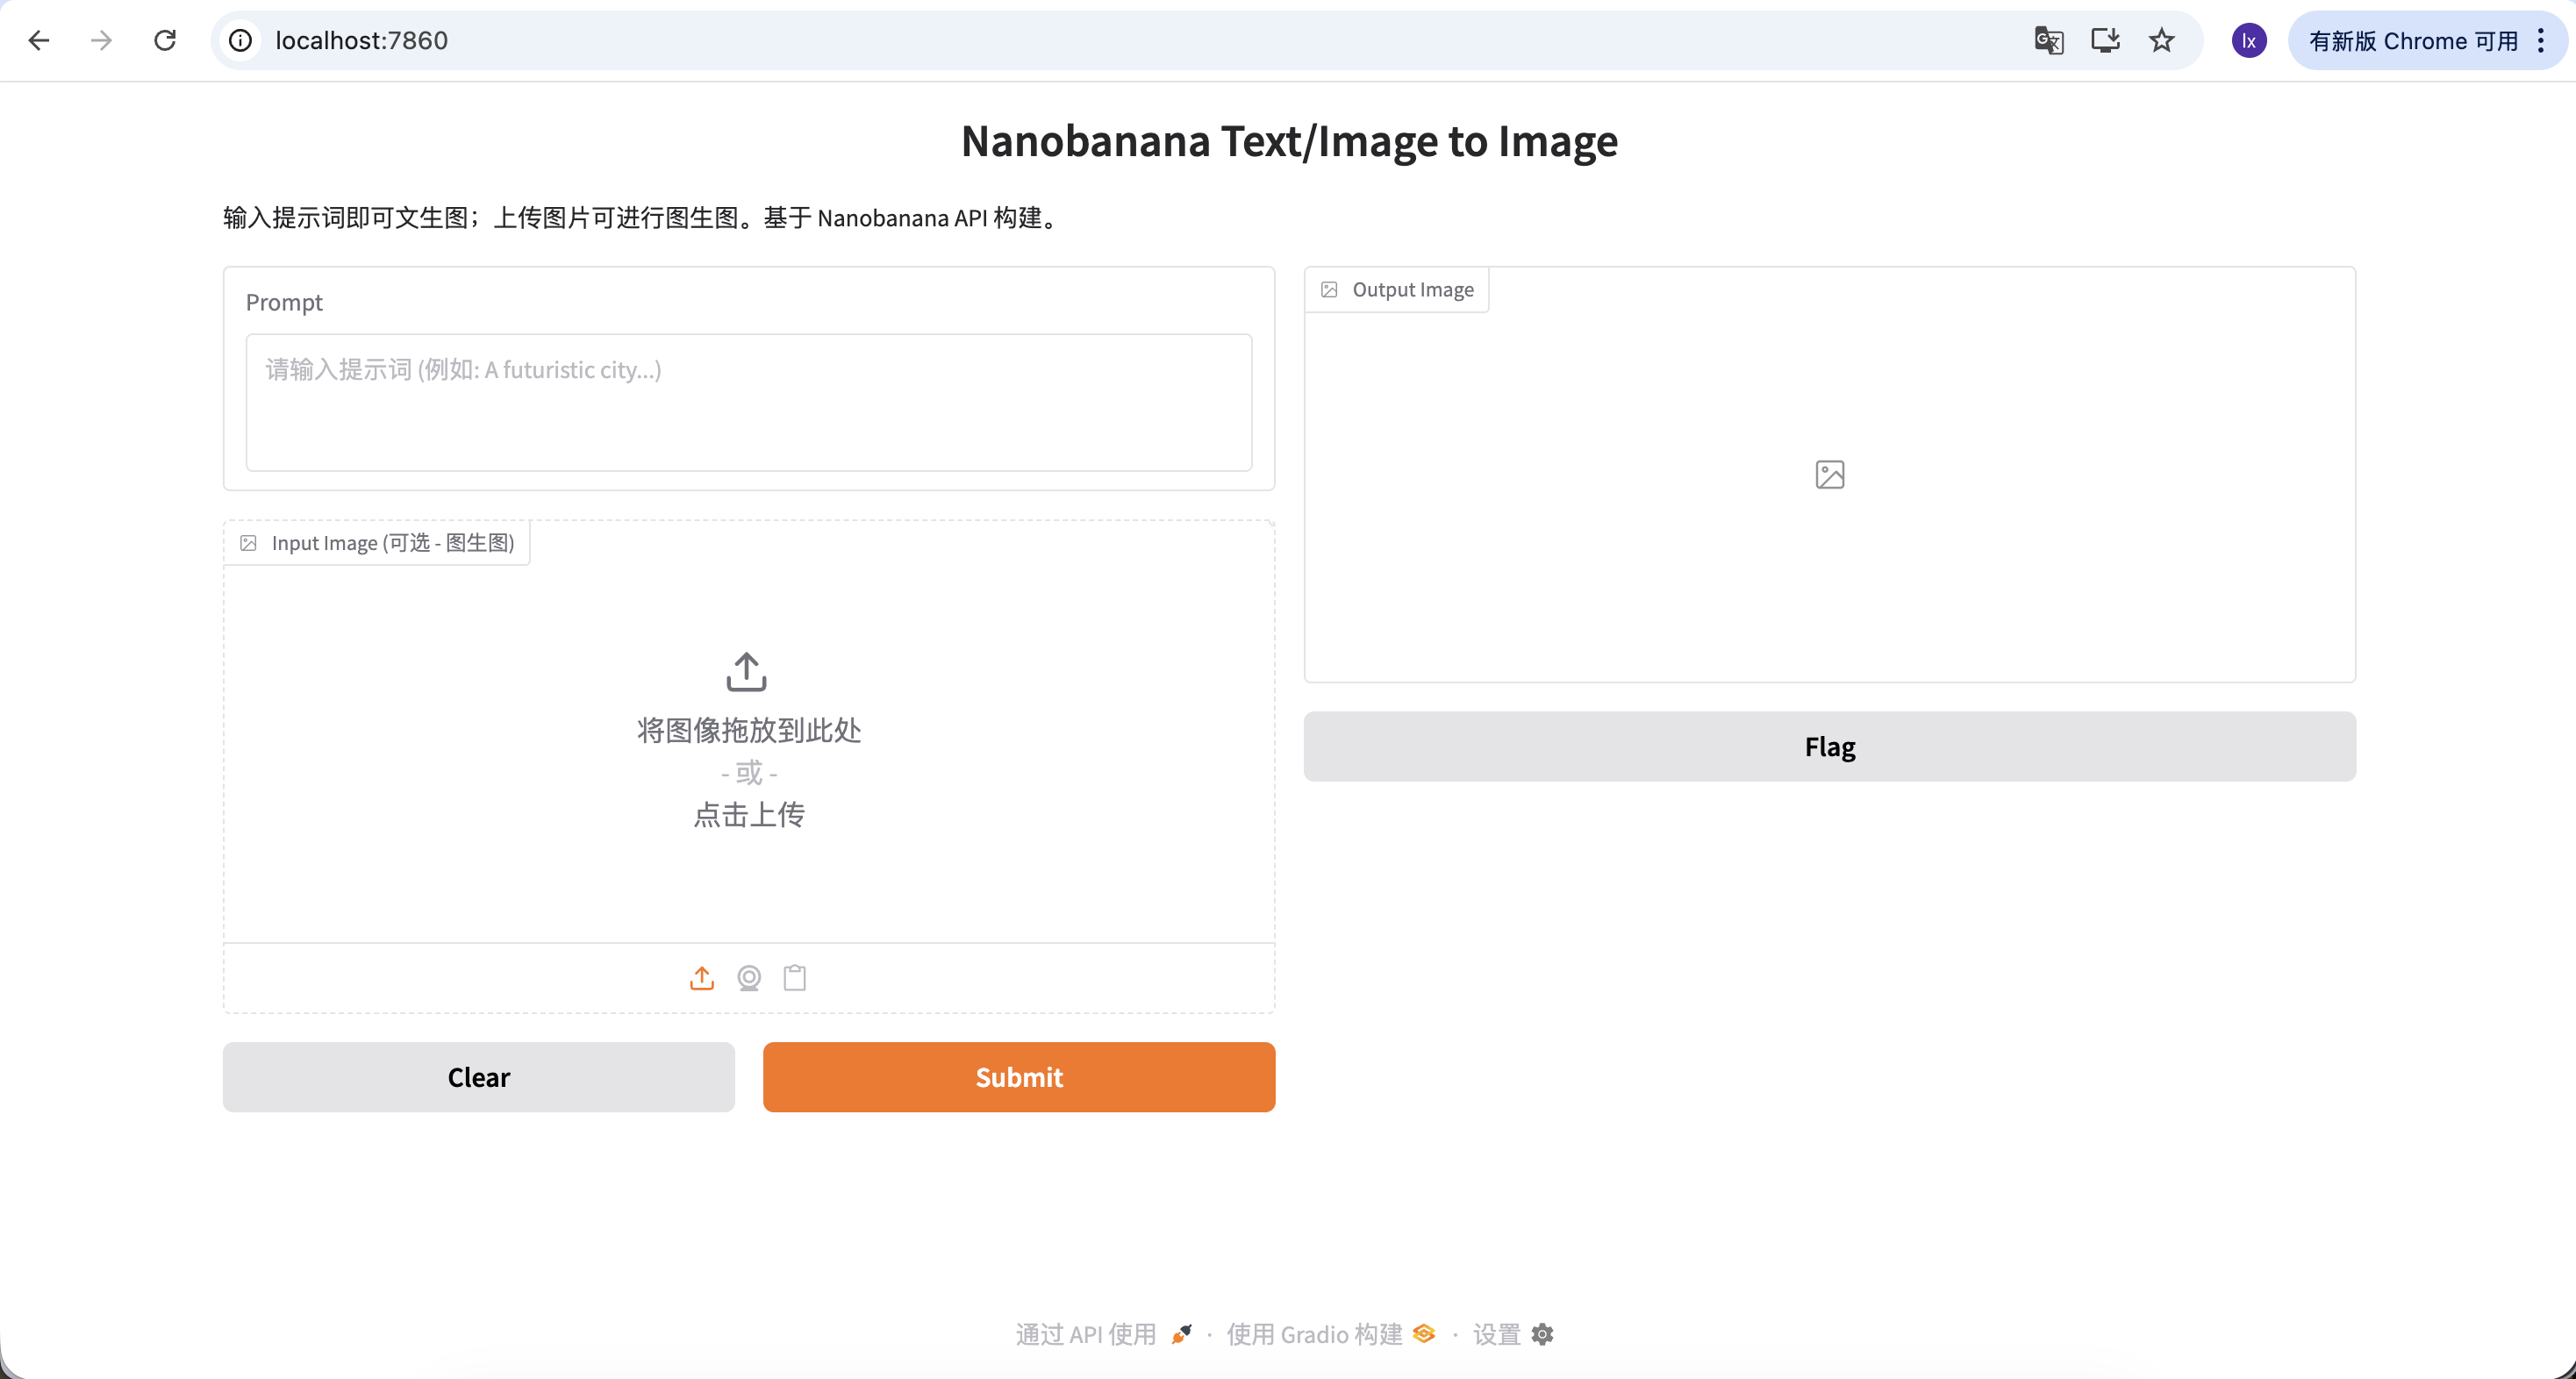
Now we can try generating your first image!
The prompt used in this example is:
A red apple
This is a deliberately simplified example that doesn't include any style or parameter descriptions.
After running the code, the process can be summarized in three steps:
After a few seconds, you'll see the generated result locally. Since model generation is random, the same prompt will produce different results. You can generate multiple times and choose your favorite image.
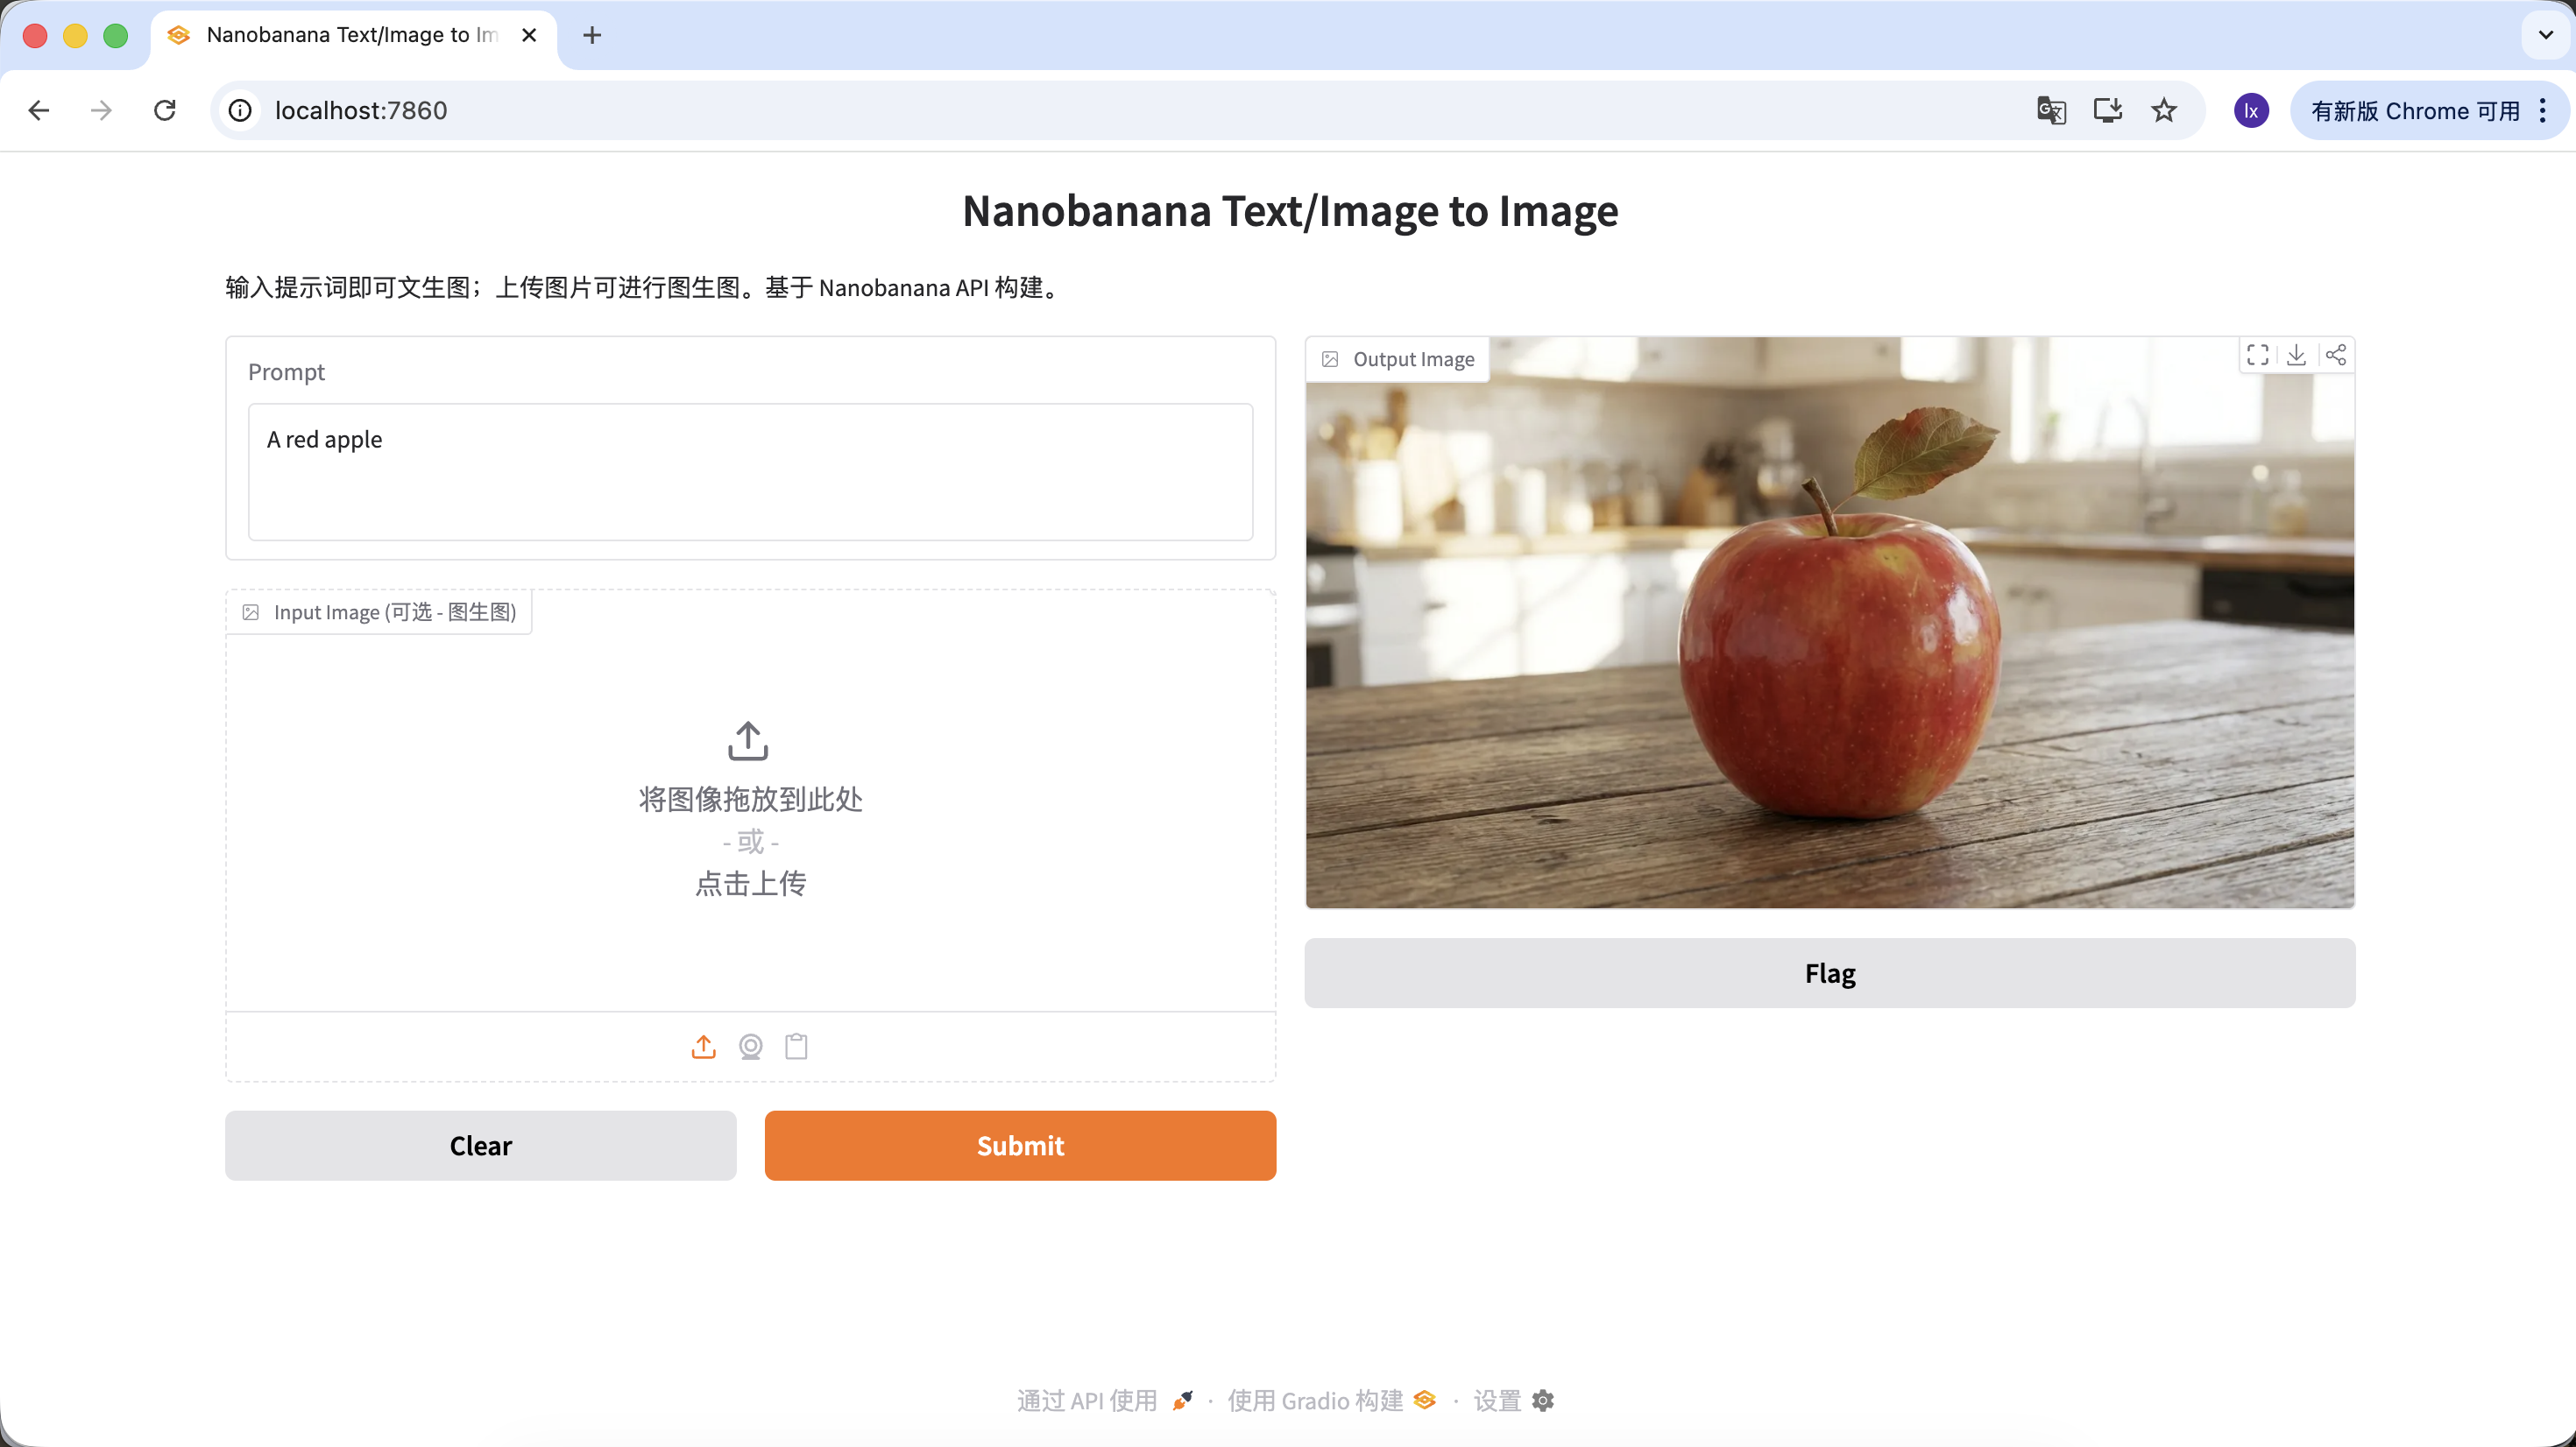
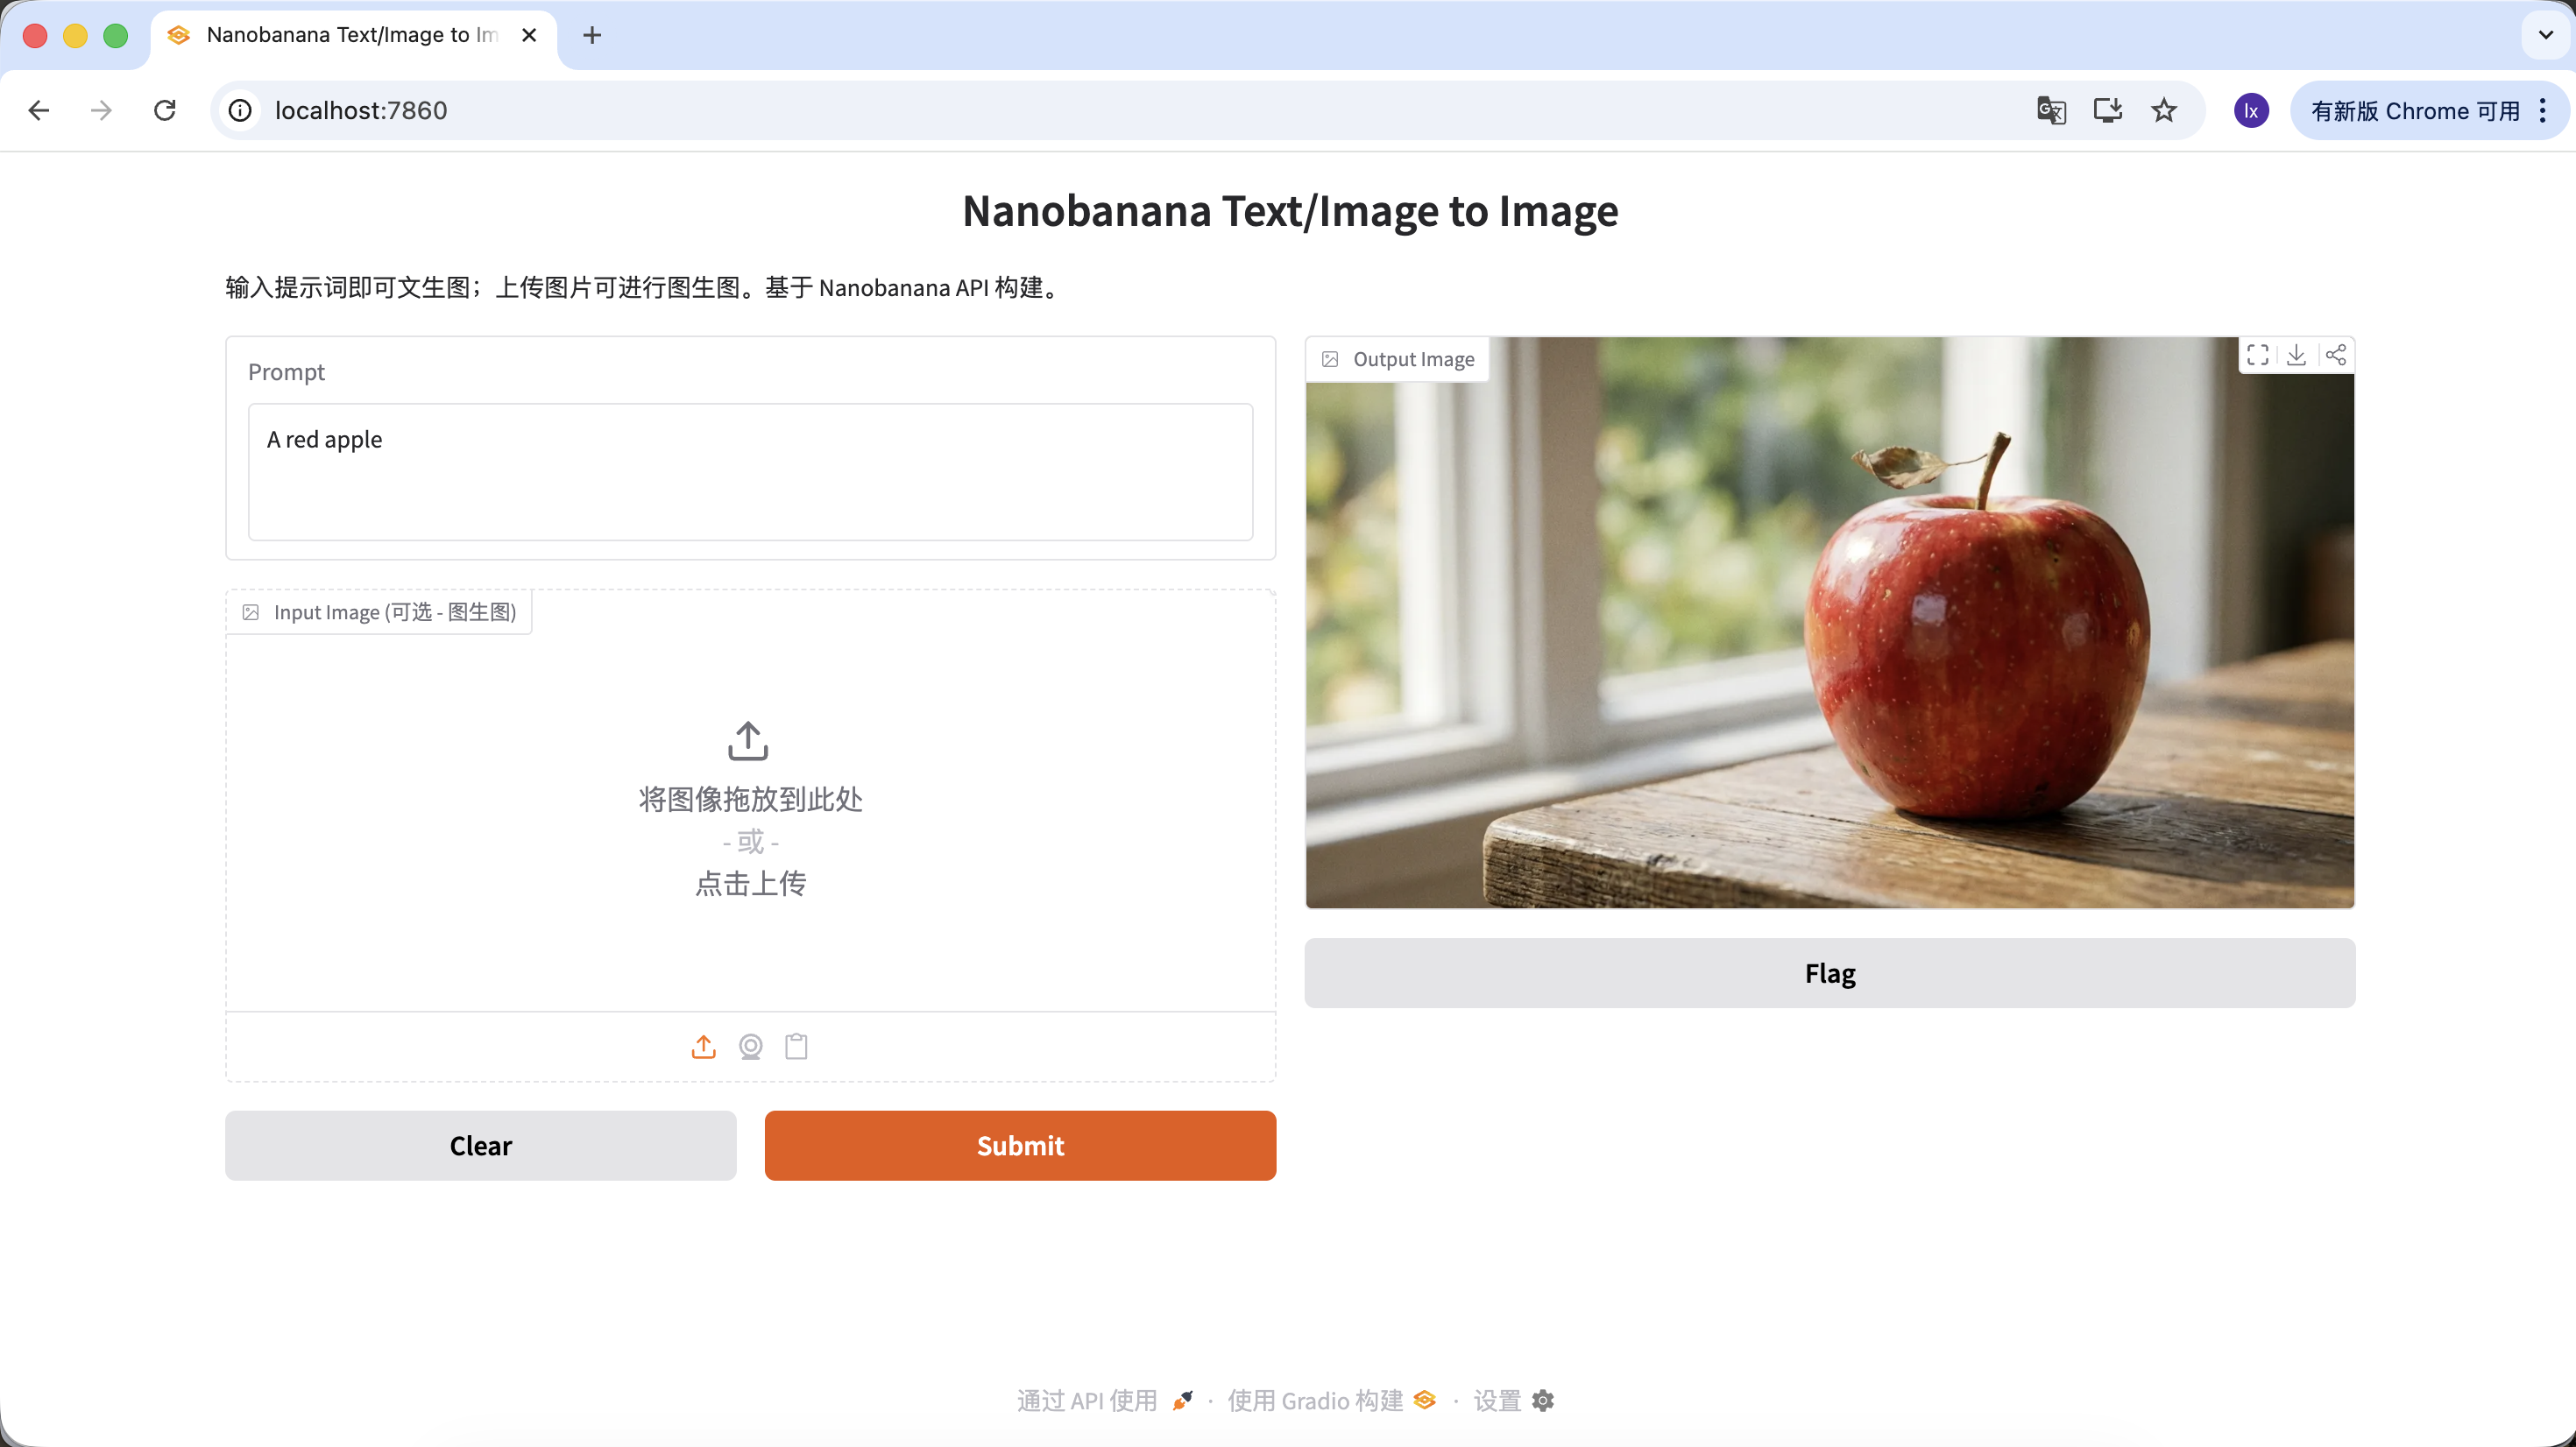
You can also enrich your prompt by giving it more description and constraints. For example, the following prompt will produce a more distinctive image.
"A hyper-realistic close-up of a fresh red apple with water droplets on its skin, sitting on a dark rustic wooden table. Cinematic dramatic lighting, rim light, shallow depth of field, bokeh background, 8k resolution, macro photography."
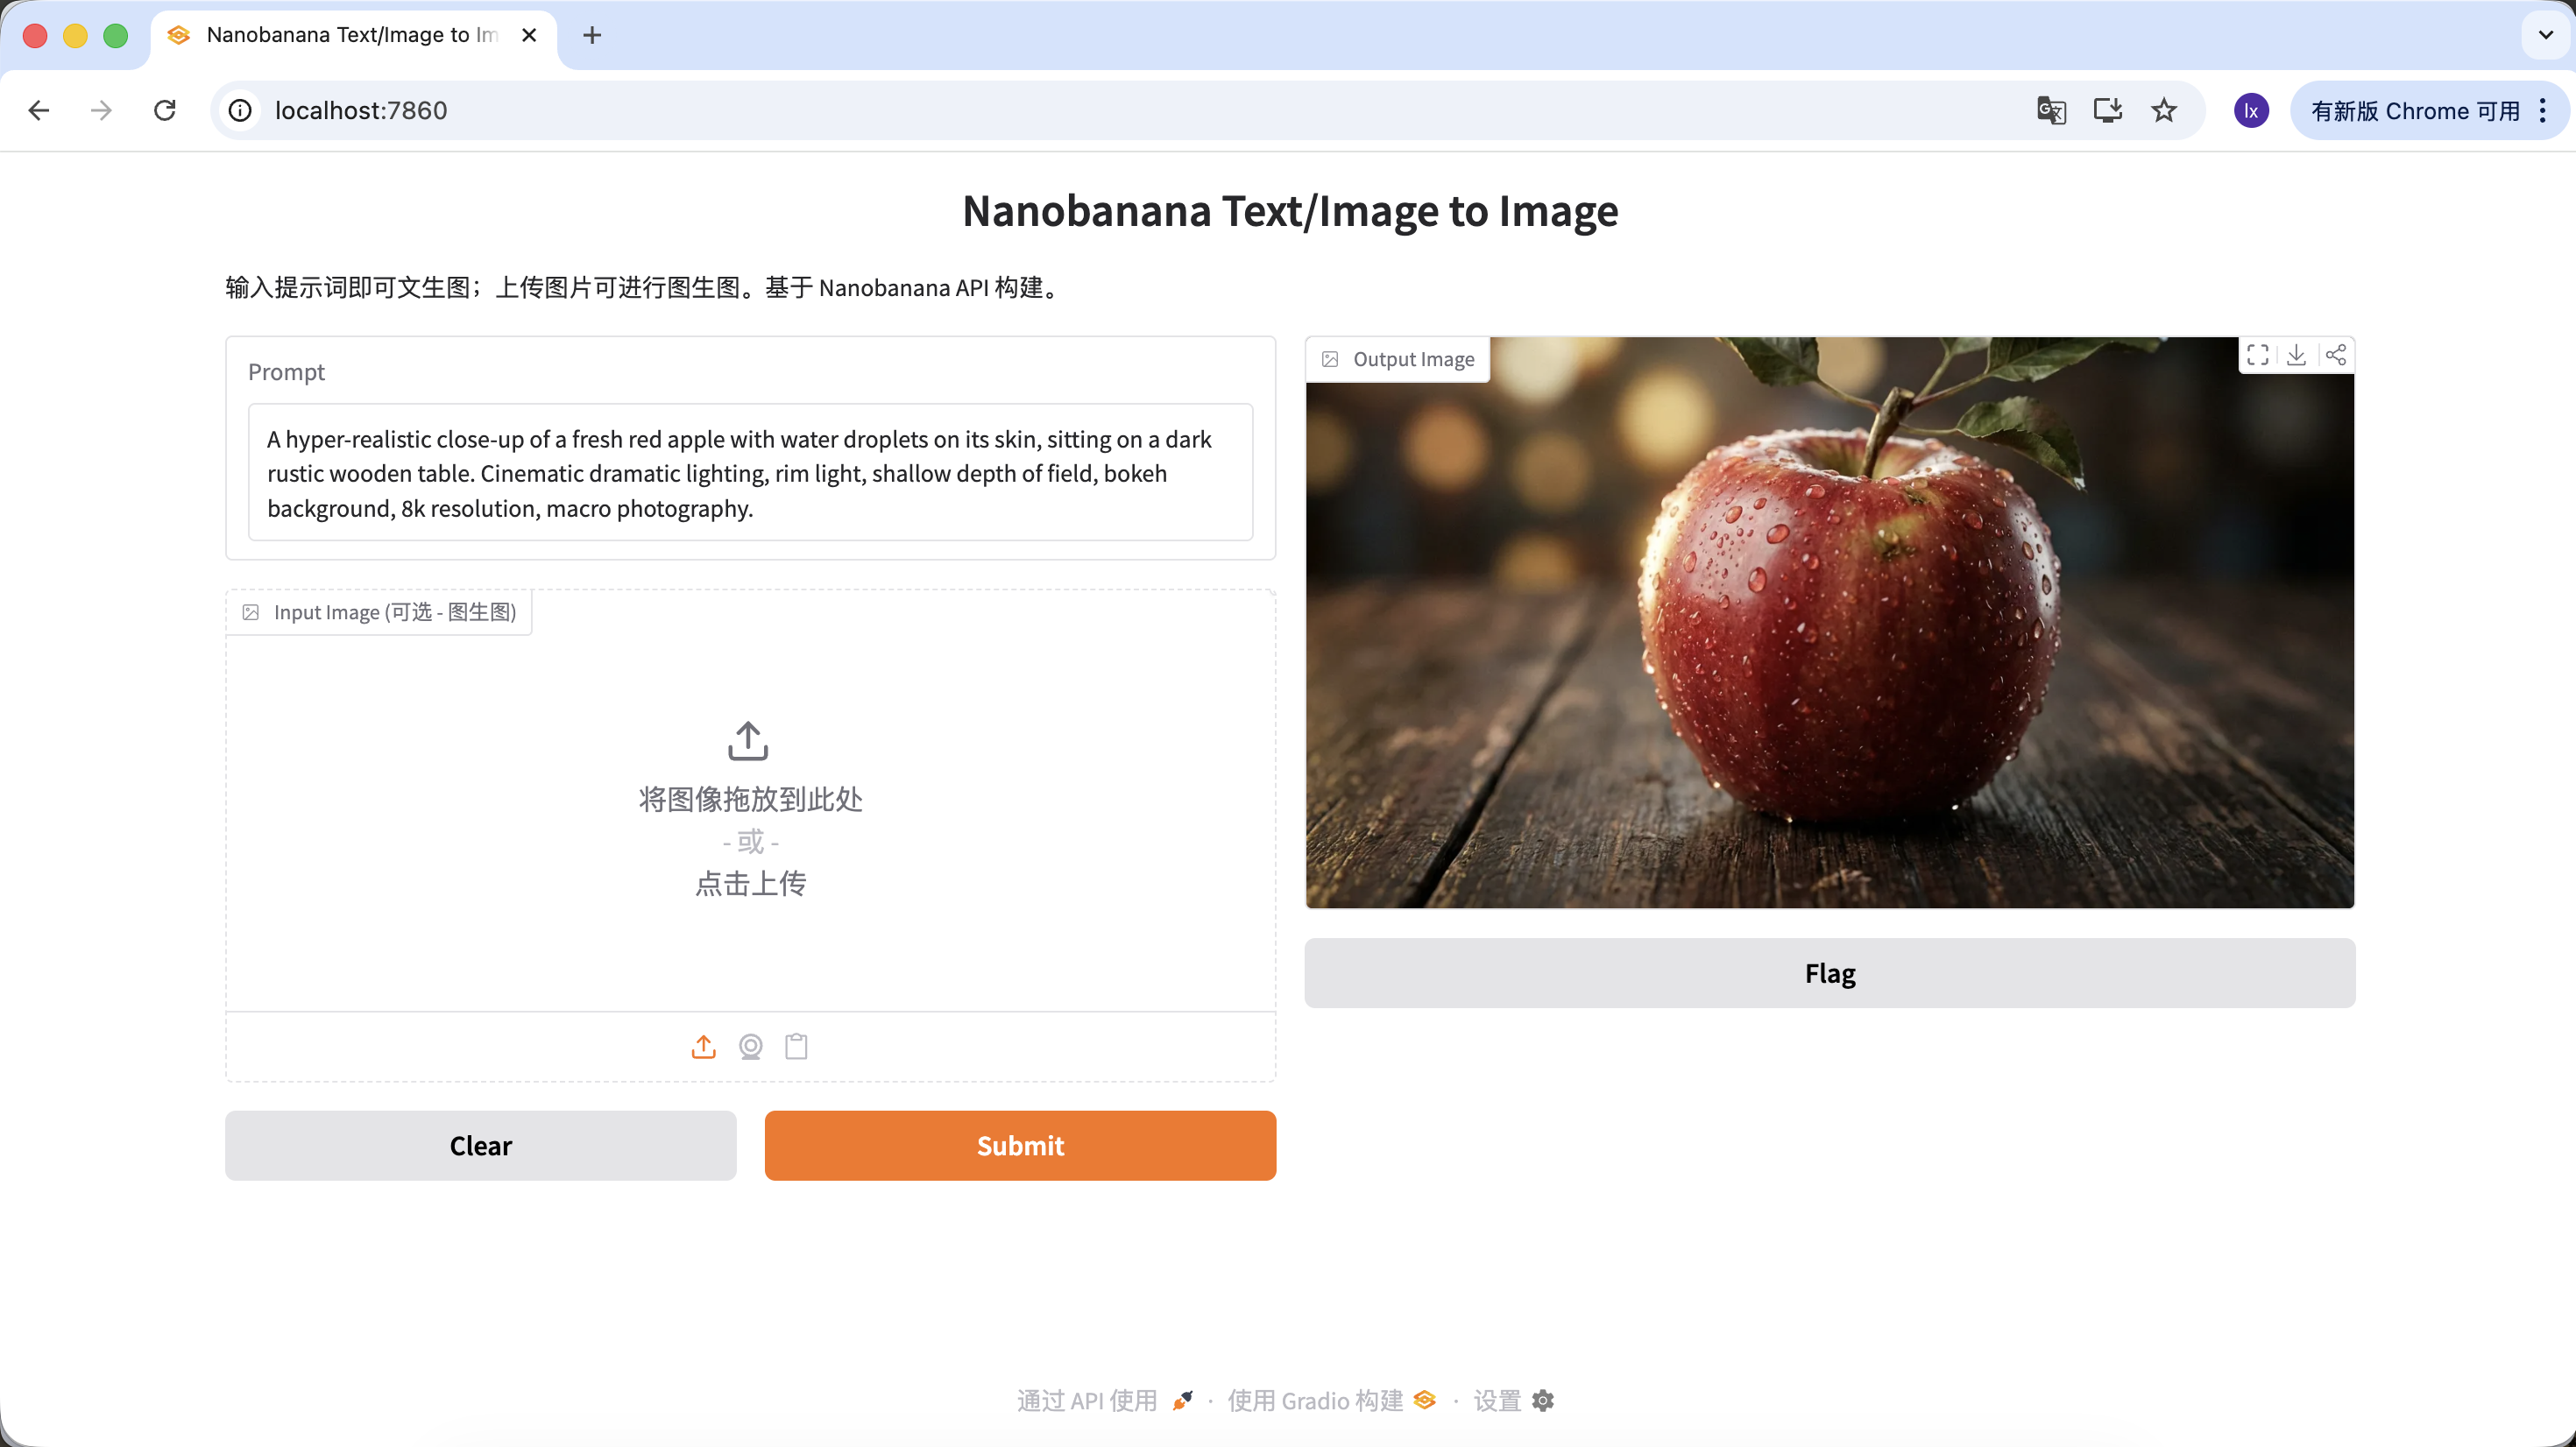
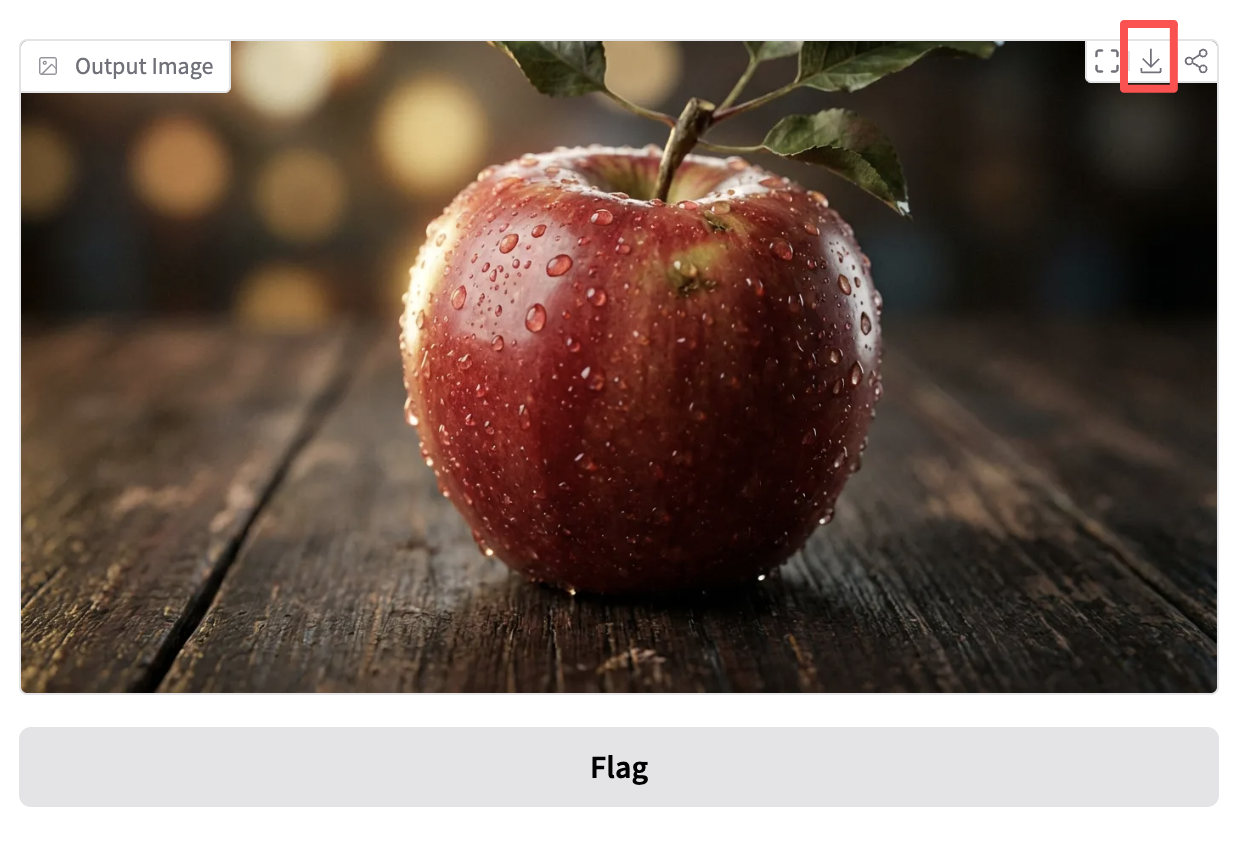
Click download in the Output Image area to save the image locally.
In real-world work, large model image generation is more often used for efficiently producing design assets rather than creating individual art pieces.
When you look at the popular cases from design-focused marketing accounts, you'll find that most of their output falls into two categories:
This category focuses on efficiency. When you need to fill in design gaps (such as empty states, avatars, illustrations), AI essentially serves as an instantly generated image library.
Example Prompt:
A set of 3D weather icons (sun, cloud, rain), glassmorphism style, frosted glass texture, soft pastel gradient colors, soft studio lighting, isometric view, transparent background, 4k.
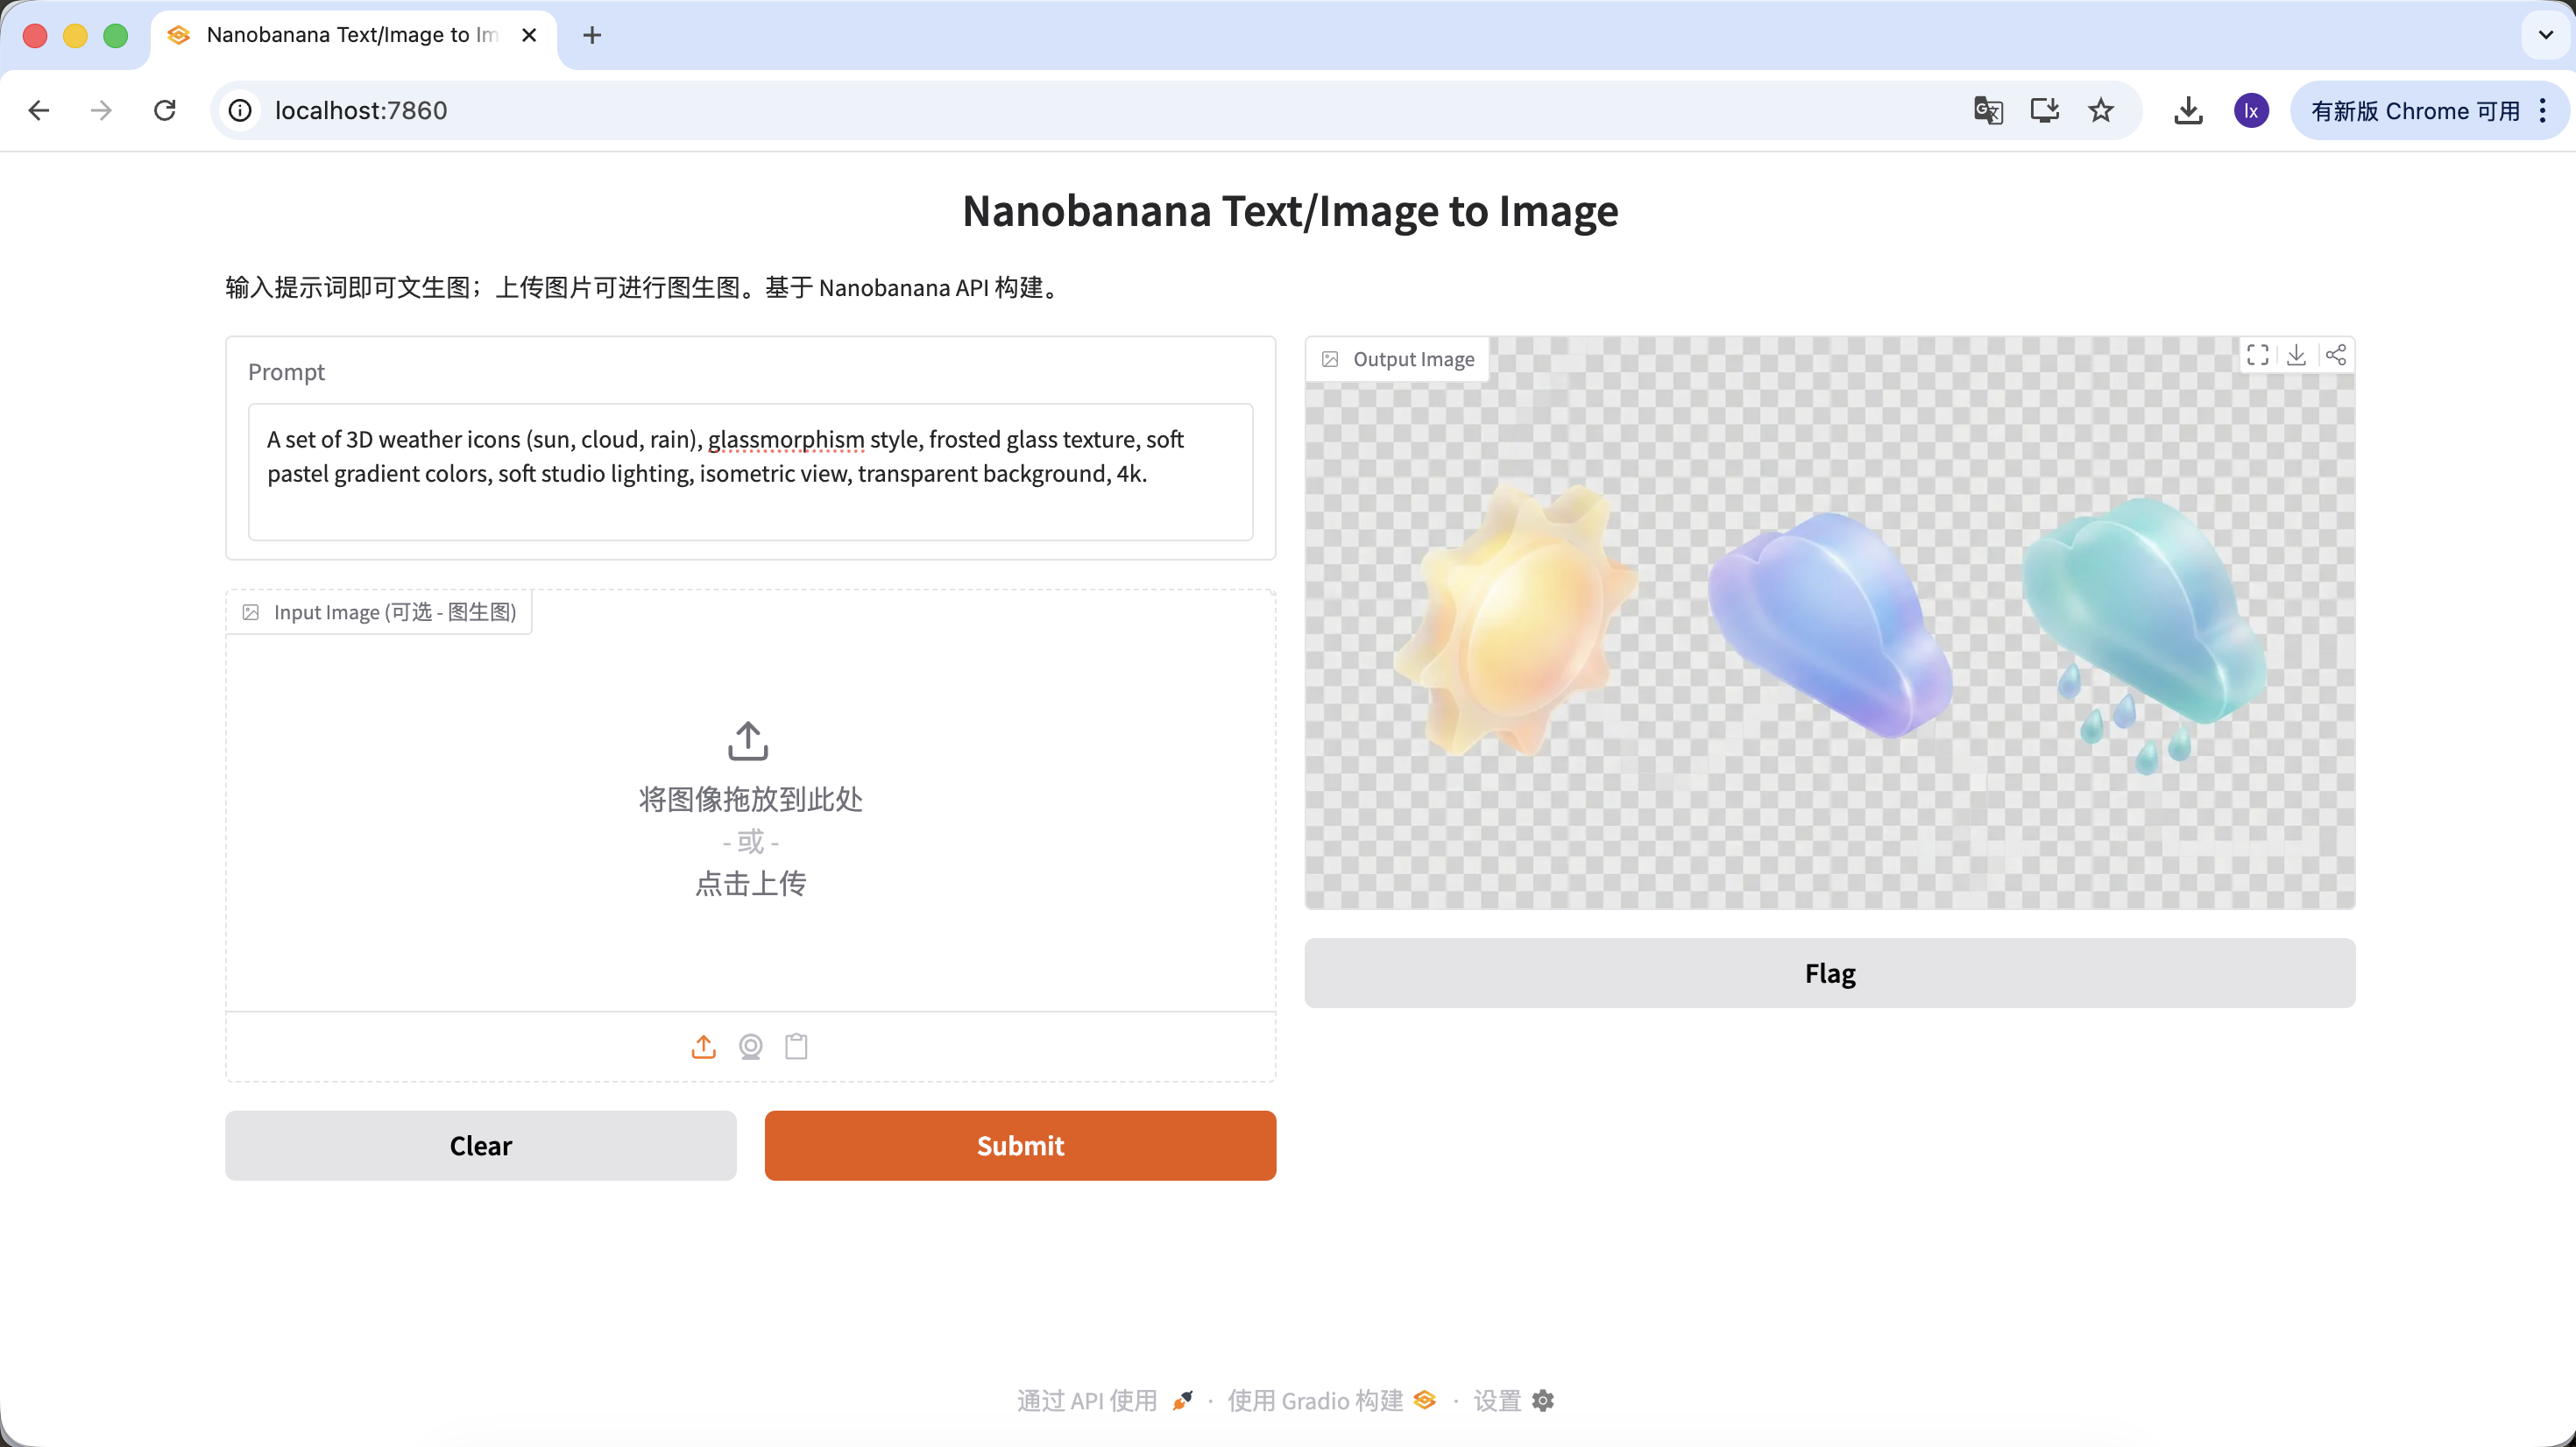
Example Prompt:
Minimalist vector logo design for a tech brand "Coffee Code", combining a coffee cup with coding brackets < >, flat design, solid black lines, white background, Paul Rand style, svg.
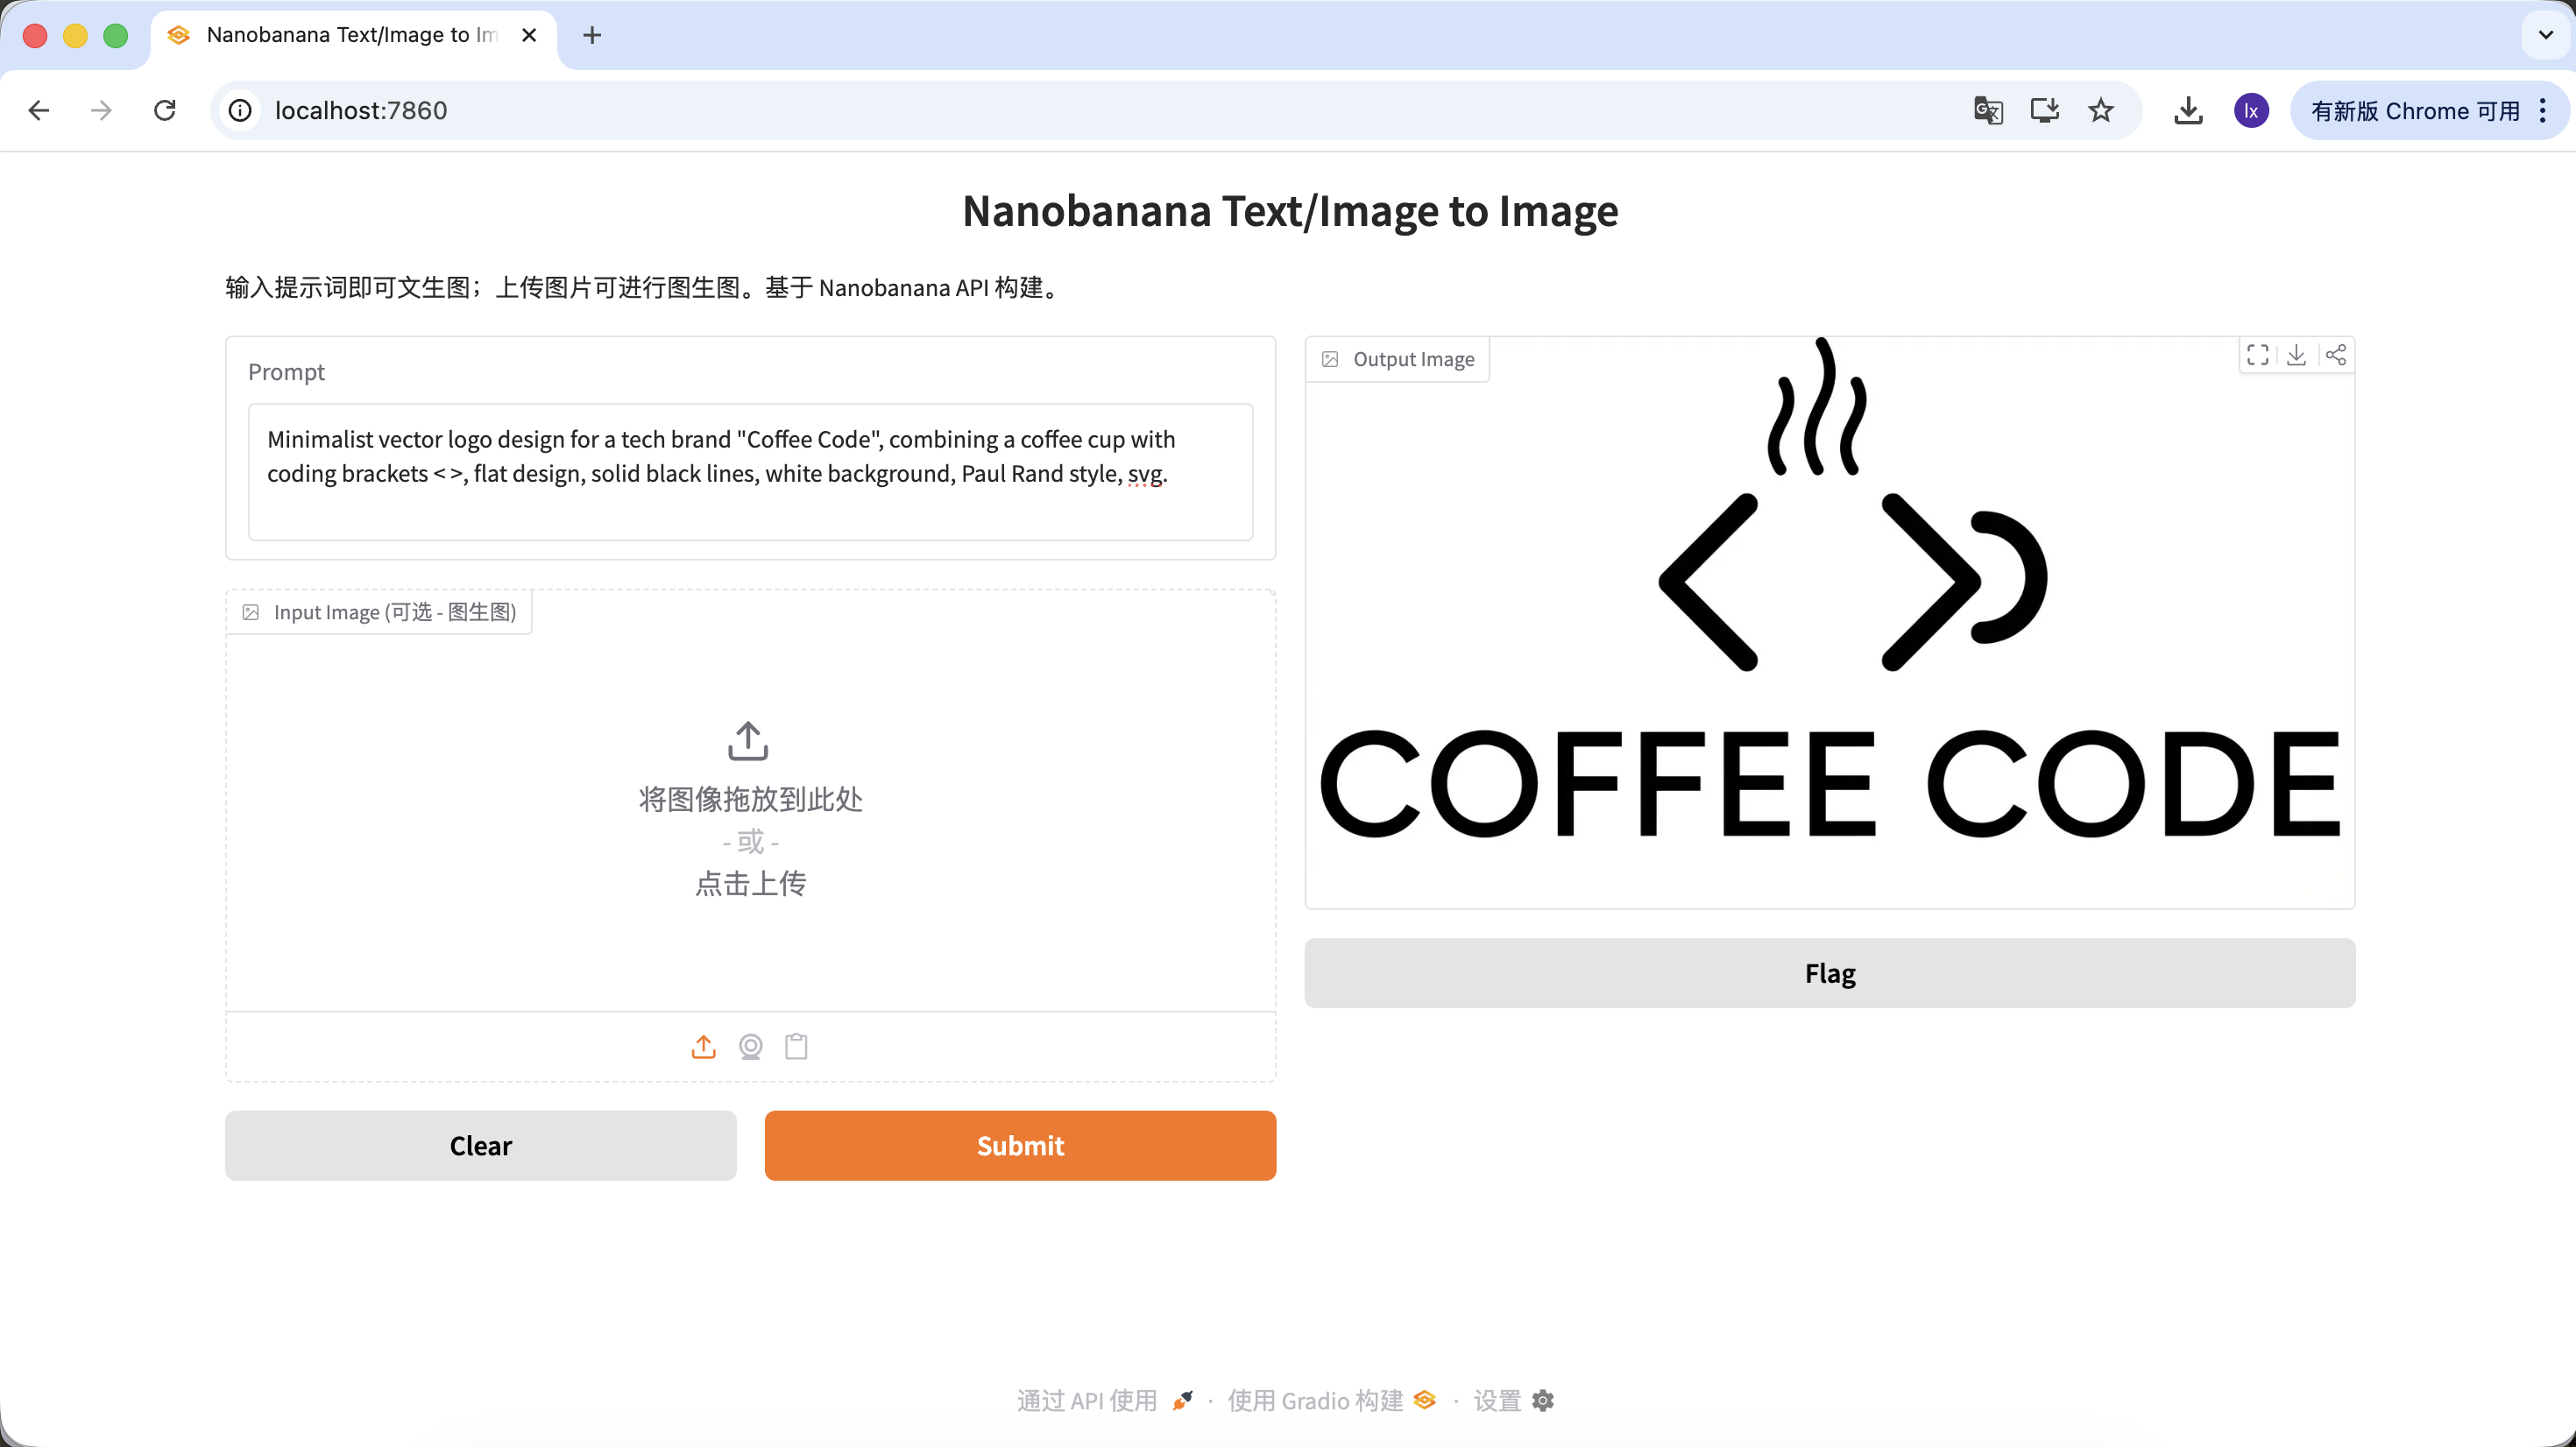
Example Prompt:
Close-up portrait of a friendly young tech professional, smiling, Memoji 3D style, clay render, bright colors, soft lighting, solid plain background, Pixar character design.
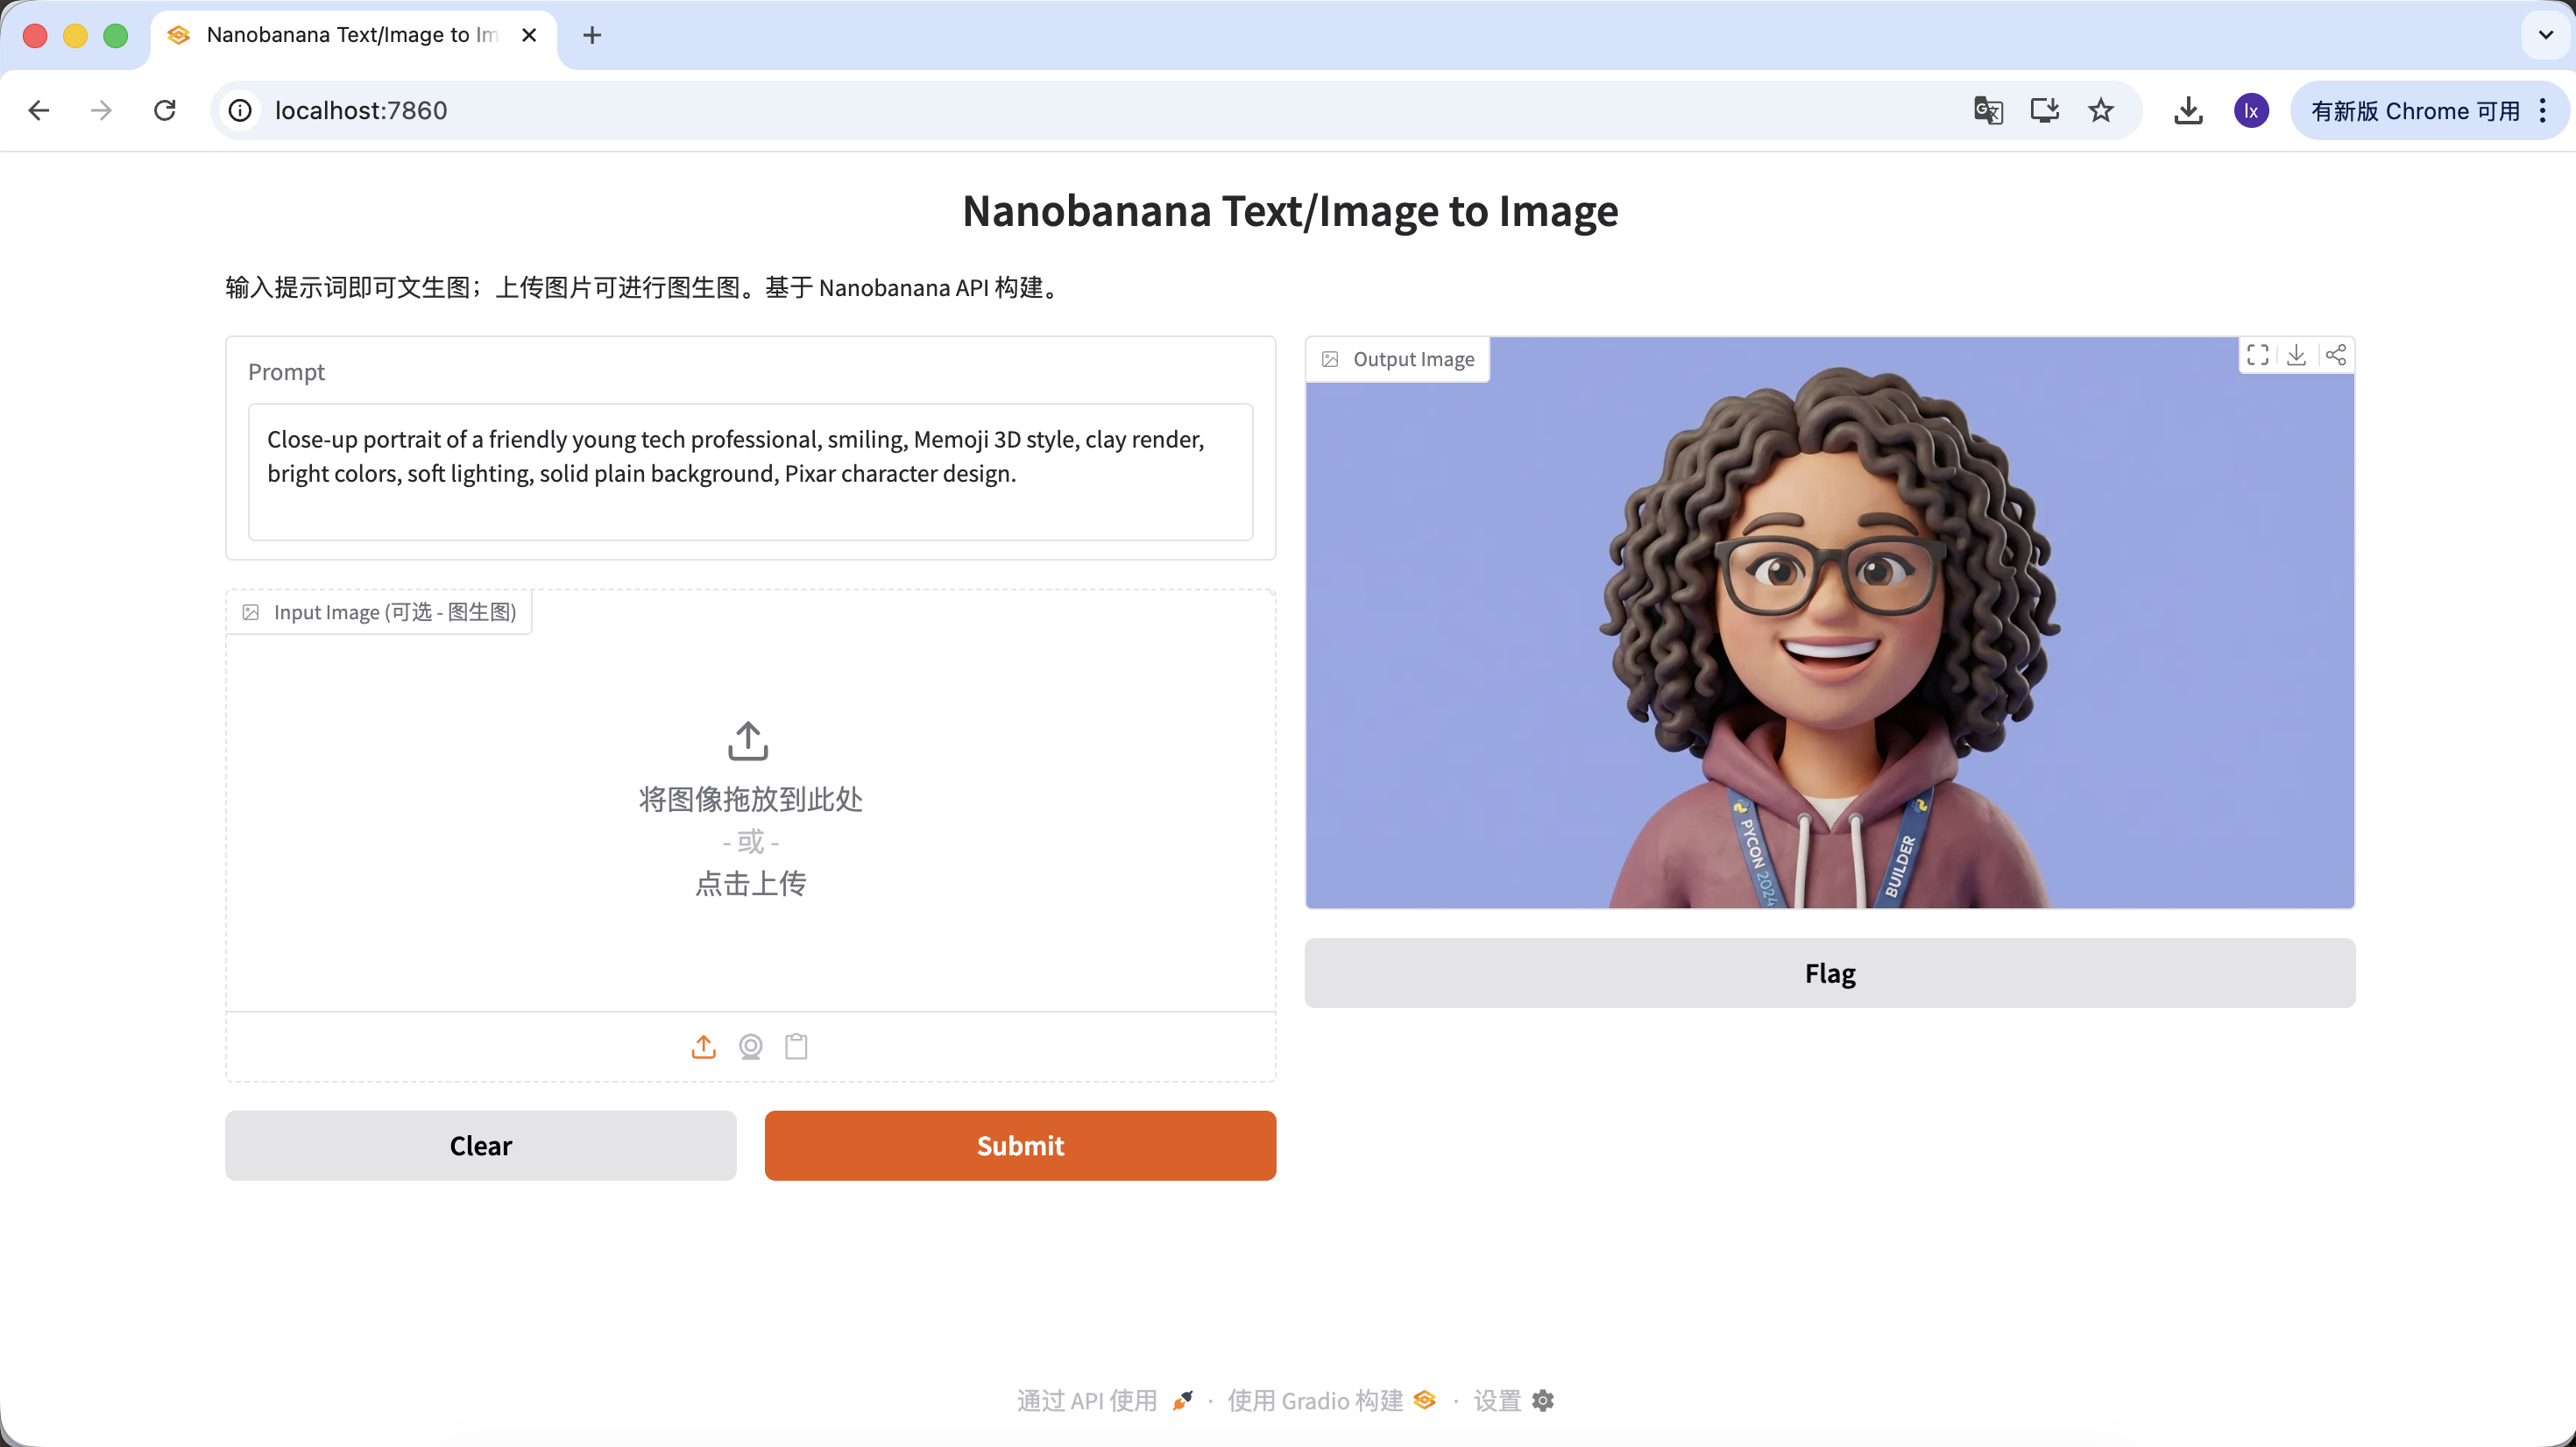
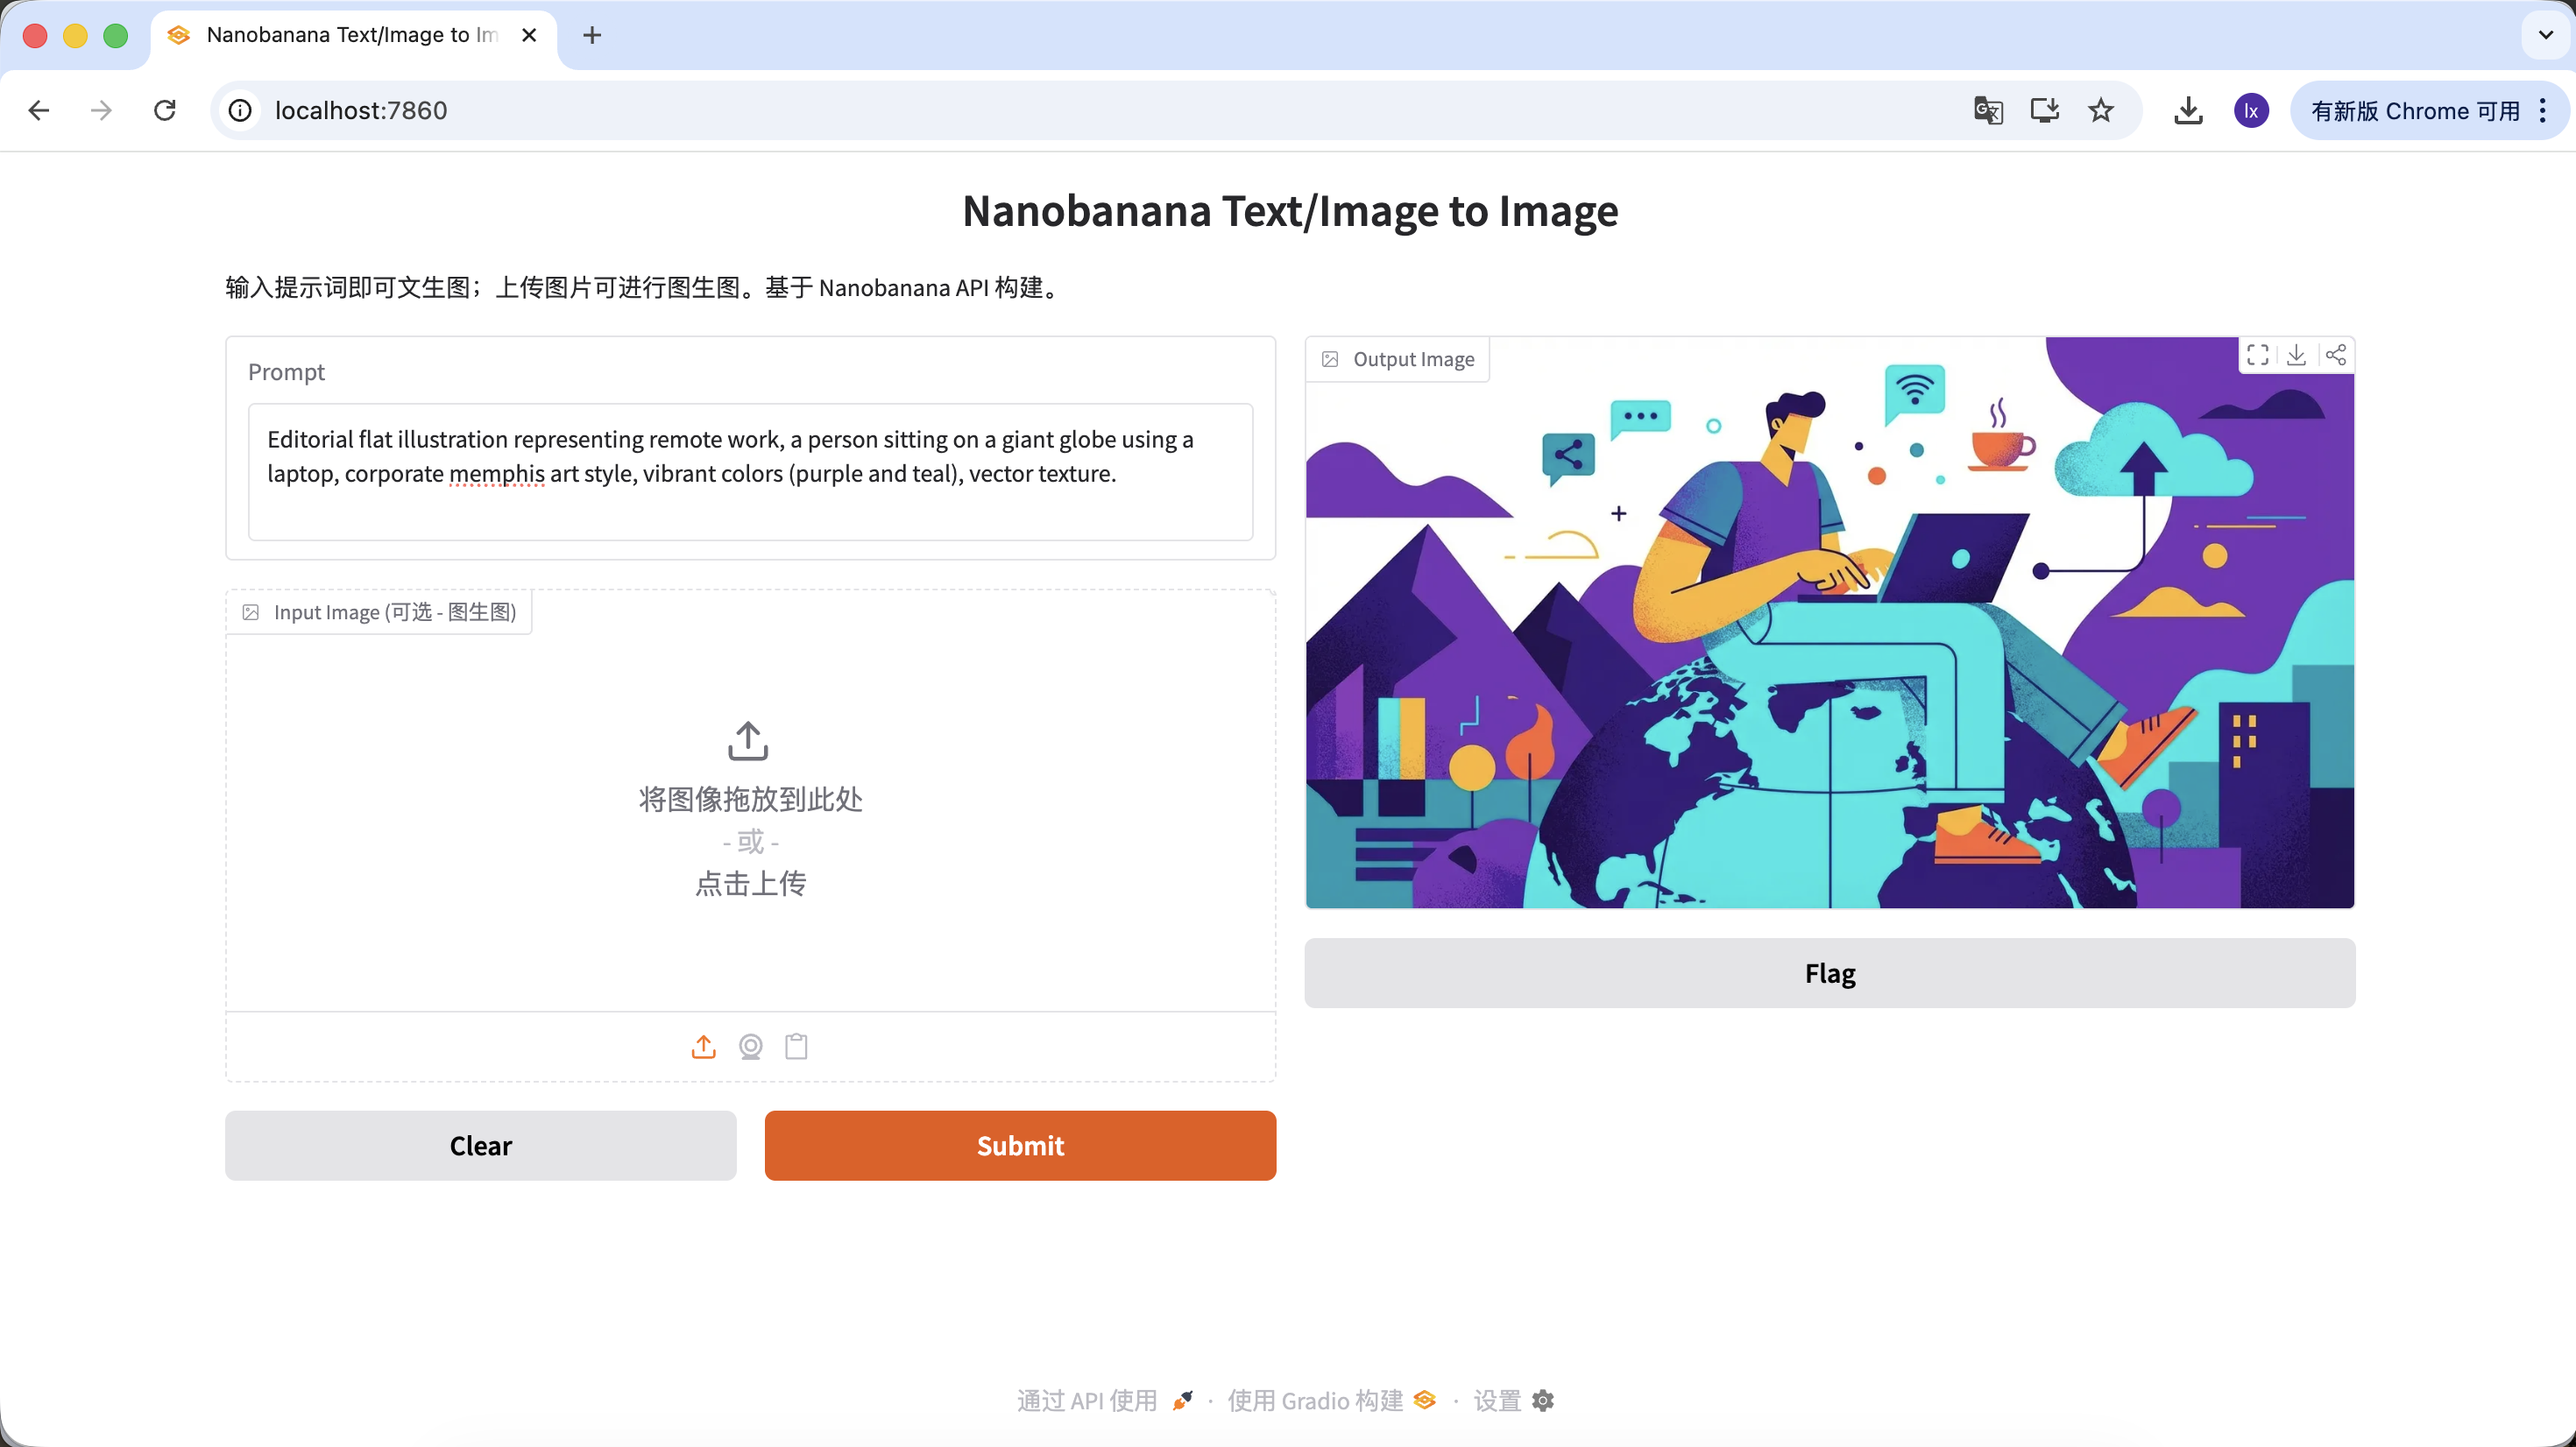
Example Prompt:
Editorial flat illustration representing remote work, a person sitting on a giant globe using a laptop, corporate memphis art style, vibrant colors (purple and teal), vector texture.
This category focuses more on scalability. It's used when you already have a satisfactory main visual and need to generate an entire set of consistently styled assets.
In game development, UI consistency is crucial. Suppose you already have a "PLAY" button for your main interface and now need to expand it into a complete set of uniformly styled function buttons (such as pause, settings, home). Relying solely on hand-drawing makes it difficult to ensure that each button is perfectly consistent in gloss, perspective, and color values.
Basic Operation Flow:
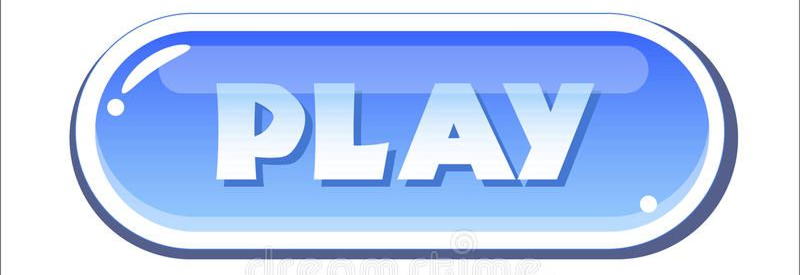
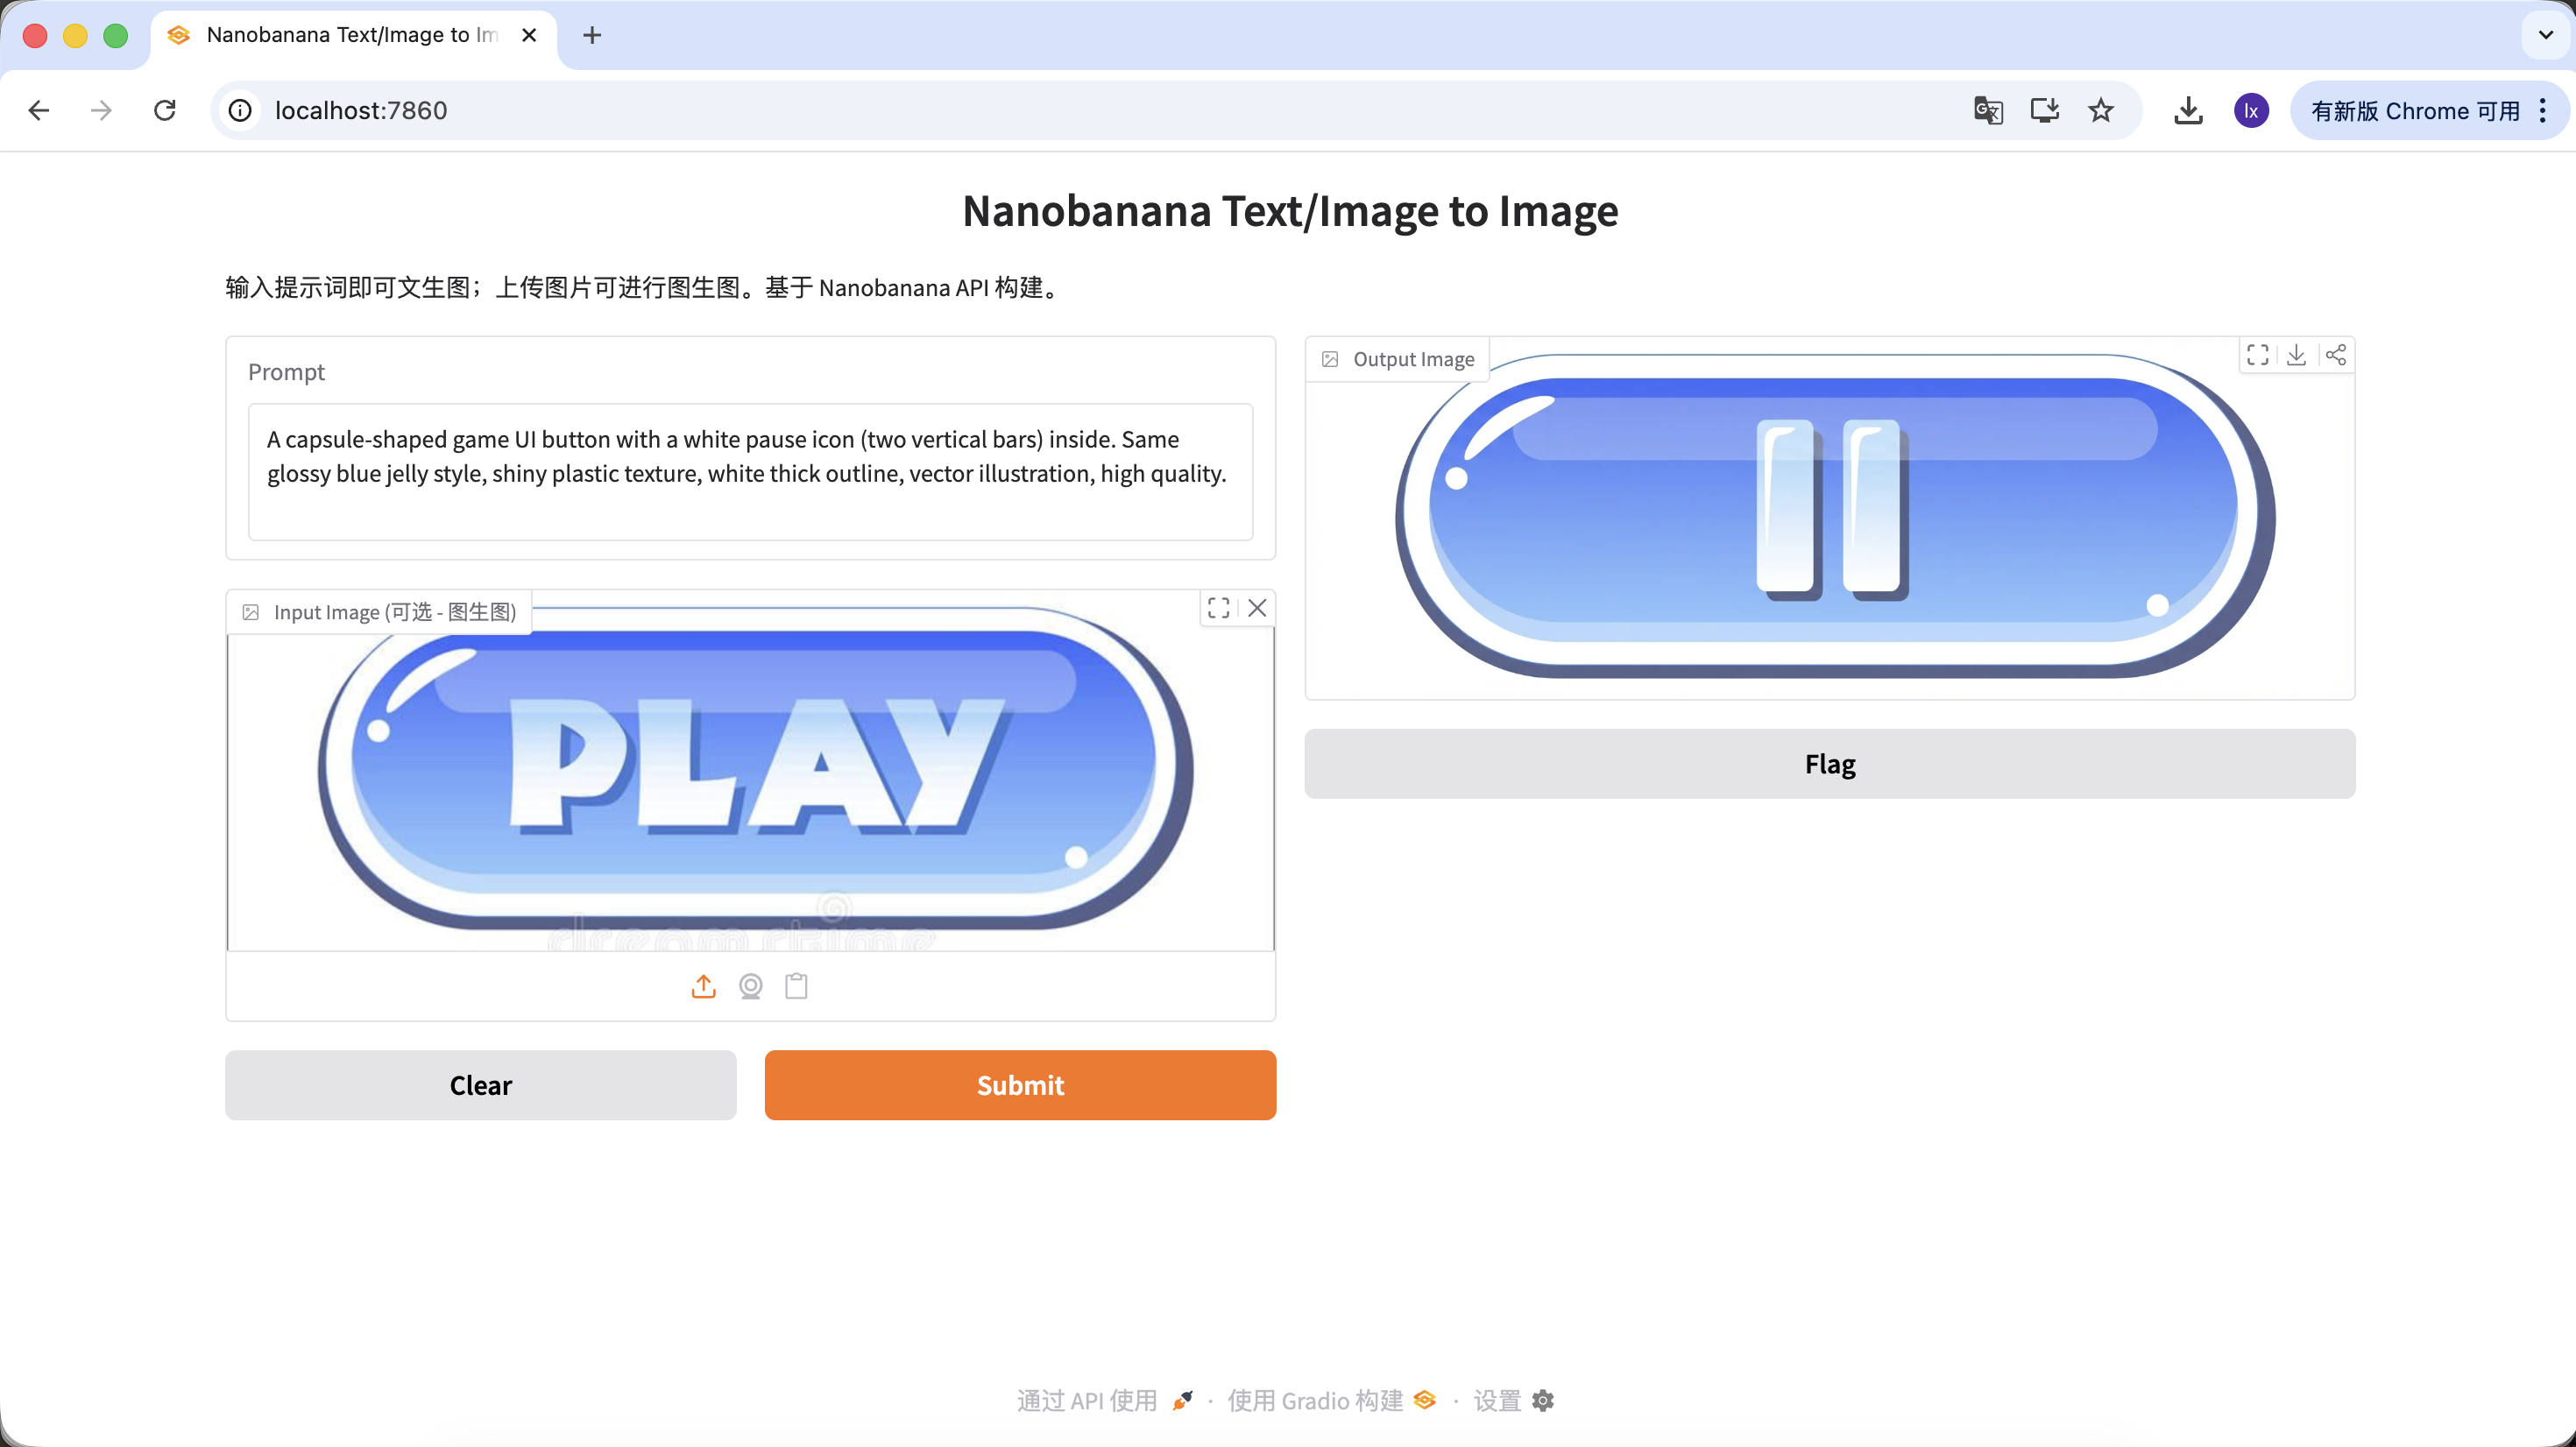
With this flow, as long as you replace the subject description, you can get buttons with different functions but consistent styles.
Example Prompt:
Variant A: Pause Button (Icon Type)
A capsule-shaped game UI button with a white pause icon (two vertical bars) inside. Same glossy blue jelly style, shiny plastic texture, white thick outline, vector illustration, high quality.
Variant B: Settings Button (Complex Icon)
A capsule-shaped game UI button with a white gear icon (settings symbol) inside. Same glossy blue jelly style, shiny plastic texture, white thick outline, vector illustration, high quality.
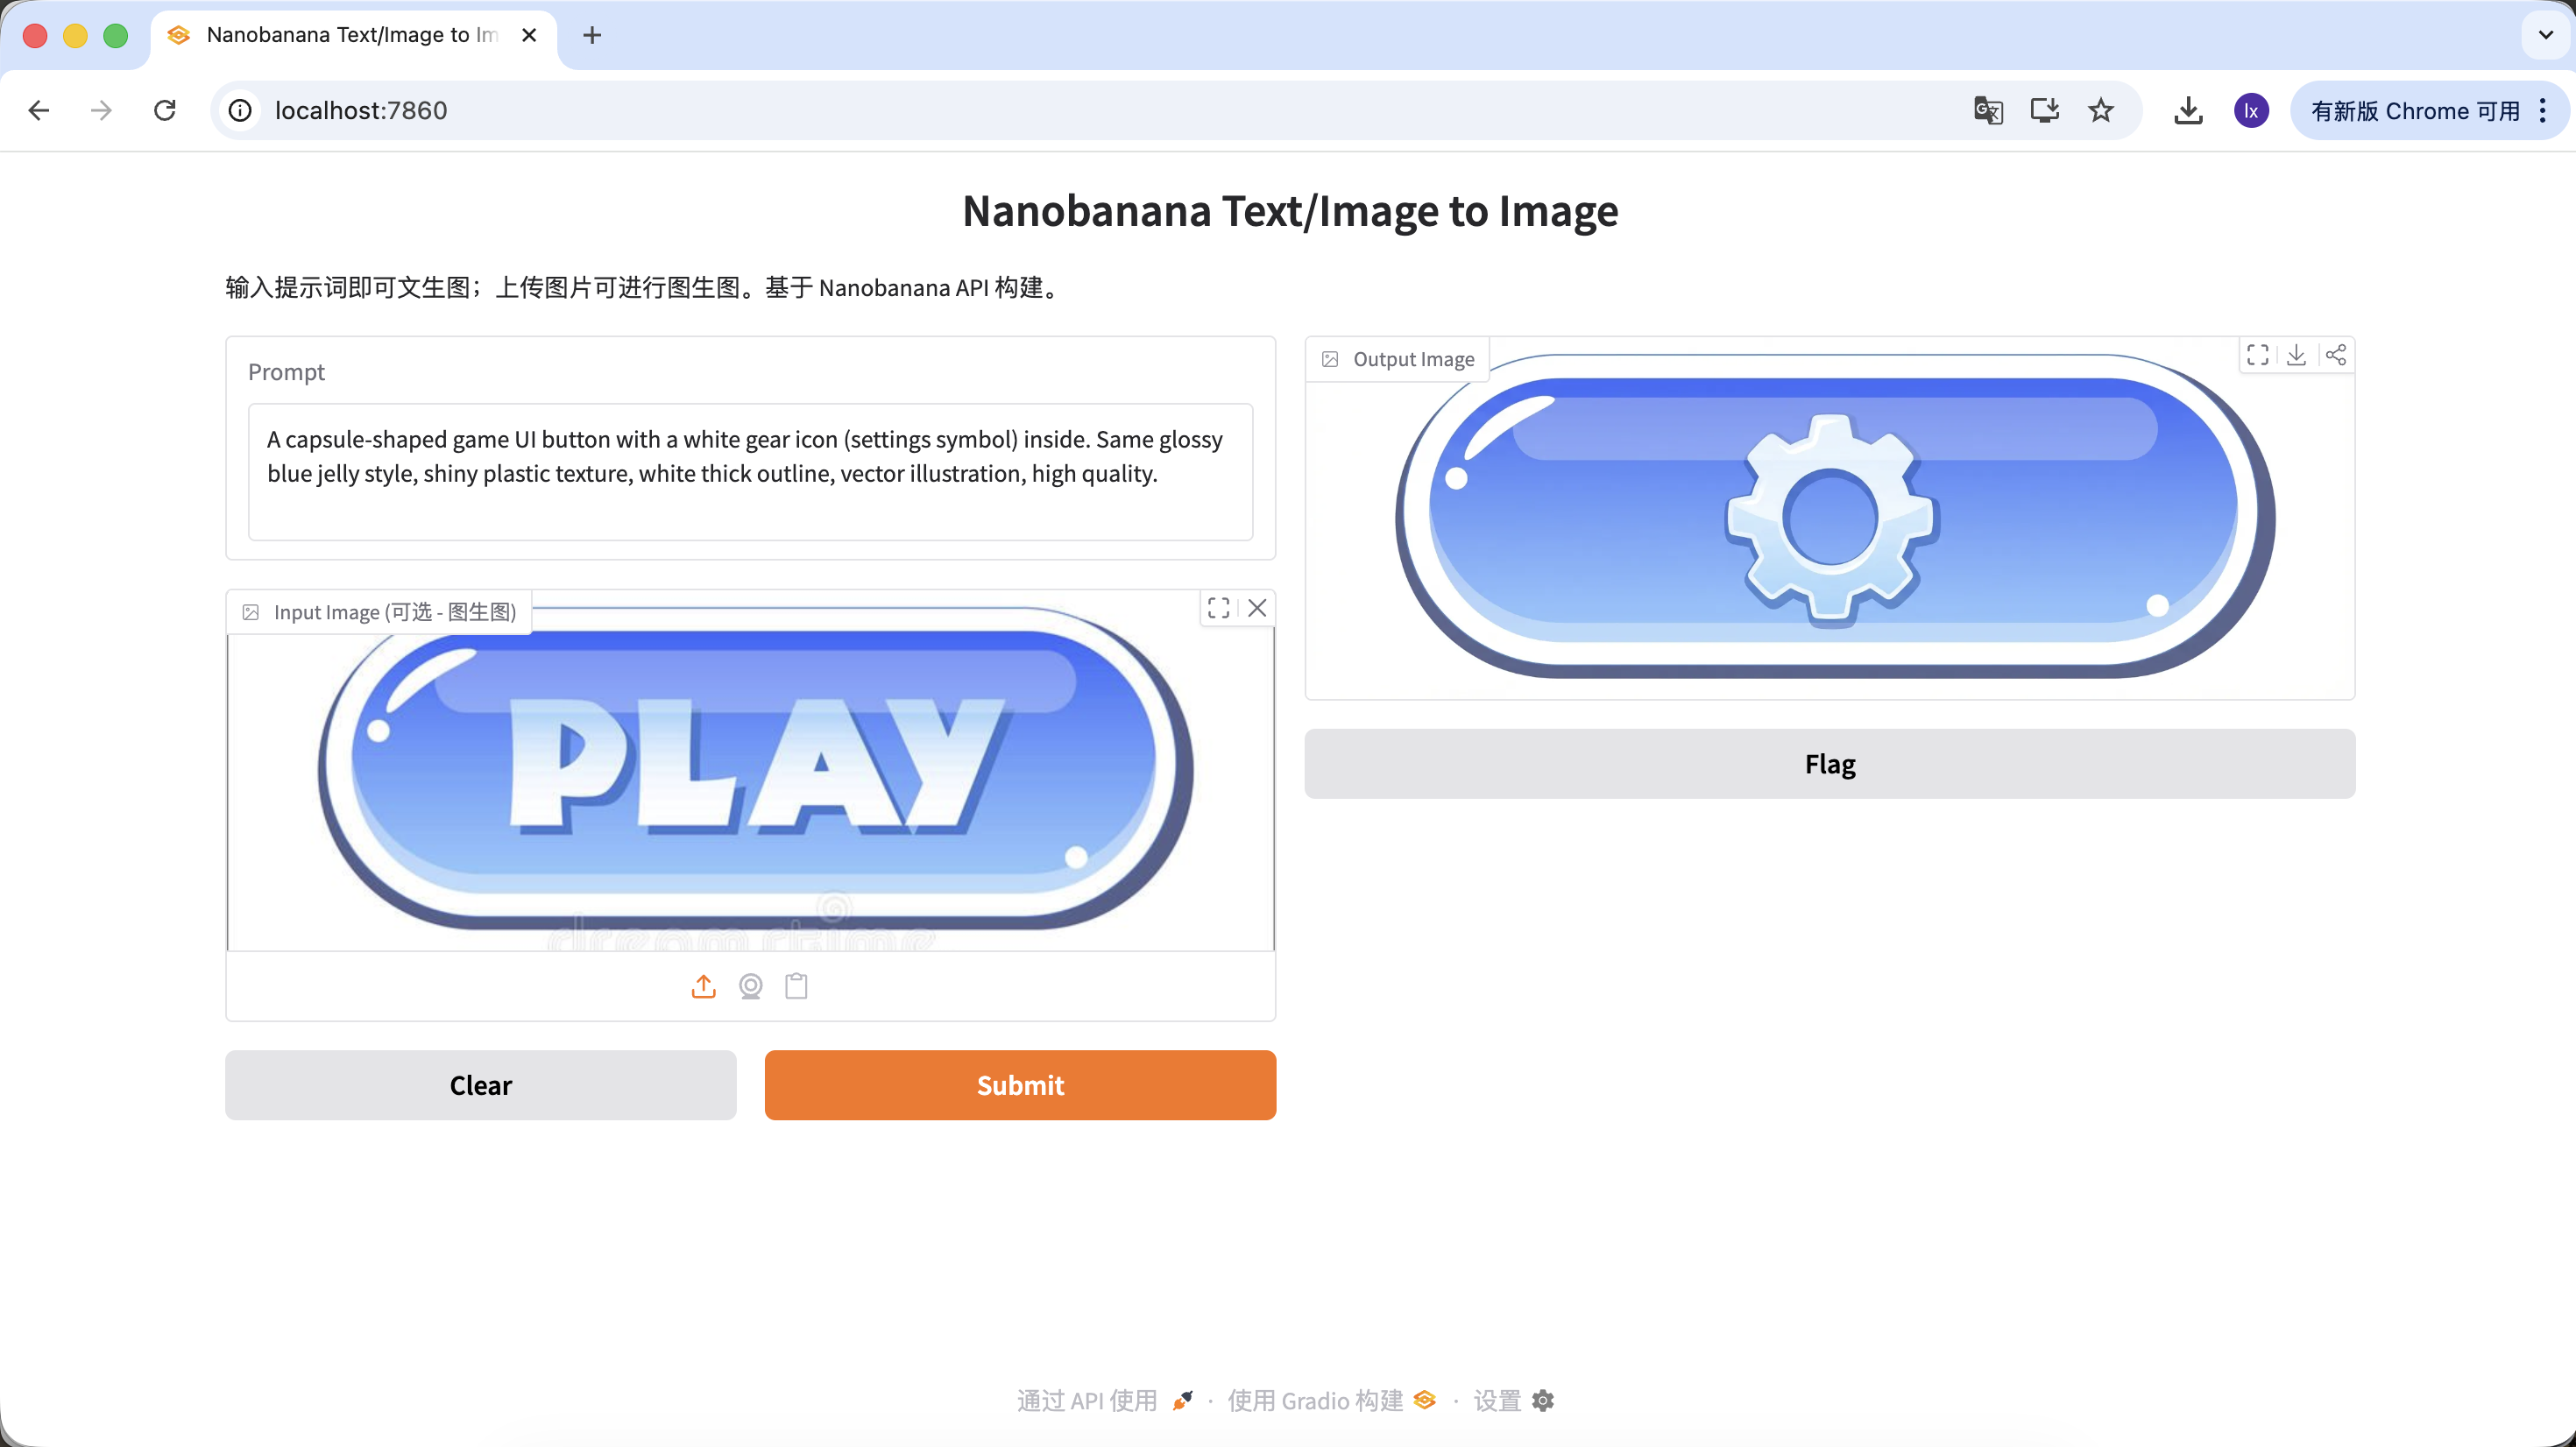
Variant C: Replay Button (Shape Change)
If you need to change the button shape, you can directly describe the shape in the prompt. The model will attempt to change the structure while preserving the material characteristics.
A round game UI button with a white circular arrow icon (replay symbol) inside. Same glossy blue jelly style, shiny plastic texture, white thick outline, vector illustration, high quality.
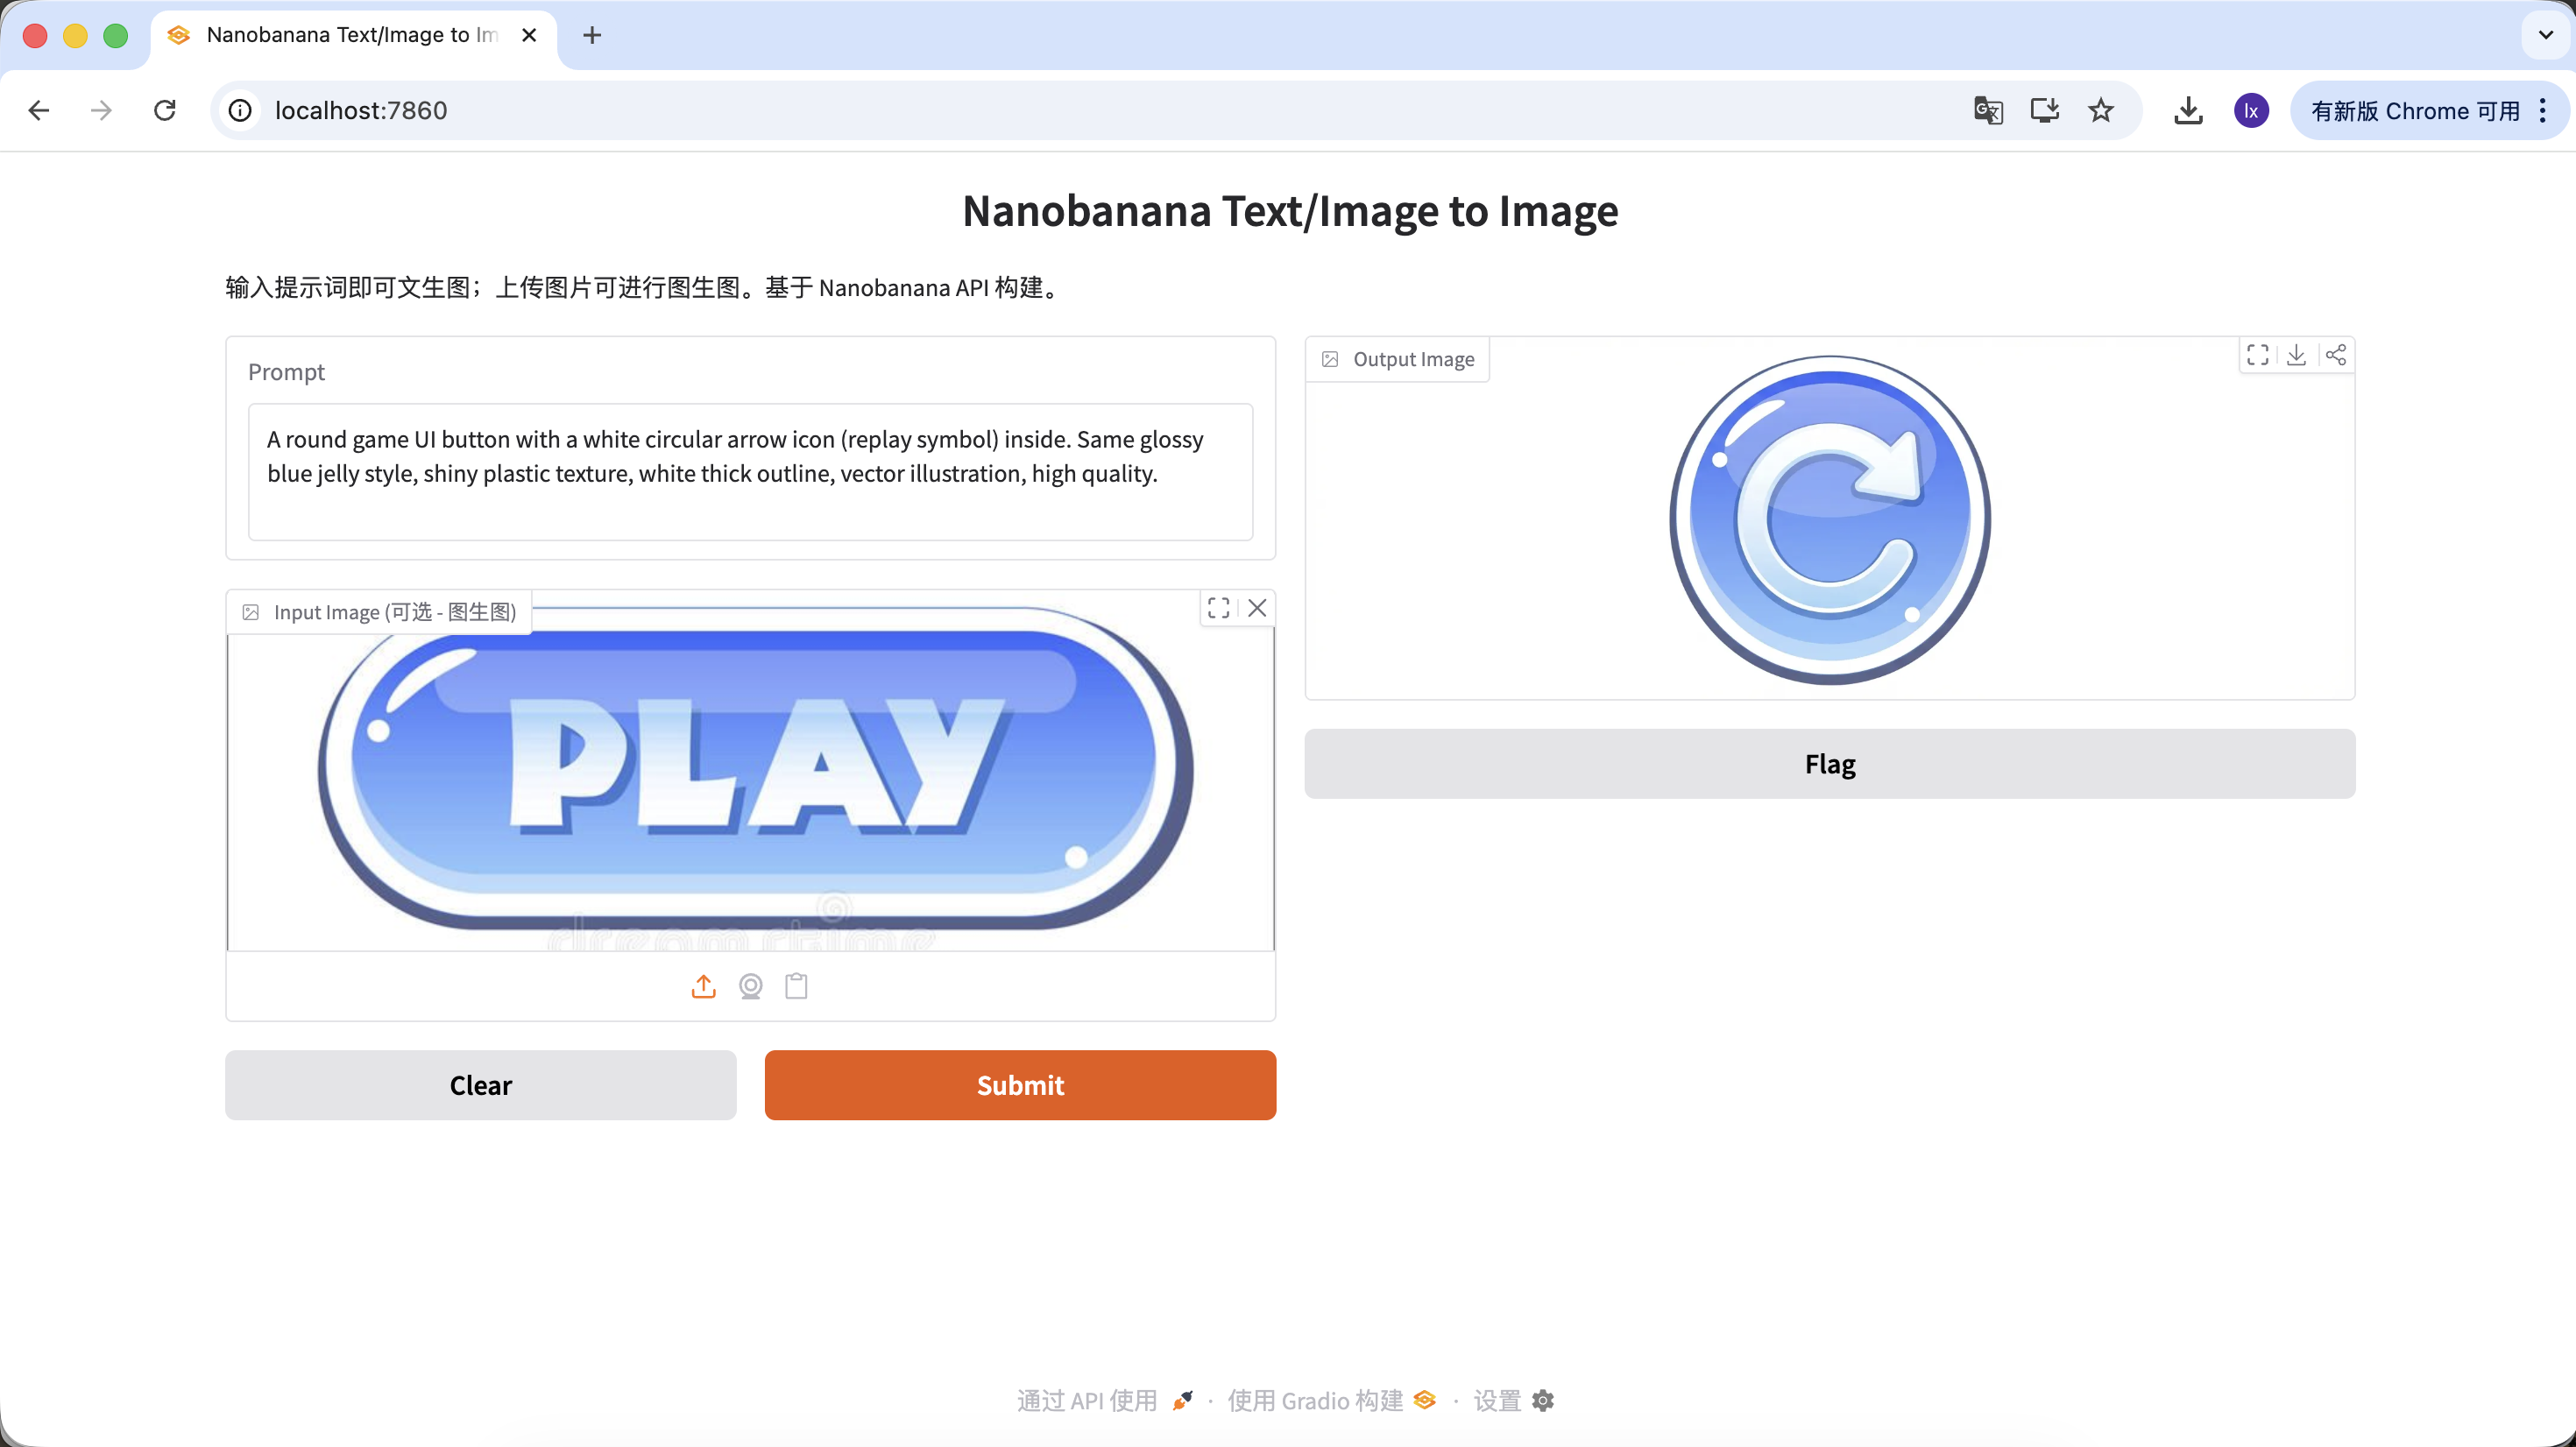
Through this set of operations, you can not only replace button functions and icons but even change button shapes, while all generated results remain highly consistent in material, color scheme, and lighting. This is exactly the core value of large models in design asset generation scenarios.